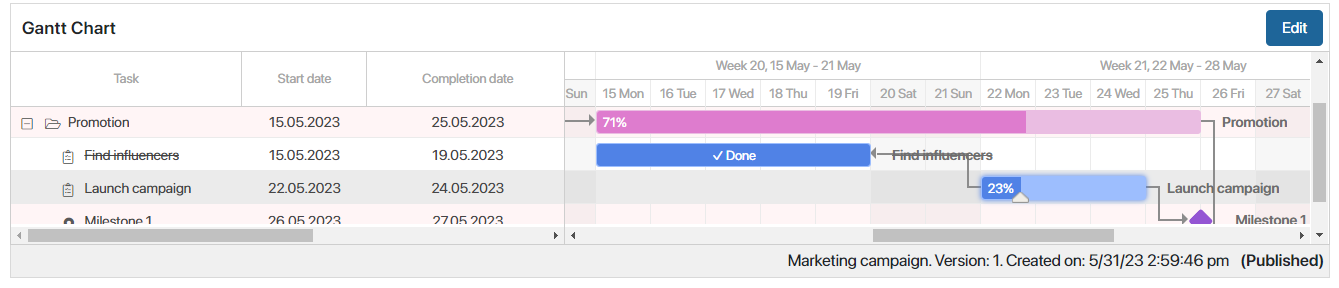
After plan publication, project participants can view it on a project’s page on the Project Schedule tab. It consists of tasks of different types. They are placed in a certain order and have assigned executors and deadlines.
On the left side of the project plan, you can see a list of tasks, along with their start and completion dates. Pull the table border to the right to additionally display the duration of tasks in days, their completion percentage and the executor. You can change the table columns display.
On the right, each task is represented by a colored bar. The color depends on the task’s type, deadline, and also progress percentage. When a task is completed, it is crossed out, the Done indicator is shown on its bar, and the bar color changes to a darker shade.
The time interval on the visible part of the plan corresponds to the current date. If this date is outside the project timeline (before or after), you will see the start of the project or the completion period, respectively.
Under the plan, you can see the project name, the current plan version number, the date the plan was created, and its status.
The system administrator can:
- Enable task indexing in the list taking into account tasks’ nesting.
- Display the task participants in an additional column of the plan.
- Change the design color for each type of tasks.
- Configure plan editing on the page tab itself or in a separate window.
- Enable plan versioning.
To monitor the progress of multiple projects, you can customize the display of their plans along a single time axis on the app page. Read more in the View project group plans article.
Toolbar for viewing the plan
You can use the controls that are placed above the plan.
![]() Select what task dates to show: Plan, Estimation, or Actual.
Select what task dates to show: Plan, Estimation, or Actual.
![]() Customize the task table in the plan: change the list of columns and their order. These changes will apply to both the project plan viewing and editing modes.
Customize the task table in the plan: change the list of columns and their order. These changes will apply to both the project plan viewing and editing modes.
![]() Collapse or expand all subtasks in the task list.
Collapse or expand all subtasks in the task list.
![]() Open the search bar to set parameters and sort plan items on the diagram by them, considering their nesting. The system administrator can define fields for sorting.
Open the search bar to set parameters and sort plan items on the diagram by them, considering their nesting. The system administrator can define fields for sorting.
![]() Open the options menu to display additional data:
Open the options menu to display additional data:
- Show project start and end dates. Indicate the beginning and end of the project.
- Show current date. Indicate the current date.
- Hide non-working days. Hide non-working days. This option is available if the Use the business calendar option is enabled in the project.
- Show overdue tasks. Highlight overdue tasks.
- Show the critical path. Highlight on the chart in red color the tasks that are completed on the project end date or later, as well as all related tasks.
- Hide executed. Hide completed tasks. In this case, the executed parent task with the Task type will be displayed if it has unfinished subtasks.
![]() Navigate to the current date.
Navigate to the current date.
![]() Increase or decrease the time period. The plan can be broken down into the following time periods: day, week, month, quarter, or year.
Increase or decrease the time period. The plan can be broken down into the following time periods: day, week, month, quarter, or year.
![]() This option allows you to display the plan in full-screen mode. The action is available if the administrator has enabled the button display in the widget settings.
This option allows you to display the plan in full-screen mode. The action is available if the administrator has enabled the button display in the widget settings.
Edit. This action is available if you have the permissions to edit the plan. It allows you to go to plan editing page.
Working with plan versions
By default, you work with two versions of a plan: a published version and a draft.
If your administrator has enabled versioning for a project type, saving edits to the published version creates a new draft. Subsequent changes will be added to it.
Plan drafts are available:
- In the About the Project widget on the project page.
- In plan editing mode. To do this, click the magnifying glass icon in the search bar on the toolbar and select the desired version to:
- View, edit, or publish a draft plan.
- Import new tasks.
- Export the plan.
- Compare with the current version.