You can use several project types for different activities of one company.
Each project type is a separate app that contains:
- A unique project template with plan tasks, folders, and documents.
- Its own properties, statuses, business processes, access permissions, and plan publication settings.
These apps are displayed in the Projects workspace under the Project types separator.
If project types are not configured, each new project is created based on the base type as an item in the Projects app. The basic type plan template does not contain tasks by default.
You can customize the basic project type to fit your company’s standards. For example, if in a construction company each project goes through the stages of design, procurement, acceptance of work, etc., you can add the corresponding statuses and processes to the basic type.
Customize basic project type
You can specify the following changes for the basic project type:
- In the Projects app settings: add statuses and business processes, configure forms and access permissions.
- In the project plan template:
- A list of standard tasks for all project stages.
- Folders and documents on the Files tab.
These changes will be applied to any project created in the Projects app. You can also use them when creating a new project type. Please note that the folder and file structure is not copied; it is created anew in the template for each type.
To access the Projects app settings, click the gear icon to the right of its name and select one of the following options:
- Form Settings. Modify the project page of the selected type and place additional fields or widgets on it.
- Status Field. Add statuses and customize their change during a business process or manually.
- Business Processes. Create processes for switching from one status to another.
- App Access. Customize access rights to the project type.
- Access Settings. Assign access rights to projects of the selected type.
The change history for certain app settings is saved if structure versioning is enabled in the system. You can restore a previous version of the default type and make it current. For more information on when and where an app version is created, and how to work with versions, see Versioning of structures in BRIX.
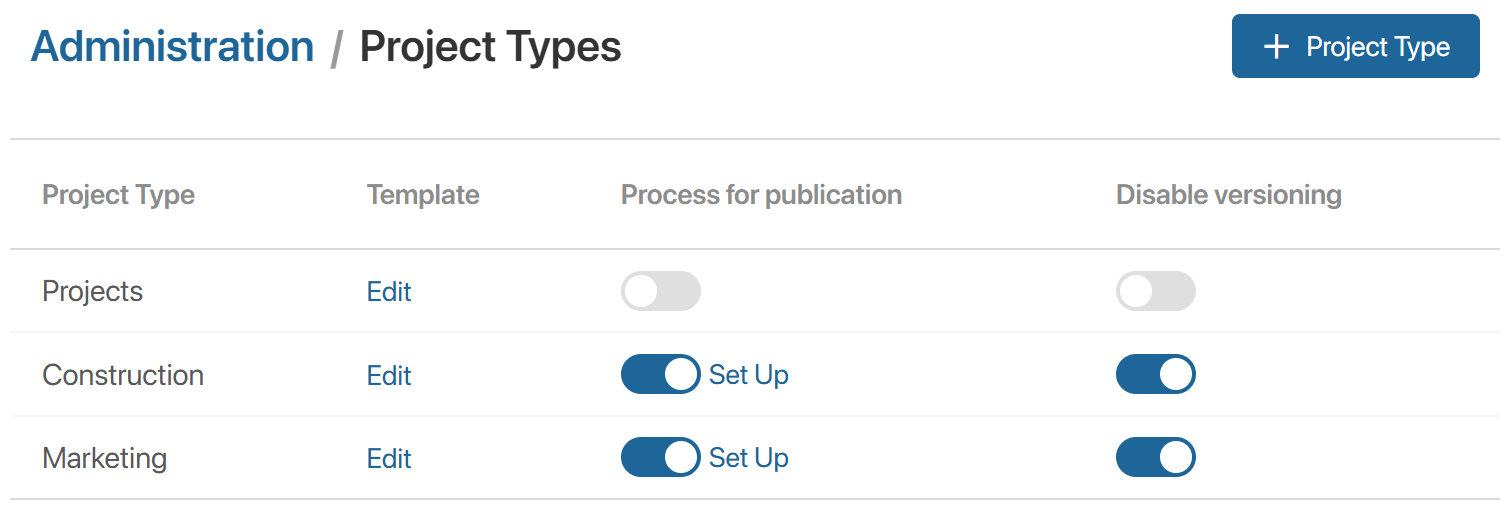
You can also configure plan publication and work with plan versions in Administration > Project Types.
Edit plan template
To populate the default type template with tasks and documents:
- Open the template page using one of the following methods:
- On the Project Register page.
- In the Projects app.
- In the Administration > Project Types workspace, select the Template column and click Edit.
- Go to the Project Schedule tab and click Edit. You can create a template plan the same way you create a project plan. Publish the completed template plan.
- Go to the Files tab and add a folder structure with documents.
Create a project type
When adding a new project type, you can apply:
- Base type settings. You can select a configured or an empty template for the plan template.
- Default settings. They are set in the Projects app settings. The project plan template is manually filled in from scratch.
For example, the company has created a base type for construction projects. You can use it when you create a separate project type for warehouse construction. For a new project type for staff motivation, use the default settings and create the plan from scratch.
To add a new project type, perform the following steps:
- Go to the Administration > Project Types workspace.
- Click +Project Type. In the opened window, fill out the fields:
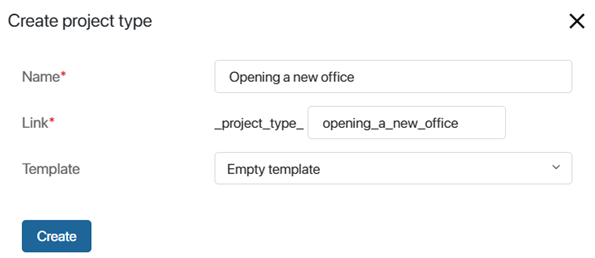
- Name*. Specify the project type name.
- Link*. It is formed automatically. The link text can be changed during creation. The link is used for quick access to the project type.
- Do not copy base type. The option is enabled by default and it allows you not to apply the base type settings. Statuses, processes, forms, access rights, and project plan templates added to the base type will not be copied to the new type.
- Template. The field will appear if you’re copying the base type. Select which project plan template option you want to use for the new type:
- Projects (Template). Configured for the base type.
- Empty template.
- Click Create.
After that, an app with a new project type and a template page of this type will be added to the Projects workspace in the left menu. You can move the app under the Project Types separator using the Set Up button. Customize each new project type in the same way as the base type.
начало внимание
A project type cannot be deleted once created.
конец внимание
- For new project types, the following options are available:
- Configure project plan approval.
- Disable plan versioning. Then users will be able to create multiple plan drafts and compare unpublished versions with each other. By default, employees only work with two versions of a plan, the published version and one draft.
The settings will apply to all projects of the selected type.
- Fill in the plan template with tasks in the new project type. To do this, open the template page in one of the following ways:
- In the Administration > Project Types workspace, select the Template column in the corresponding row and click Edit.
- In the Projects workspace on the Project Register page or in the app with the project type name, select the desired template.
- Go to the Project Schedule tab to add tasks to the project plan. If the project type uses:
- Empty template. Click the Create Plan button, then add tasks and link them.
- Configured template. Click the Edit button to change the list of typical tasks for the new project type.
- Publish the template plan.
- Go to the Files tab to add folders and documents to the project template.
Please note that after creating project types, you can edit the base type settings, including the plan template. These changes can be automatically applied when adding new project types. Previously created project types are edited manually.