App is a field type used to specify one or more items of a specific app. For example, to display links to deals concluded with the client in their page.
You can use this field to allow an employee to:
- Only view the value and go to the page for the related app item.
- Select an existing app item in the field.
- Add a new record.
When you create an App‑type field, you need to:
- Configure the field settings. Fill in the basic options which are always available. If you are adding the field to an app form, also define additional settings.
- Specify whether the field can be filled in. The available options vary depending on where the field is placed:
- On an app form.
- On a form in a business process, such as a task page.
- In the interface designer when customizing a page, widget, or form template.
начало внимание
Only users in the Administrators group can add and configure fields.
конец внимание
App-type field settings
When you add an App‑type field to an app, business process, or widget context, you see the window with its settings:
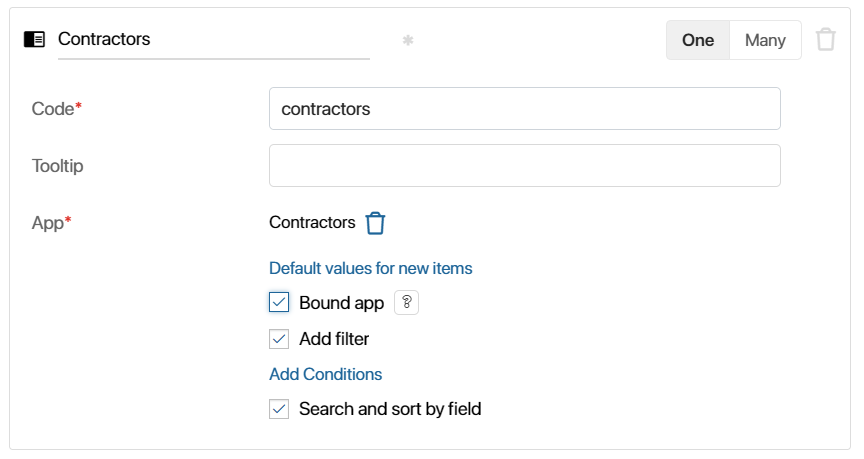
- Complete the basic settings which are always available:
- One or Many. Determine how many app items the user can specify in the field.
Please note, if the field is placed on a form of an app that already contains items, you cannot change the subtype from Many to One.
начало примечание
Note
When configuring the display of items on an app page, a field with the subtype Many can be added to a table, tiles, or a kanban board. In this case, when the app is opened, data is loaded for all links from this field for each displayed item page. This increases the system load, especially if there are many such links. To optimize the display of app pages, you can enable eager data loading.
конец примечание
- App*. Specify the app whose items will be specified in the field. Please note that after saving the option, it cannot be changed.
- Add filter. Enables setting up filters for records when selecting existing items from a linked app. For instance, you can choose to display only items created by the current user. To learn more, see Add a filter for users and app items on the item form.
- If the field is added to the app context, additional options are also available:
- Field for linking. Link fields in two apps so that links to related items are automatically synchronized. If the app you specified has a field with a link to the current app, this option will be enabled automatically. To learn more, see Configure a field to link items of two apps.
- Default values for new items. Used to speed up creation of linked items with automatic filling of the fields. You can configure copying of data from the item of the current app or set the values manually. To learn more, see Default values for new items.
- Bound app. Controls saving of the linked item. Used when a linked item should only be added together with its parent one. When this option is enabled, the child item is not created in the system until the parent item is saved. To learn more, see Bound apps.
After this, determine whether the field can be filled in.
Place a field on app forms
When you add an App-type field during app creation:
- If working in the standard form setup mode, you cannot change the ability to edit a field; the default settings are used.
When creating and editing the field, the user can always select or add a record to the field, and from the view form, they can create a new app item. - After switching to the Advanced mode of form settings, you can configure how the user works with the create and edit forms, as well as app view form.
You can allow or prohibit selection from existing app items and the creation of new ones, make the value viewable only, or display data from the related item page.
Add data to a field in the standard mode of form settings
By default, after creating an app, you work in the standard mode of form settings. This allows you to define a single set of fields that users will see when creating, viewing, and editing app items.
You cannot change the editability settings for the App‑type field in this mode. An employee can always:
- When creating or editing an item:
- Select an existing record in the field — if the user has access permissions to view items.
- Add a new record — if they have permissions to create items.
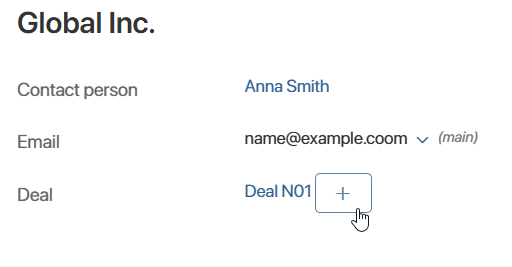
- On the item view form — go to the record page or add a new related item using the
 button, if the user has sufficient permissions.
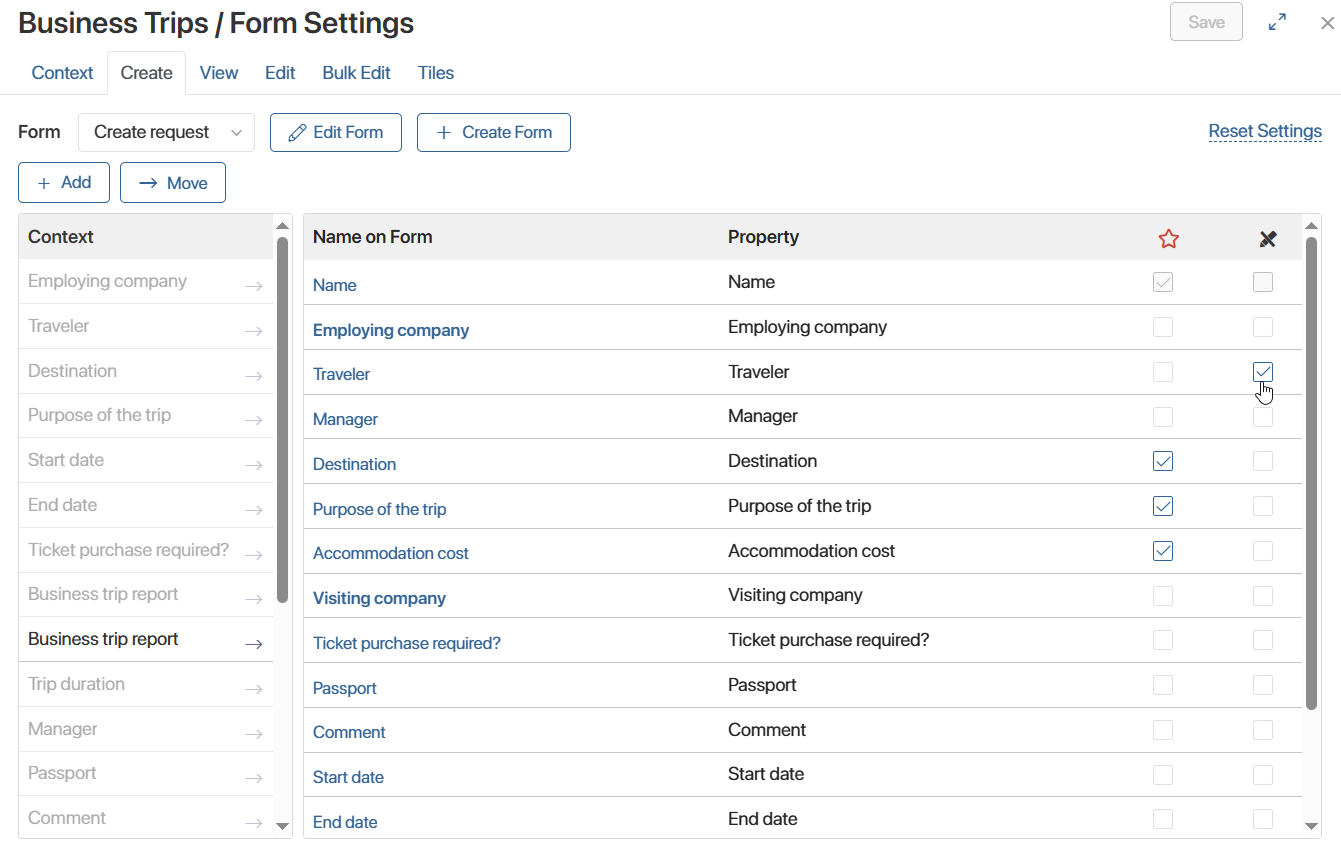
You can switch to the Advanced mode of form settings to customize field editability separately for the create, view, and edit app forms. For more information on placing form fields in Advanced mode, see Create, View, and Edit Tabs.
Customize field editability on create and edit forms
If you're working in Advanced mode of form settings, when placing an App-type field on the create and edit tabs, you can:
- Allow editing a field.
To make a field editable:
- Next to the field name, disable the Read only option.
- Click the field name, then in the window that opens, go to the App Item tab.
- Configure what data the user can enter in the field:
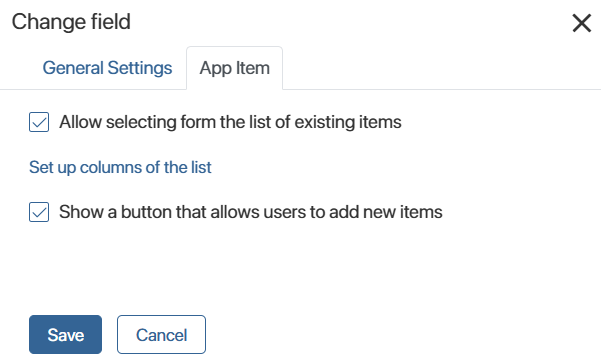
- Allow selecting from the list of existing items. By clicking the magnifying glass icon next to the field, the user will see a list of all available app items in a table format with the ability to search by parameters. If you set up a filter in the Add filter option, the user will see only records that match the specified criteria.
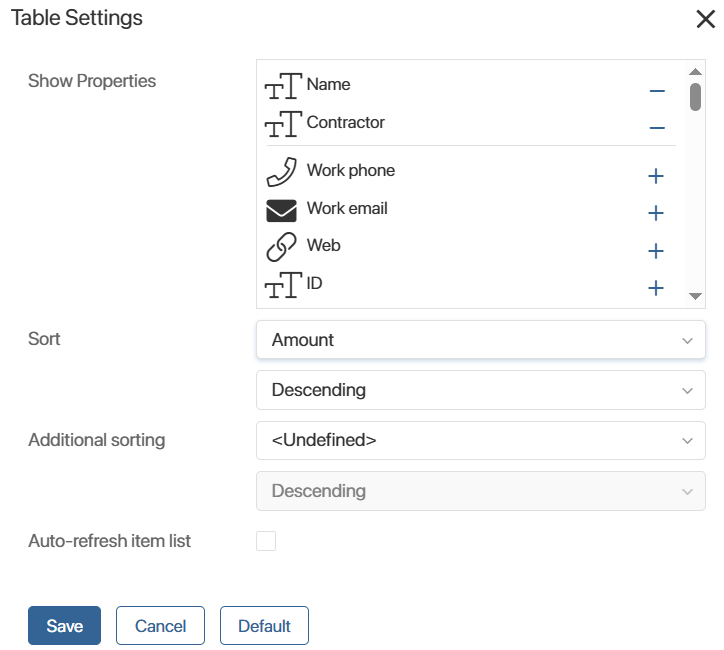
Select Set up columns of the list to configure table settings the same as on any app page.
For example, to search for a contract, add the Name and Contractor parameters and enable sorting by the Amount field. Then the user will see a table of contracts with contractors listed, and their order in the list will depend on the contract amount. You can also apply the settings specified when setting up the table in the app by clicking the Default button.
- Show a button that allows users to add new items. The + Create button will appear next to the field, allowing you to add a new record to the specified app.
- Save the settings.
Please note that if you enabled the Bound app option when adding the field, you cannot customize the populated field. Since a child record is added to the field, the button for creating an item is always available, and selecting from existing items is disabled.
- Make the field read-only and display nested properties.
Leave the Read only option enabled to prevent the field from being filled in. For example, if the set value can't be changed when editing an item or the field is filled automatically by a script.
In this case, you can display nested properties — data from the related item — next to the field. This way, the user will see all the necessary information without having to navigate to another record's page. For example, in the Client field, under the organization name, you could display details filled in separate fields: Address, Work Phone, etc.
To do this:
- Click the field name in the list.
- In the window that opens, go to the Properties tab.
- Move the app properties from the Context column to the Name on Form column.
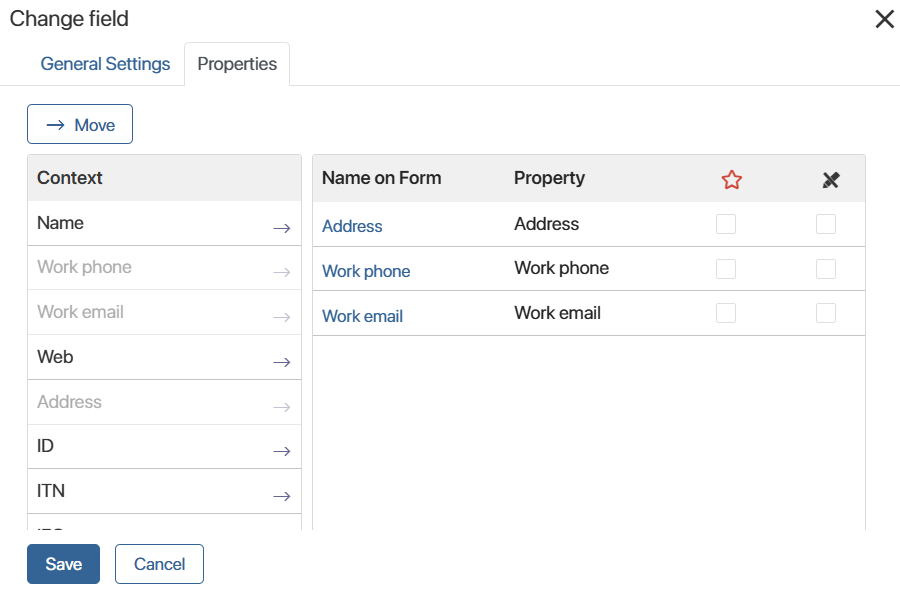
- Save the settings.
The form will display a link to the related item and the data from its fields.
Customize field display on the view form
If you move a field to the View tab in Advanced mode of form settings, you can simultaneously configure the display of nested properties and the addition of a new record.
Click on the field name to open the settings window. You can:
- Show nested properties.
On the Properties tab, drag and drop fields onto the form, just as in the Create and Edit tabs. Data from the linked app item will appear next to its name on the page.
- Configure adding records from the item page.
In the Add Item tab, the button ![]() is enabled by default. The user can add a linked item to the field without editing the current record.
is enabled by default. The user can add a linked item to the field without editing the current record.
To configure the button, select an option:
- <Standard creation>. Used by default and allows you to add an item to the linked app and a link to it in the item page.
- + Item. Duplicates the functionality configured for the item creation button on the app page. If a business process is linked to the add new item button, it will be launched.
- Start business process. Allows you to launch the process that adds the item when you click the button.
You can find the use case for configuring a button for adding an item Create an app item on the page of another app.
To disable the ability to create a record in a field, on the Add Item tab, disable the Show a button that allows users to add new items option.
Place a field on a form in a business process
You can add a field of the App type to a form in a business process. For example, so that an employee can see a link to a contract being processed or specify a client on a task page.
Configuring a field is the same as adding it to a create or edit form in an app.
If a field on a task form is editable and an employee does not have sufficient access permissions, they will automatically be able to fill in the field. They will not have direct access to the app and will not be able to edit item fields outside of the task.
Place a field in the interface designer
The interface designer is where you create form templates, pages, and custom widgets. When you configure them, you can use:
- When setting up a page or widget — fields added in the interface designer on the Context tab.
- When setting up a form — fields from the Context tab, as well as from the context of the app or business process for which the form is being created.
When you add an App‑type property to an area for modeling, in the window that opens, you can:
- Make the field editable. Disable the Read only option. The user will be able to:
- Select an existing item. The user will be able to select an item from a list of records they have permission to view. You can filter available items using the Add filter option in the field settings.
- + Create button next to the field — if the user has permissions to add app items.
- Make the field read-only. Enable the Read only option. A link to the item will be displayed in the field.
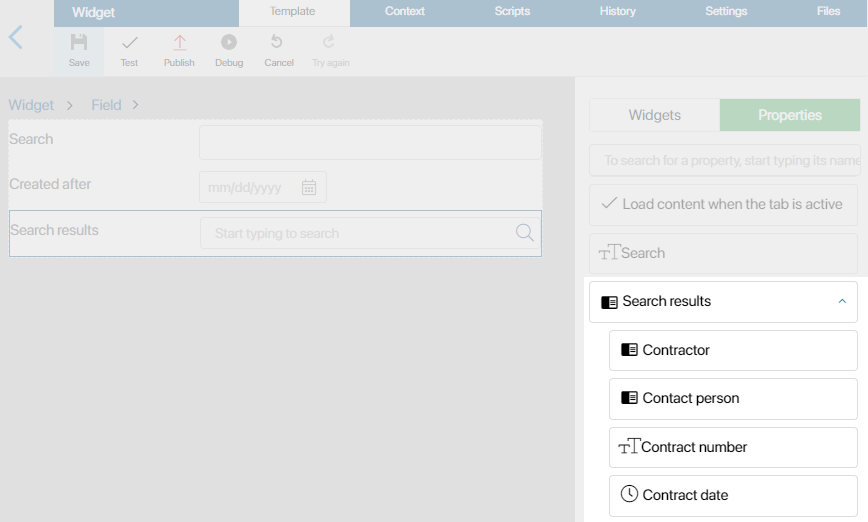
Display nested properties in the interface designer
If an App‑type field has a subtype of One, its nested properties can be placed anywhere on the form, page, or widget.
To do this, in the menu on the right, click the arrow icon opposite the field name, then drag the property from the list that appears onto the area for modeling.