If you are working with external project management systems like MS Project, you can use the project plan import and export feature. You can also transfer a plan from one BRIX company to another.
Import a project plan
You can import a project plan from an .mpp or .xml file. The imported tasks will be added to the current version of the plan, preserving their hierarchy. Note that if plan versioning is enabled by the administrator, the changes will be saved as a new version.
To import a project plan:
- On the project page, click the Project Schedule tab and click Edit.
- Select a project plan version into which you want to import tasks in the search field of the toolbar. If plan versioning is disabled, tasks will be added to the current version.
- Click the
 button.
 - In the provided window, upload an .mpp or .xml file and configure the settings:
- Import completed tasks. You can add only active plan tasks from an external system to the current plan. To do this, clear the check box in this option.
- Merge plans. Enable this option if you are importing a plan that you previously exported from the system. This will prevent tasks with identical IDs from being duplicated, and existing tasks will be replaced with imported ones. Task IDs in BRIX are compared.
- Assign a user to unassigned items. Select the person responsible for imported tasks with executors whose full names are not found among BRIX users. All these tasks will be assigned to the selected executor once import is completed. If you leave the field empty, you can select executors for each task during import.
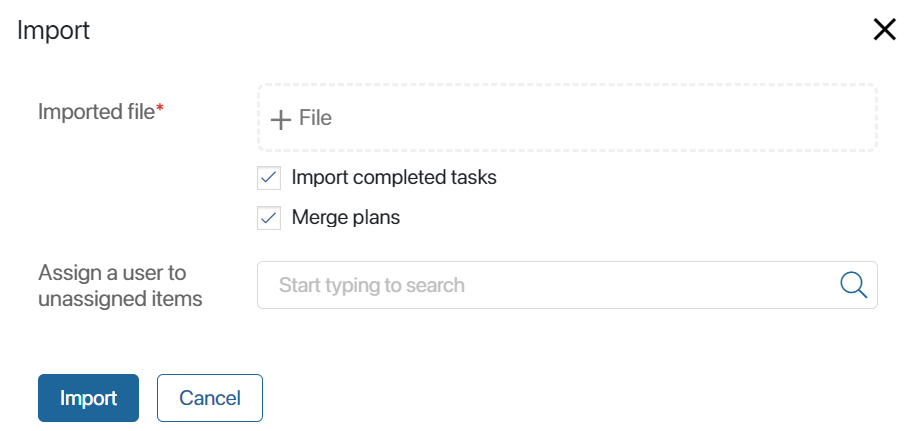
- Click Import.
Once the import process is completed, you will see the new project plan version with the imported tasks added to the previously existing ones. If plan versioning is disabled, all changes will be saved in the current version.
In the imported tasks:
- The nesting is preserved.
- The Name, Executor, Start date*, and End date* fields are filled out with data from the external system.
- If the initial task type is not supported by the system, the Type* field is set to Task, and the associated Control* field is set to Notify when the task is completed.
- All task executors are automatically assigned the permissions granted to Project Participants.
Please note that fields added by the administrator to the task page are not imported.
After the plan has been imported:
- If there are users responsible for the imported tasks that need permissions different from those of the Project Participant, contact the administrator.
- In Process type tasks, manually set up the input parameters of the imported process. To do that, open the task form and enter the data in the Business Process section.
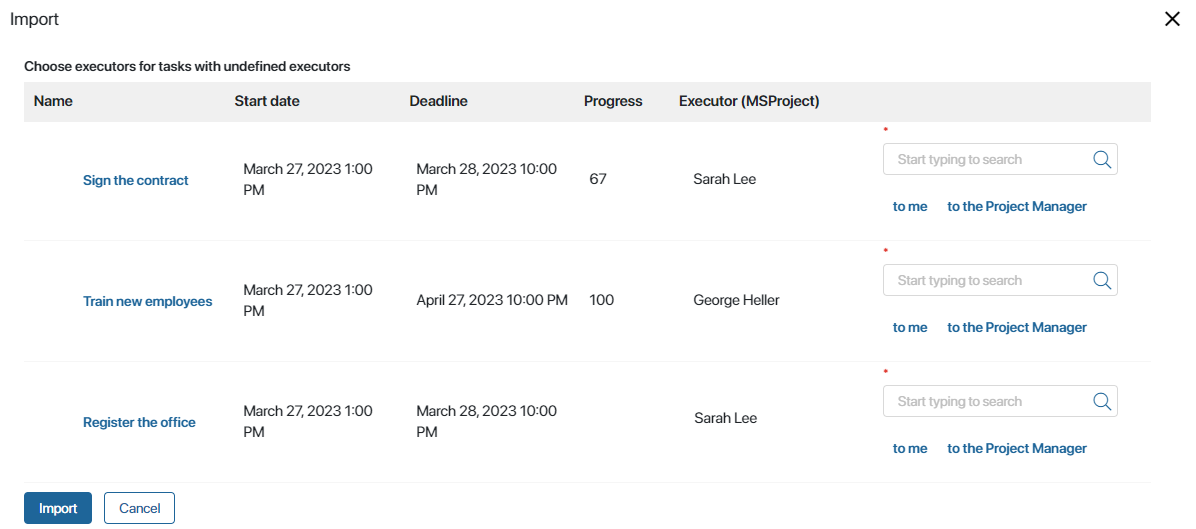
Executor conflicts
If the executors of the imported tasks are not BRIX users, and you haven’t assigned a user responsible for these tasks, you will be asked to assign other executors during import. You can:
- Assign any user by clicking the magnifying glass icon.
- Assign the tasks to yourself by clicking to me.
- Assign the tasks to the project manager by clicking to the Project Manager.
When you assign an executor for each task, click Import.
Export a project plan
You can export a project plan as an .mpp or .xml file. To do this:
- On the project page, click the Project Schedule tab and click Edit.
- In the toolbar, select the plan version for export in the search field. This step is performed if plan versioning is enabled.
- In the toolbar, click
 and select .mpp or .xml.
Please note that fields added by the administrator to the task page are not exported.
The project plan file will be downloaded to your PC.