Individual service terms are formalized as SLA standards. These standards regulate request processing times for specific services and enable notifications to managers if processing deadlines are violated.
In Service Desk, the following SLA standards apply to services:
- Default terms applied to all requests for a service. They are created and stored in the SLA app.
- Additional standards defined when creating or editing a primary SLA and stored in the SLA Priorities directory. An additional standard only applies to a request that meets the conditions defined within it:
- Priority level.
- Processing rule.
For example, the primary SLA applies to all requests for the Email service. You then add an additional standard that only applies to high-priority requests. When such a request arrives in Service Desk, the additional standard will be assigned. All other requests for the service will be processed according to the primary SLA.
In the SLA app, records are displayed as a table containing key terms: name, linked services, acceptable response and resolution times, and minimum SLA compliance percentage.

You can customize table display settings and sorting parameters.
Requests can also be viewed as tiles.
Create an SLA
To add a new service level agreement, go to the SLA app and click the + SLA button in the upper-right corner.
Step 1: Fill in the main SLA information
Fill in the fields in the Main Information section:
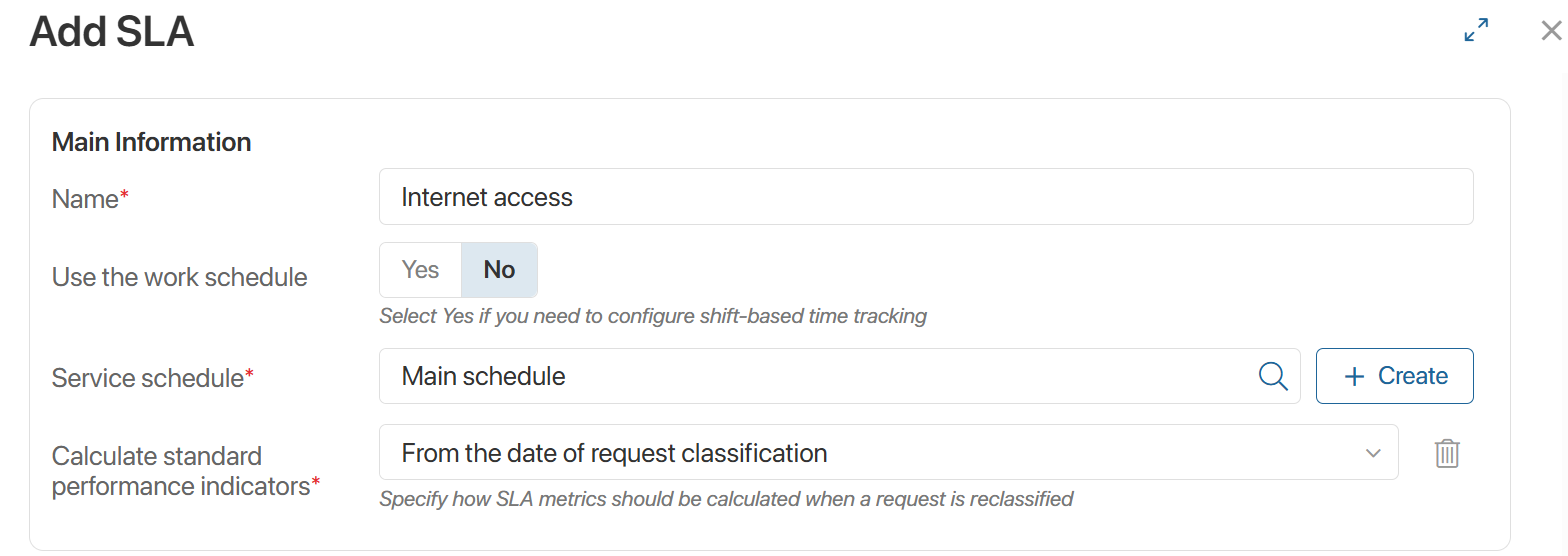
- Name*. Enter the SLA level name.
- Use the work schedule. By default, SLA depends on company working hours. Select Yes to enable a specific work schedule for operators.
- Work schedule*. Select operator working hours from the Work Schedule directory.
- Service schedule*. If not using a work schedule, select company service hours from the Service Schedule system app.
- Calculate standard performance indicators*. By default, standard time tracking starts from request classification until resolution. To reset the SLA timer if the service changes, select From the date of request classification.
Step 2: Add an additional SLA standard
The default SLA applies to all requests for a service. In the SLA standards calculation mode* field, specify additional standards that will take priority for requests with certain characteristics. For example, a high-priority request or one from a specific counterparty may be processed faster than specified in the primary SLA for the service.
Additional standards can be selected for an SLA based on one of the following criteria:
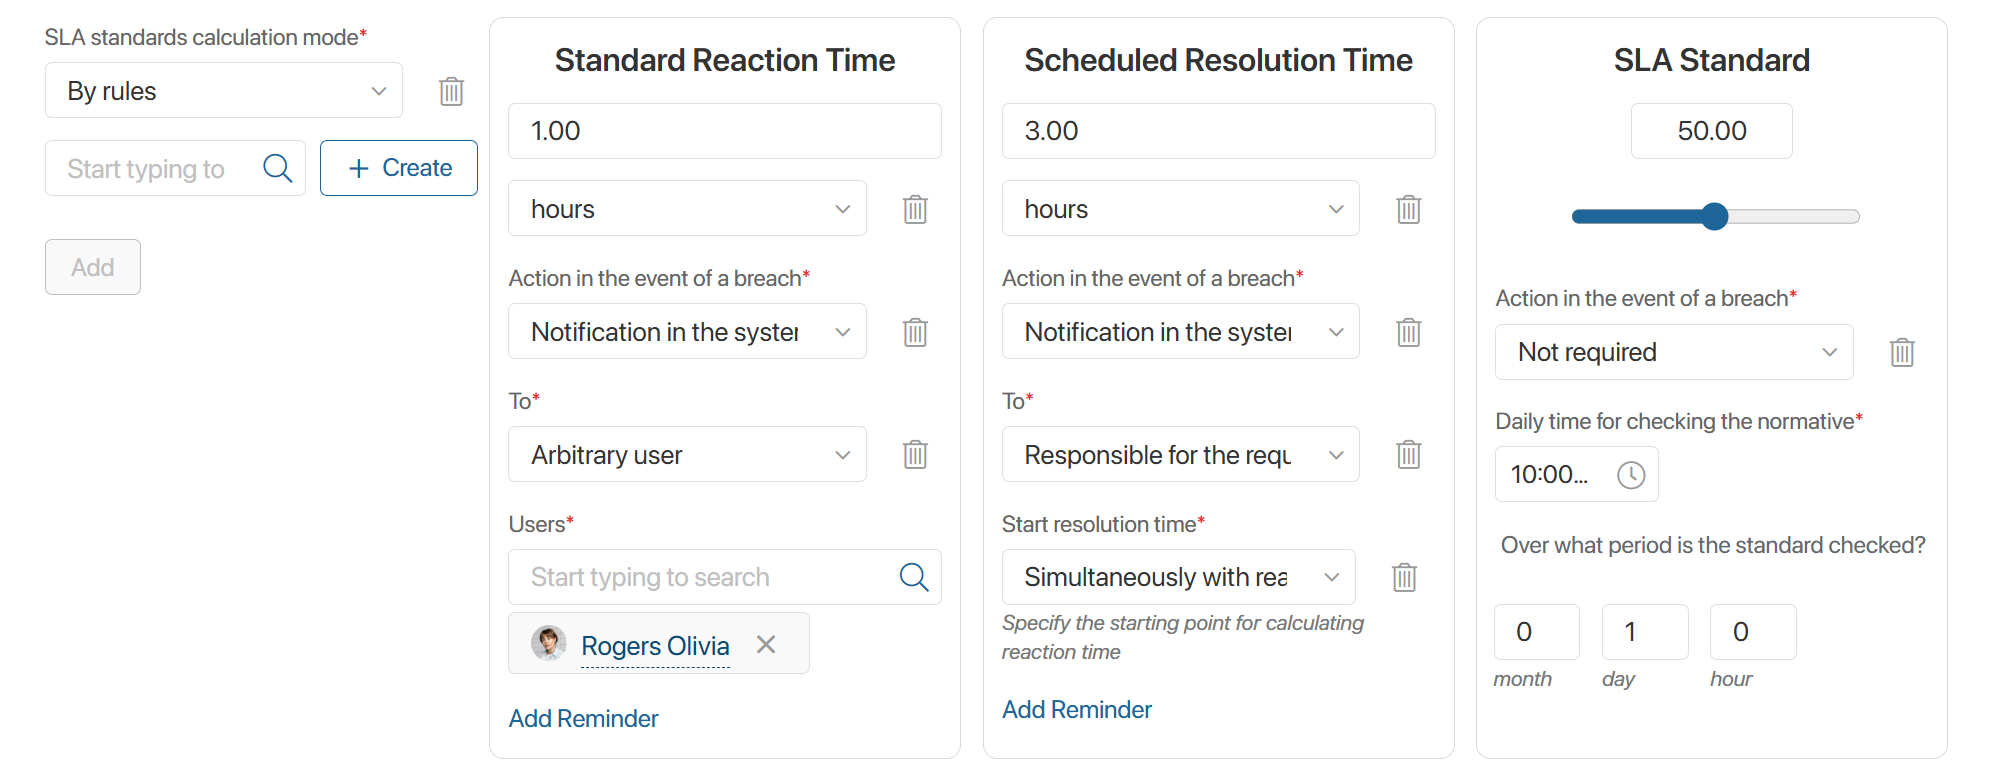
- By rules. Select or create a standard that defines processing times for requests that meet the rule specified in the standard.
To create a new target, click the + Create button. In the creation form that opens, specify the request processing rule from SD Rules > Rules, as well as the operator work schedule and the standard response and resolution times for requests. - By priority. Select or create a standard that applies to requests of a specific type and priority.
To create a standard, click + Add Priority and in the form that opens, specify the request priority level and the standard response and resolution times for requests.
Click Add to attach the additional standard to the SLA.
Step 3: Set the standard processing time for requests
- Fill in the fields in the Standard Reaction Time section:
- Set the timeframe for operators to acknowledge requests, e.g., 1 hour or 3 days.
- Action in the event of a breach*. Choose the response to violated deadlines: Not required, Notification in the system, Notification in the system and email alert, or Email alert and task in the system.
- To*. If selecting alerts in the Action in the event of a breach field, specify recipients: the responsible for the request, an arbitrary user, or both.
- Users*. If selecting an arbitrary user, specify them.
- Reminder. Enable reminders before the deadline of the response to the request:
- Reminder type*. Specify where the user will see the reminder. Choose Notification in the system or Email alert.
- To*. Specify who will receive the reminder about the expiring response time for the request: the responsible for the request, an arbitrary user, or both.
- Users*. If selecting an arbitrary user, specify them.
- Calculation of reminder time*. Select when to send an alert. Set as minutes remaining or a percentage of total response time. E.g., if you set 50% of a 2-hour deadline, the alert will be sent 1 hour before the response deadline.
- In the Scheduled Resolution Time section, set the deadline by which the operator should process the request. The standard is configured in the same way as the Standard Response Time section. Then fill in the additional fields:
- Start resolution time*. Define when the resolution timer should start:
- Simultaneously with reaction. The standard resolution time includes the response time and is counted from the moment the request enters the system.
- After reaction. The resolution timer starts only after the operator has started working on the request.
- In the SLA standard section, define the allowable violation percentage for requests over a set period. Fill in the fields:
- Action in the event of a breach*. Choose the response for unmet SLA standard: Not required, Notification in the system, Notification in the system and email alert, or Email alert and task in the system.
- To*. If selecting alerts in the Action in the event of a breach field, specify recipients of the alert about the SLA standard violation. You can select a user, group, or org chart item.
- Daily time for checking the normative*. Set when SLA compliance is verified.
- Over what period is the standard checked? Define the SLA compliance evaluation timeframe.
- Click Save.
Edit or delete an SLA
Users with edit permissions can modify existing terms: adjust response and resolution times, update violation actions, etc.
To edit, open the SLA page and click Edit.
After changes, click Save.
To delete, click Delete on the SLA page.