The app is used to group services into separate catalogs.
Operators can use catalogs to filter services when creating a request in Service Desk > Requests.
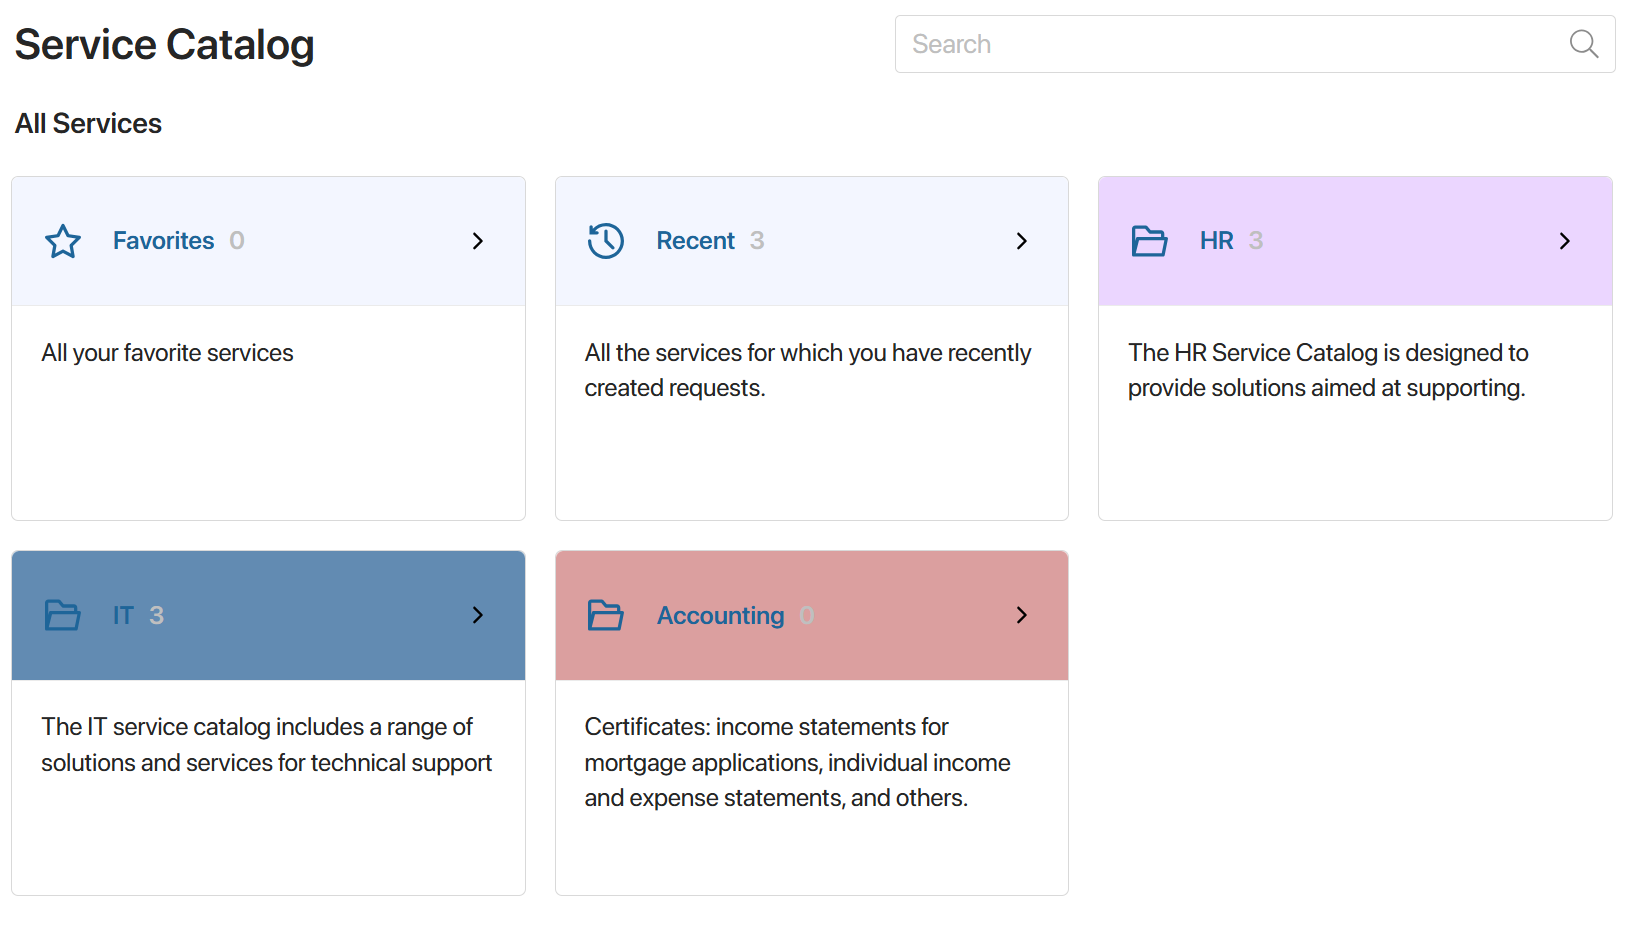
The created catalogs are displayed on the external portal of Service Desk on the Service Сatalogs page.
Using catalogs, external users can select a service and submit a request for it. Please note that users only have access to the service catalogs specified in their profile in the External users directory.
Create a service catalog
To add a new catalog:
- Go to Service Сatalogs.
- Click + Сatalog in the upper right corner.
- Fill in the fields in the opened window:
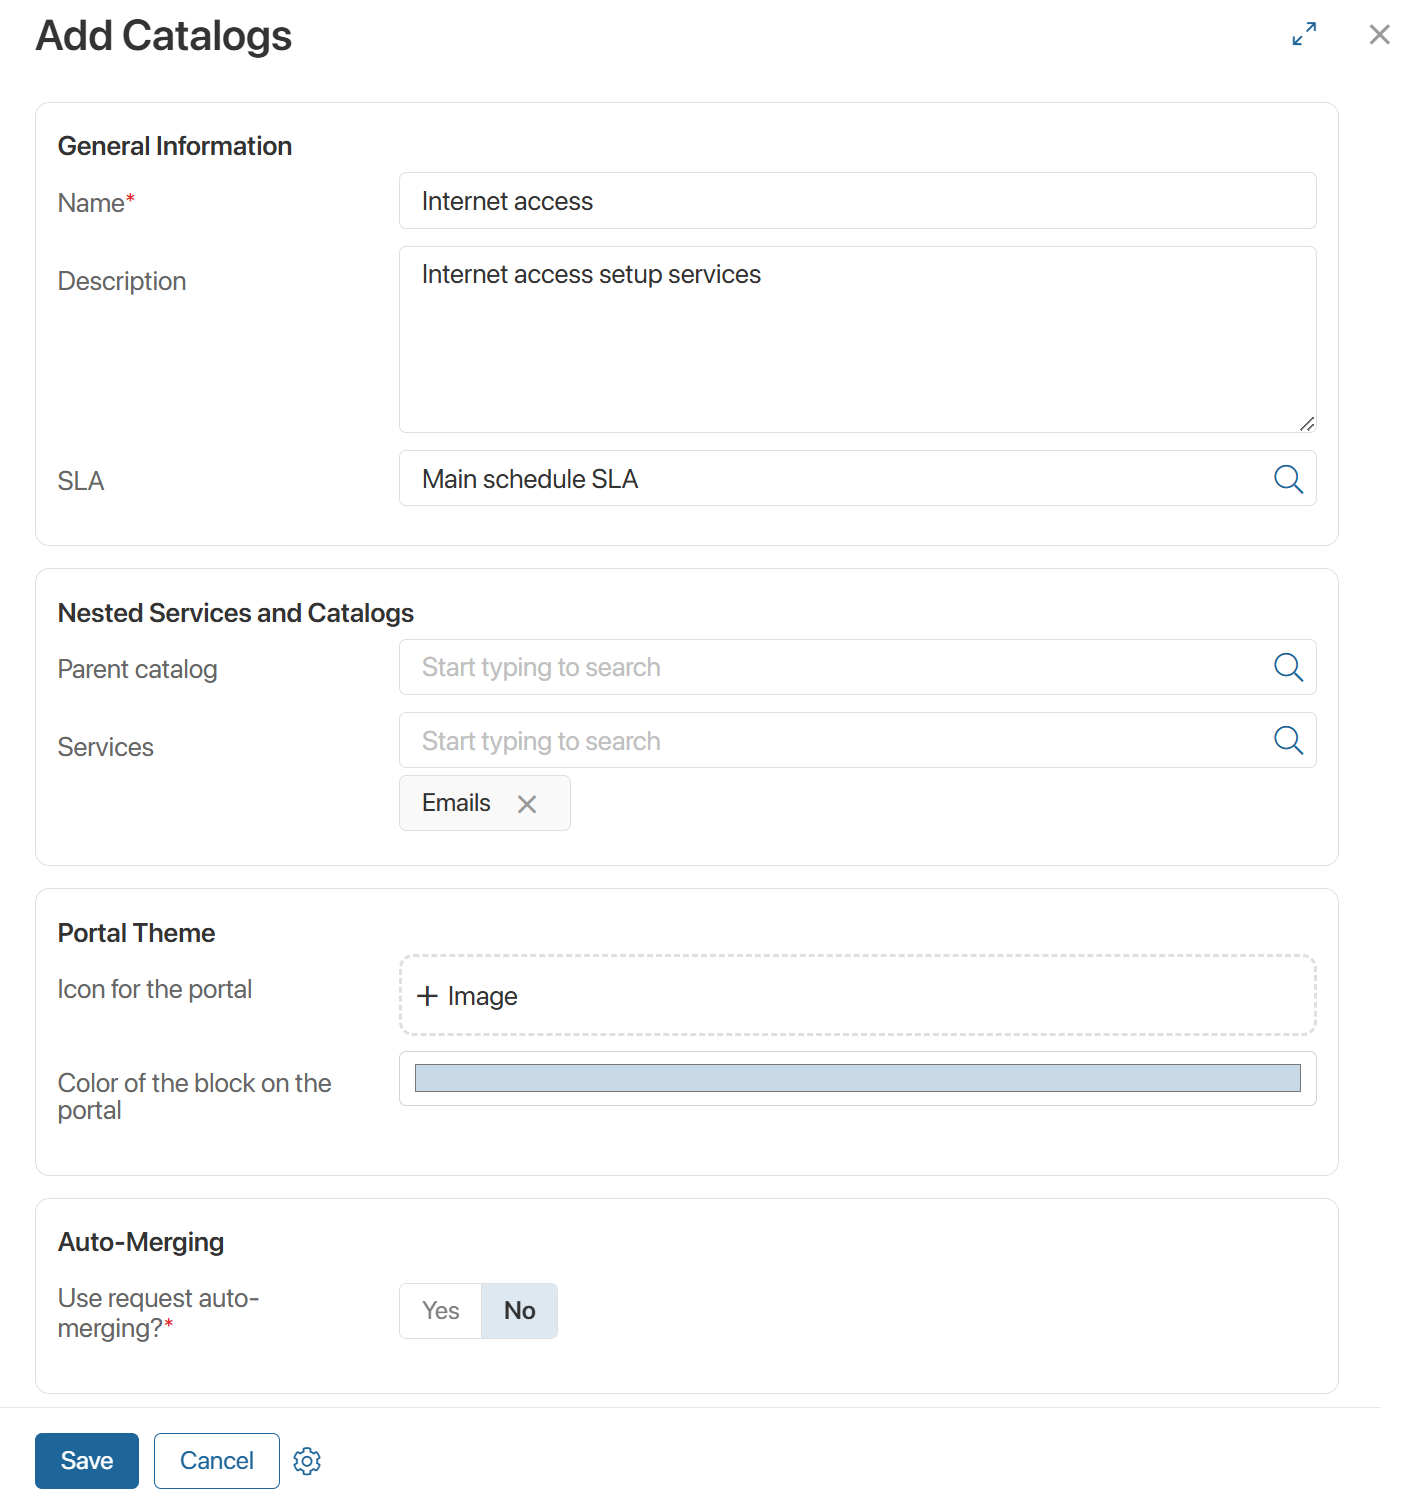
- Name*. Enter the name of the service catalog.
- Description. Add additional information.
- SLA. Specify the SLA priority for the services in the catalog.
- Parent catalog. For catalog hierarchy on the external portal, specify the parent catalog for the current one.
- Services. Specify the services that belong to the catalog.
- Icon for the portal and Color of the block on the portal. You can customize the service catalog information page displayed on the external portal’s Service Catalog page by setting a specific color and adding an image. To do this, upload an icon and select a color. The system administrator can preset or change the catalog design in Service Desk > Service Desk Settings.
- Use request auto-merging?* By default, operators manually link duplicate requests into a master request. To enable automatic merging, select Yes. In the fields that appear, specify the conditions under which requests for services in the current catalog will be linked into a master request:
- Time*. Enter the period during which requests are submitted to the system.
- Time unit*. Select the unit of measurement for the period: minutes, hours, days.
- Number of requests for merging*. The minimum number of requests that meet the conditions and will be linked into a single master request.
- Rule for automatic request merging*. Create or select an item from SD Rules > Rules that contains the request criteria for merging.
To apply the configured conditions to requests for catalog services, contact your system administrator. On the Service Desk Settings > Request Merging page, they will enable the Within service catalogs option.
Once this is enabled, if multiple requests for the same catalog service with similar subjects and descriptions are registered within the specified period, for example, one hour, they will be linked into a master request.
- Click Save.
Edit or delete a service catalog
Users with edit permissions can modify catalog parameters: name, description, responsible persons, SLA, and service list. To do this, open the catalog page and click Edit.
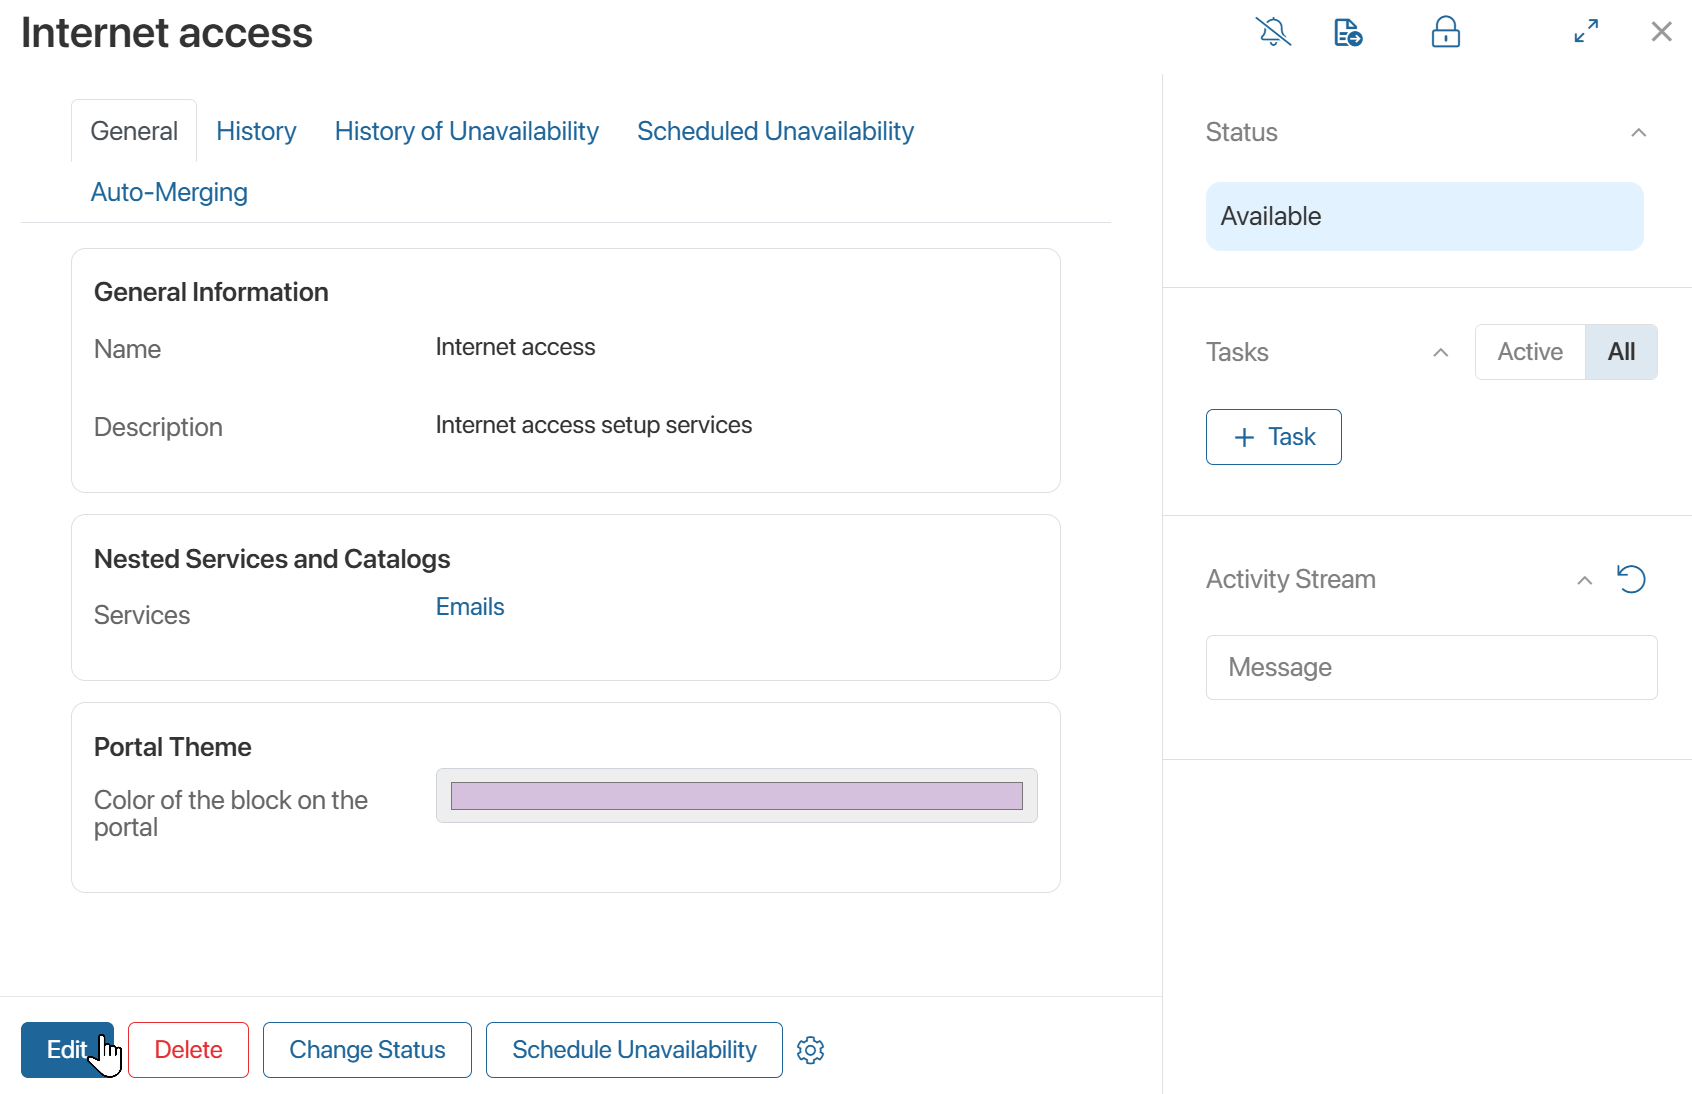
After making changes, click Save.
To delete a catalog, click the corresponding button on its page.
Service catalog action history
On the catalog page, under the History tab, you can view information about actions performed on the catalog. The table displays the following data:
- Action. Description of the recorded action. For example, status change or item update.
- Attribute. The catalog attribute that was modified.
- Value Before, Value After. The old and new values of the modified attribute.
- User. The employee who made the change.
- Date. The date and time of the change.
The data on the tab is displayed if the system administrator has enabled and configured the History of ServiceDesk Apps module.
To filter data, click the  button, set the filtering parameters: actions, users, item properties, or date, and click Apply.
You can export data in .xlsx or .pdf format by clicking the  button, selecting the format, and clicking Generate.
Service catalog status
On the sidebar of the catalog page you can see its status: Available, Not available, Partially unavailable, or Closed.
You can:
- Change the status to restrict service requests for the catalog. On the catalog page, click Change Status, select the desired status, and specify the type and comment for Not available or Partially unavailable. Clients will then be unable to submit requests for these services.
- Schedule a status change to Not available or Partially unavailable. On the catalog page, click Schedule Unavailability, set the status and exact time when services will be unavailable, and describe the reason. At the specified time, the status will update automatically, and a warning will appear on the request form.
For more details, see the Mark a service and a service catalog as unavailable article.