A route defines the sequence in which operators at different levels of technical support process requests of a specific type and priority. For example, requests with the same priority can be processed along different routes depending on the specified client.
At each stage, a separate standard applies to response time, solution discovery, and approval, known as OLA.
Let's look at how to configure a route.
Step 1: Fill in the route information
To define the request processing sequence:
- Go to Service Desk > Routes and click + Route in the upper right corner of the page.
- Fill in the fields:
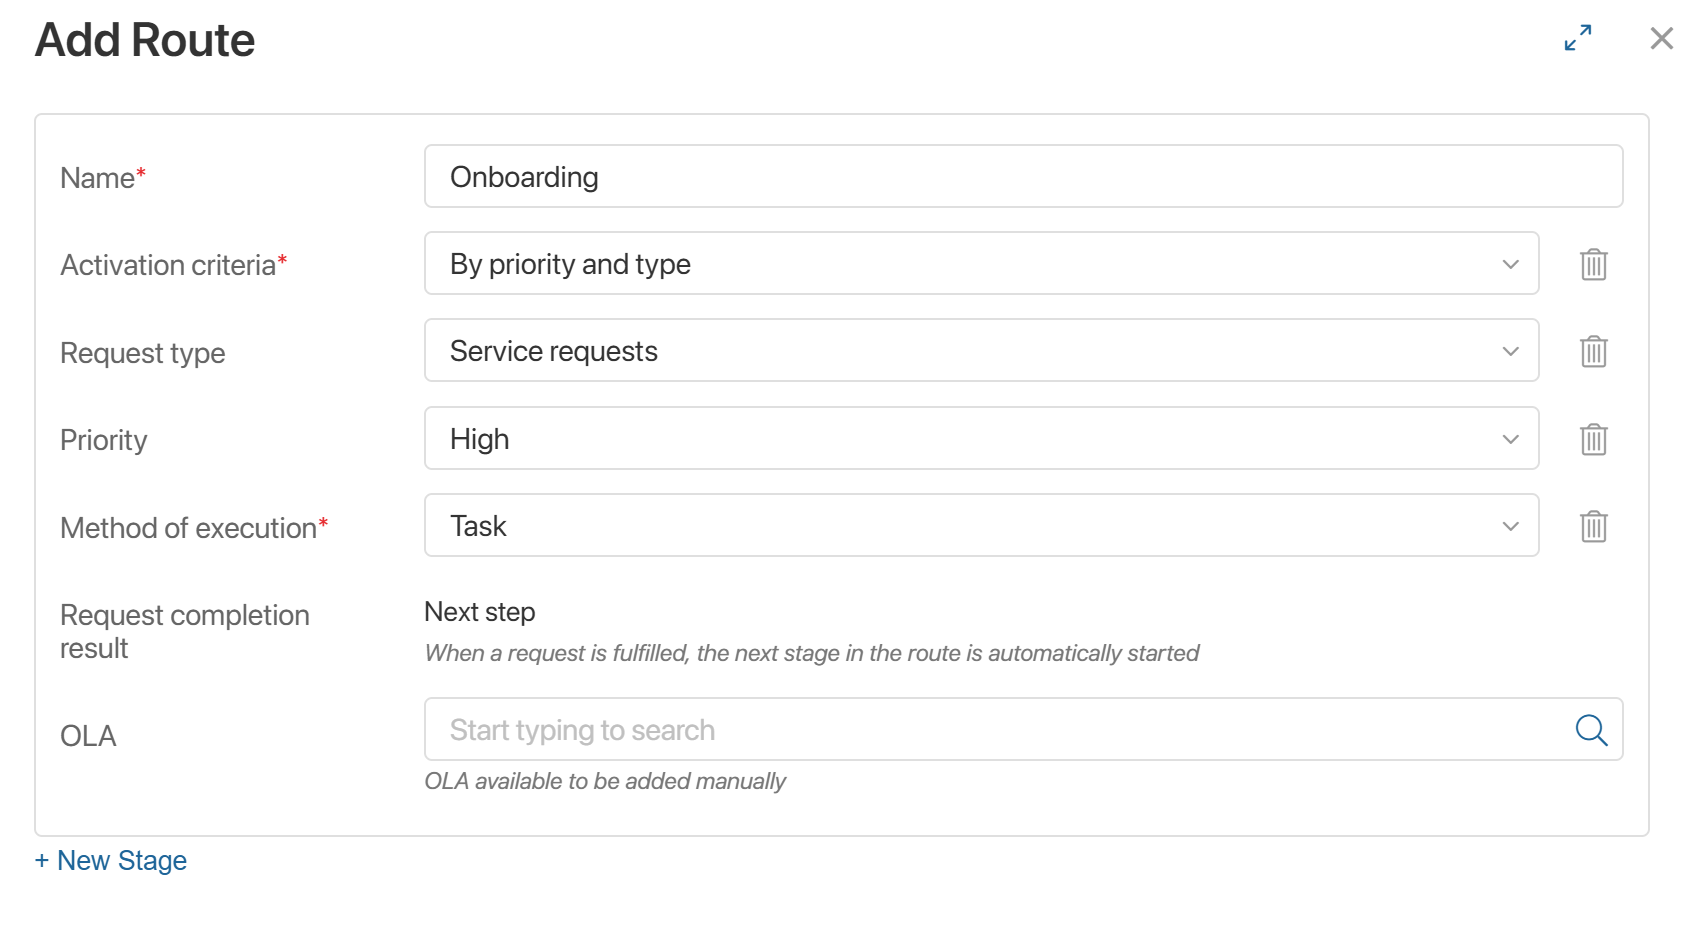
- Name*. Enter the route name.
- Activation criteria*. Select the criteria for applying this route to requests:
- By priority and type. Requests of a specific type and priority will be processed along this route. Specify the request type and priority level.
- By rule. The route will apply to requests whose parameters match a request processing rule. Create a rule or select a record from SD Rules > Rules.
- Method of execution*. Specify how the request progresses through the route:
- Request. The request moves sequentially from one stage to the next.
- Task. Each stage of request processing can be split into multiple subtasks, and you can move to a new stage without waiting for the previous one to finish.
- Create new requests. At each stage, child requests are automatically created for the main request. When all child requests are closed, the parent request will be marked as completed.
- Request completion result. If you selected Task or Create new requests as the execution method, when work at a specific stage is completed, the request will automatically move to the next step.
For the Request execution method, select how the request will be transitioned between stages:- Next step. The request will be automatically assigned to the next support group.
- Completion. The operator manually changes the support group on the request page to move it to the next stage of work.
- OLA. If you selected Completion as the request completion outcome, specify the OLA standard to be used when manually moving the request between route stages.
Step 2: Define the route stages for request processing
- Click + New Stage. List the request processing stages and, depending on the execution method selected earlier:
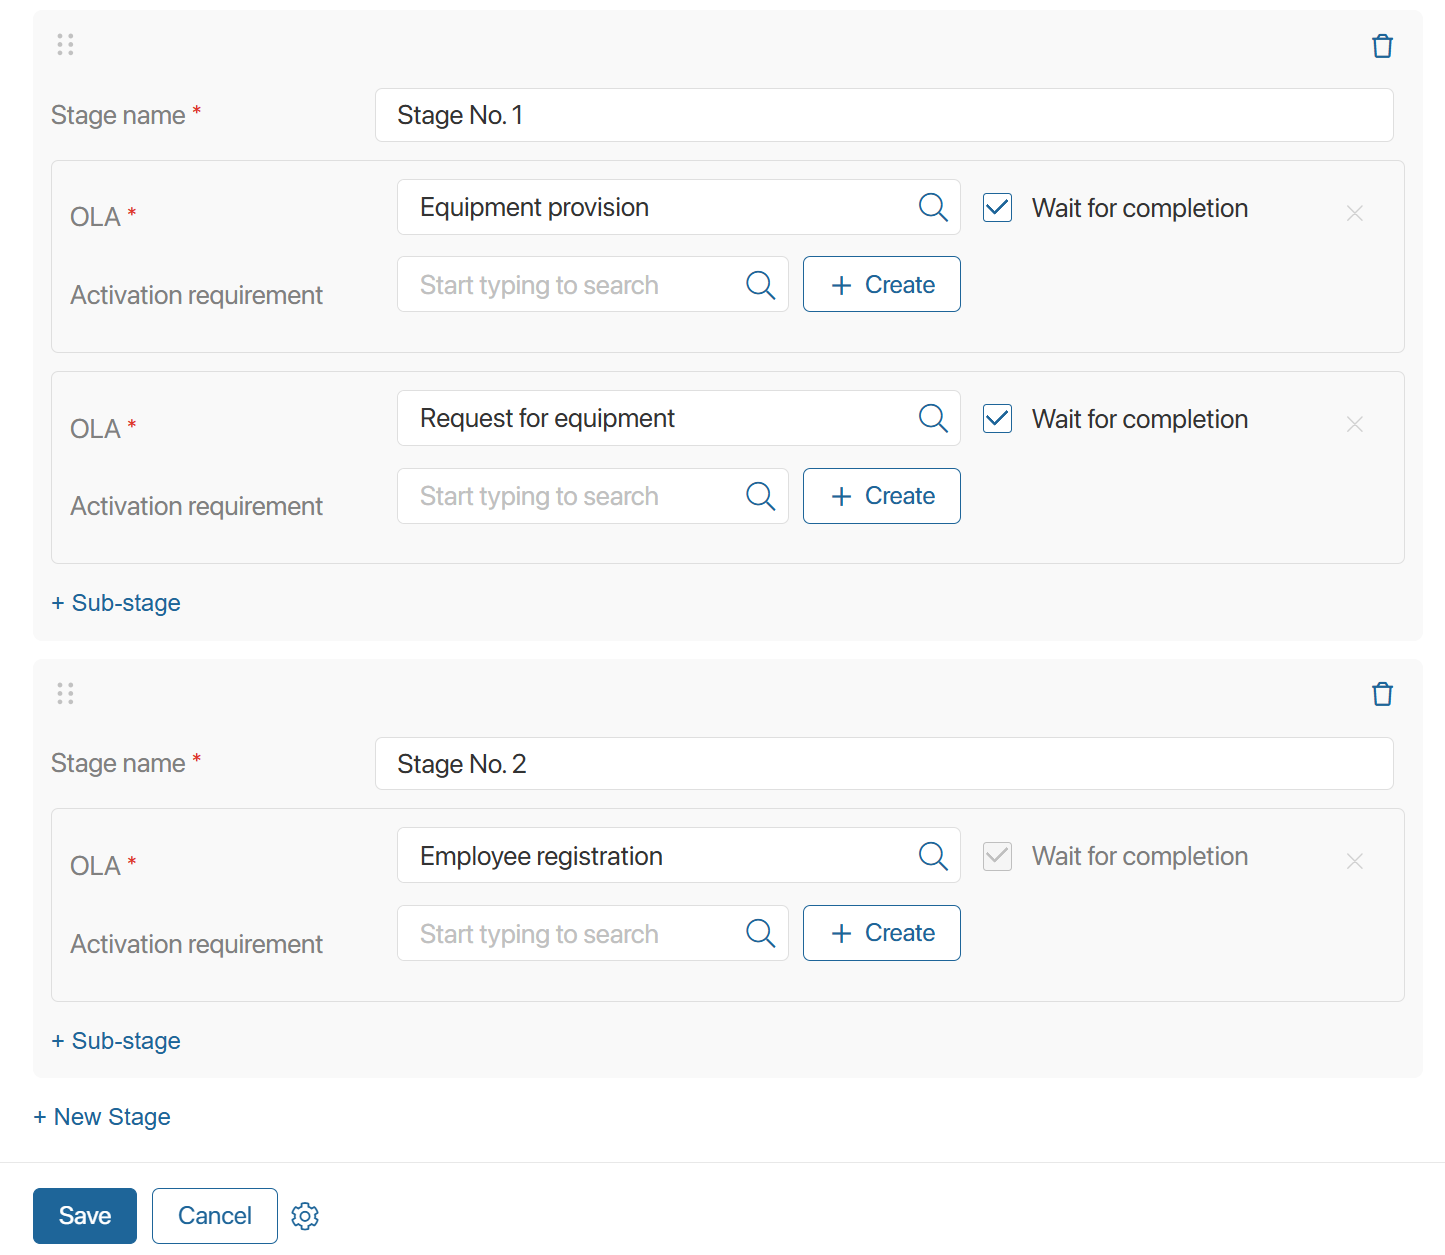
- Request and Task. Specify OLA standards for each step.
- Create new requests. Specify the service whose OLA and SLA standards will apply to the child request at this stage, and select how problem data will be passed to the child request:
- Request. Information about the request subject, description, etc. will be automatically taken from the parent request.
- Route. Enter the subject and text for the future child request, and attach additional files.
- By default, the Wait for completion option is enabled next to each stage name, meaning the request will not move to the next stage until the current one is closed.
To allow the next stage of work on the request to begin before the current stage is completed, disable this option. For example, during the onboarding process, a new employee may not yet be registered in the system, but they can already receive equipment for work. - You can change the order of stages. To do this, hold the
 icon and drag the stage up or down on the form.
To delete a stage, click the trash bin icon. - Save the settings.
The new route item will appear in the app. It will also be displayed on the request page on the OLA Stages and OLA Gantt tabs.