Widgets are a convenient tool for setting up dynamic forms, for instance, if some information needs to be displayed when certain conditions are met.
Let’s look at how scripts can be used in widgets by creating a page with a multiple-question test.
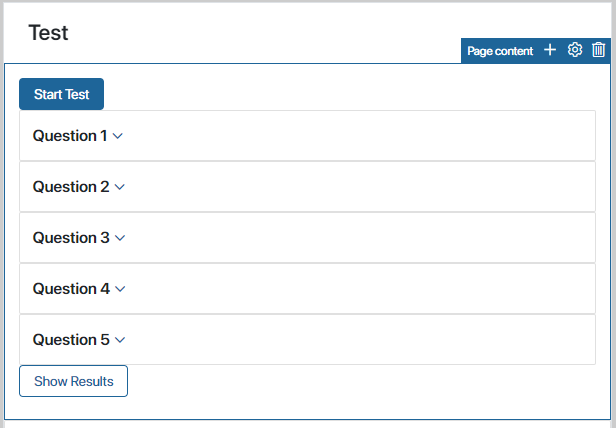
We will configure:
- Expandable panels with questions.
- A pop-up warning that only one answer can be selected.
- A modal window showing whether the test was passed.
Step 1. Create questions
First, create multiple choice questions for the test:
- Open the page and go to the interface designer.
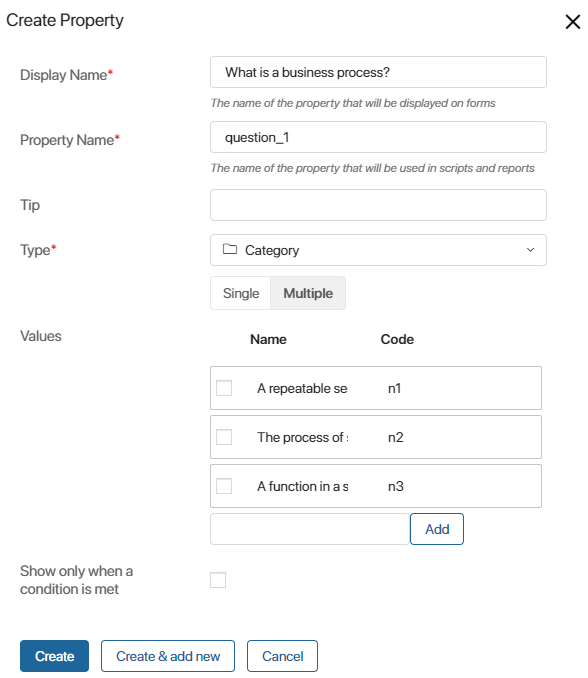
- On the Context tab, create a Category type variable and set the following parameters:
- Display Name*. Enter a question to be displayed on the page.
- Property Name*. Change the automatically generated property name to
question1. - Type*. Select Category and choose the Multiple option.
- Values. Enter possible answers for the question. Change their codes to
n1,n2, andn3and click Create.
- Create a few more questions in the same way.
Step 2. Configure question display
Now that you’ve created the test questions, determine how they are going to be shown on the page. Let’s make it so that the questions are collapsed by default, but as soon as the user clicks Start Test, the first question panel expands. To do that:
- In the interface designer, on the Context tab, create a variable of the Yes/No switch type called Expand question 1
(showQuestion1). - Add the Panel with header widget to the modeling canvas.
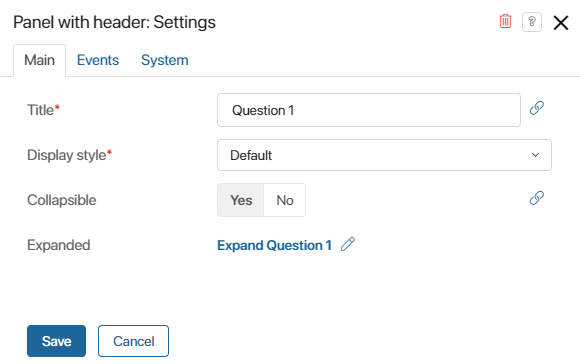
- In the window that opens, set the following parameters:
- Title*. Enter the panel’s name, Question 1.
- Collapsible. Select Yes.
- Expanded. Specify the Expand question 1 variable that you created in step 1. With this variable in the condition, the panel will expand when the user clicks the button that is going to be added to the page.
- Click Save.
- Add the Button widget to the modeling canvas.
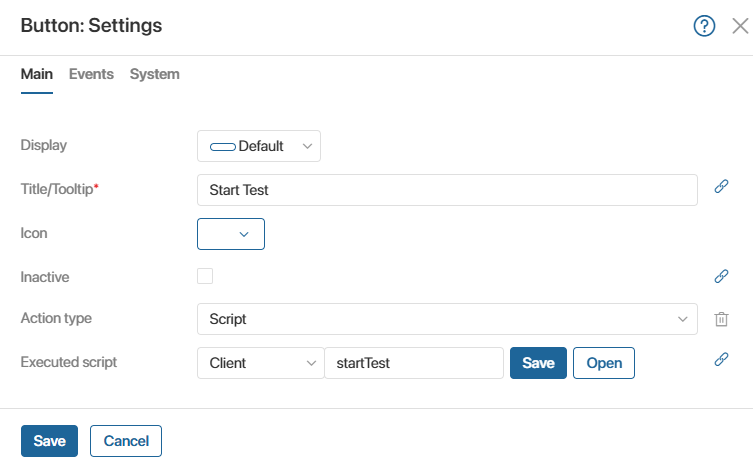
- In the settings window that opens, set the following parameters:
- Title/Tooltip*. Enter the button’s name, Start Test.
- Executed script. Add a script that will change the value of the Expand question 1 variable
(showQuestion1)totrue. To do that, click Create, enter the function name: startTest, click Save, and then select Open.
On the Scripts tab that opens, write the following script in the created function:
async function startTest(): Promise<void>{
Context.data.showQuestion1 = true
}
- Save the settings.
- Inside the Panel with header widget, place the Category type variable with the first question that you created earlier. To do that, on the right-side panel of the interface designer, switch to the Properties tab and drag the field to the widget. On the page, the property will be displayed as the Field widget.
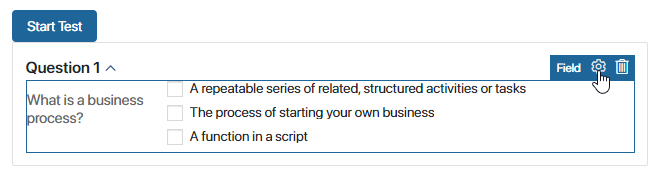
- Add as many panels to the modeling canvas as you have questions. Set names for each panel. In the Collapsible field, select Yes, in the Expanded field, No. Place the properties with the questions into the panels.
- Save and publish the changes.
Now all the questions are collapsed when the page opens. When the user clicks Start Test, the first question automatically expands.
Step 3. Configure warning display
In the test, there is only one possible answer for each question. If the user selects several answers, an Information box with a warning should be displayed. The box disappears when the user hovers the mouse over it.
To set up the information box, do the following:
- In the interface designer, on the Context tab, create a variable of the Yes/No switch type called One answer
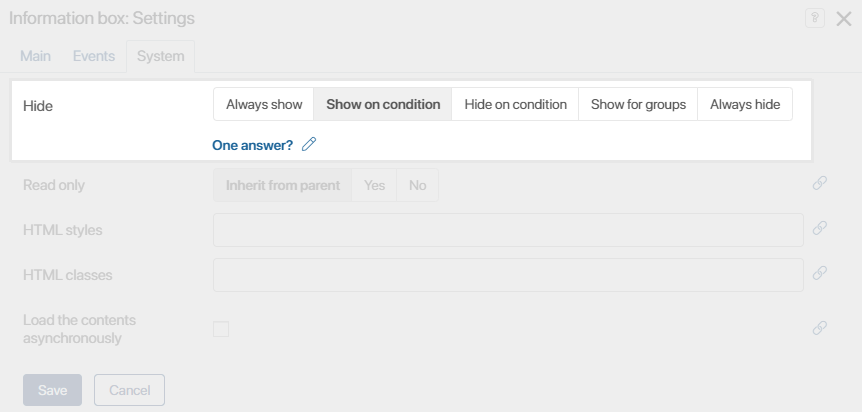
(oneAnswer). - Add the Information box widget to the modeling canvas. In the settings window that opens, in the Hide field, select Show on condition. Then specify the One answer variable. Whether the information box is shown will depend on the value of this variable.
- The number of answers selected by the user needs to be checked. To set up the checking, do the following:
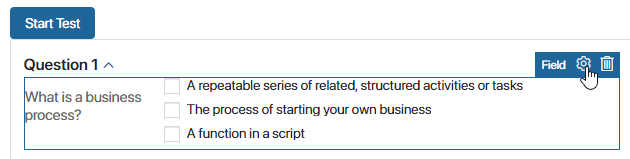
- Select the Field widget containing the first question and open its settings by clicking the gear icon:
- Go to the Events tab and add a script that will check the number of selected answers and change the value of the One answer variable. To do that, in the On value change field, click Create, enter the checkQuestion1 function name, then click Save and Open.
- The Scripts tab in the interface designer will open. Add a script that will define the value of the One answer
(oneAnswer)variable, for example:
async function checkQuestion1(): Promise<void> {
if (Context.data. question1 && Context.data. question1.length > 1) {
Context.data.oneAnswer = true
} else {
Context.data.oneAnswer = false;
}
}
- In the settings of the Information box widget, go to the Events tab and add a script to the On mouse enter handler. This script should change the value of the One answer
(oneAnswer)variable tofalse:
async function closeBlock(): Promise<void> {
Context.data.oneAnswer = false
}
- In the Question 1 panel, add a Button widget, name it Next Question, and link a script that checks the answer to the first question. When the button is clicked:
- If more than one answer is selected, the information box appears with its configured text, for example, Select only one option.
- If one answer is selected, the first question panel closes and the user moves to the second question.
async function nextQuestion(): Promise<void> { |
- Save and publish the changes.
Step 4. Configure test results display
When the user finishes the test, they click Check Results. A pop-up window displays the test result and includes a button for closing the window.
To configure it:
- On the Context tab of the interface designer, create two Yes/No switch variables:
- Correct (correct)stores the test result.
- Results (showResult) controls whether the modal window with the test result is visible.
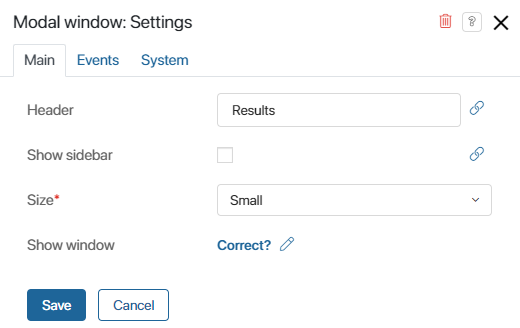
- Add a Modal window widget to the modeling canvas.
- In Show window, select the Results (showResult) variable. The value of this variable controls whether the modal window is displayed.
- Add two Information box widgets to the modal window. One is shown when the test is passed and the other when it is not. Configure them as follows:
- For a successful result, in the settings of one widget:
- On the Main tab set Information type to Positive result and Title to Test passed.
- On the System tab, set Visibility to Show on condition and bind the Correct (correct) variable.
- For an unsuccessful result, in the settings of another widget:
- On the Main tab, set Information type to Error and Title to Test not passed.
- On the System tab, set Visibility to Hide on condition and bind the same Correct (correct) variable.
- To let users hide the results after viewing them, add a Button widget inside the modal window. Enter the button name, set Action type to Script, and add the following code:
async function closeResult(): Promise<void> {
Context.data.showResult = false;
}
- To display the configured modal window with the test results, add another Button widget to the modeling canvas. In the button settings, in the Executed script field, add code that checks the selected answers and displays one of the information boxes:
- Test passed if the correct answers were selected.
- Test not passed if an incorrect answer was selected.
Sample script for checking questions and displaying results
async function resultTest(): Promise<void> {
|
- Save and publish the changes.