When work on the request is complete, the customer receives a notification with a link to a form for feedback on the service provided:
- If the customer created the request on the portal page, the notification is sent to their #Activity stream.
- If the request was created from a live chat, the notification is sent to the session.
- If the request was created by a company employee, they will receive a task with a link to the form.
The form looks like this:
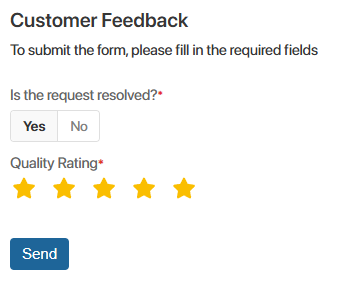
The submitted review will be automatically saved in the Feedback directory.
Configure the feedback form
The form is configured by the administrator in two stages:
- Generate the index.html file, which contains the code for the feedback form.
- Place the code on the external portal.
Step 1: Generate the index.html file
- Go to Administration > Tokens.
- Click the +Token button. Specify the user and token name, then click Create. For more information, see the Tokens article.
- Copy the created token.
- Go to Customer Service > Customer Service Settings. Open the Feedback Form tab.
- Paste the copied token into the BRIX Token field and click Generate.
- The page will display the index.html file with the form code. Download it to your computer by clicking on the name.
Now you can use the code from the file to add the form to the portal.
Step 2: Place the feedback form on the external portal
- Create a new portal page where the feedback form will be stored. To do this, go to Customer Service > Portal and click +Page in the upper right corner. Enter a name for the page, for example, Leave a Review, and click Create. The page template will then open in the interface designer.
- In the page template, click the +Widget button and add the Code widget to the page.
- In the widget settings window that opens, add the contents of the index.html file and click Save. This will add the form to the portal.
- Save and publish the changes.
- Go to Customer Service Settings > Main Page. In the Feedback Form Link field, specify the link to the portal page where you placed the form. Now, when a request is closed, a link to the form will be automatically sent to the customer.
- You can further limit the waiting time for a response from the customer. To do this, on the Customer Service Settings > Main Page, enter the number of minutes in the Response waiting time field. If the customer does not send a response within this time, the waiting period will end and the request status will change to Closed.
Place a feedback form on a website
You can also place the generated form on your company’s external website:
- Place the code from the previously saved index.html file on your website.
- Go to Customer Service Settings > Main Page and enter the form URL in the Feedback Form Link field.
- Click Save. After that, the customer will see a link to the form located on your website in the request closing notification.
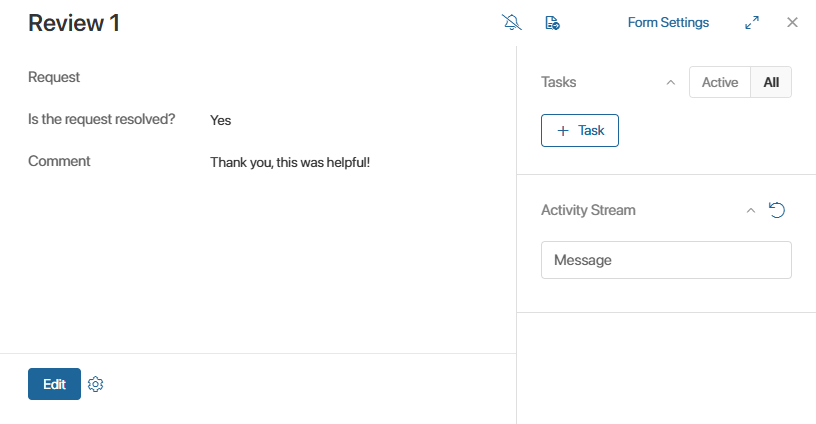
Feedback directory
All feedback collected via the feedback form is stored here.
You can open a feedback entry, view its details, assign a task related to it, or send it for approval or information.
General statistics on reviews can be found in the Requests report.