The widget allows you to create an interactive report in the form of a table whose content changes depending on the user’s choices. You can use apps of any type, as well as Contracts and Reports as data sources for the table.
For instance, you can configure a table that displays summarized information on sales volumes for each manager during a selected period. The results can be filtered or sorted according to your preferences.
Configure the widget
You can add the widget to an app item form or to a page.
To configure the widget:
- In the interface designer, drag the widget from the right-hand panel to the modeling canvas or click the +Widget button.
- In the pop-up, in the App field specify the source for the table. It can be:
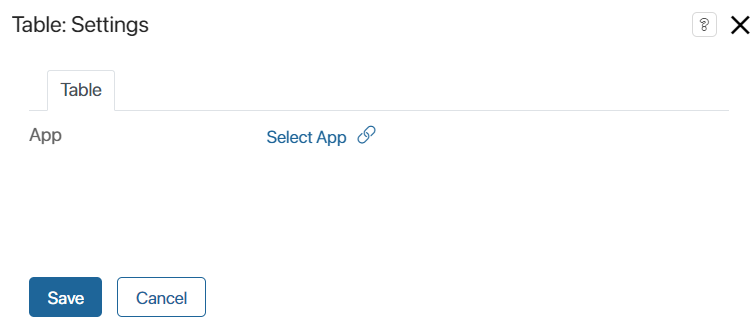
- An app, contract, or report. The table is based on the data of all the items of the selected component. Click the Select App link and specify the data source, e.g. the Deals app.
- A variable of the App (many) type. The table shows the data of the items specified in the selected variable. Click the
 icon and specify the variable of the App (many) type from the widget or app context. For example, users can fill in this variable when completing a task or the variable stores the items pre‑filtered by scripts.
If there are no values, the table shows data of all items of the app specified in the variable settings.
When using both modes, only the data to which the current user has access will appear in the table.
When you select the data source, additional options will appear in the settings window.
- On the Table tab, specify the parameters for data display:
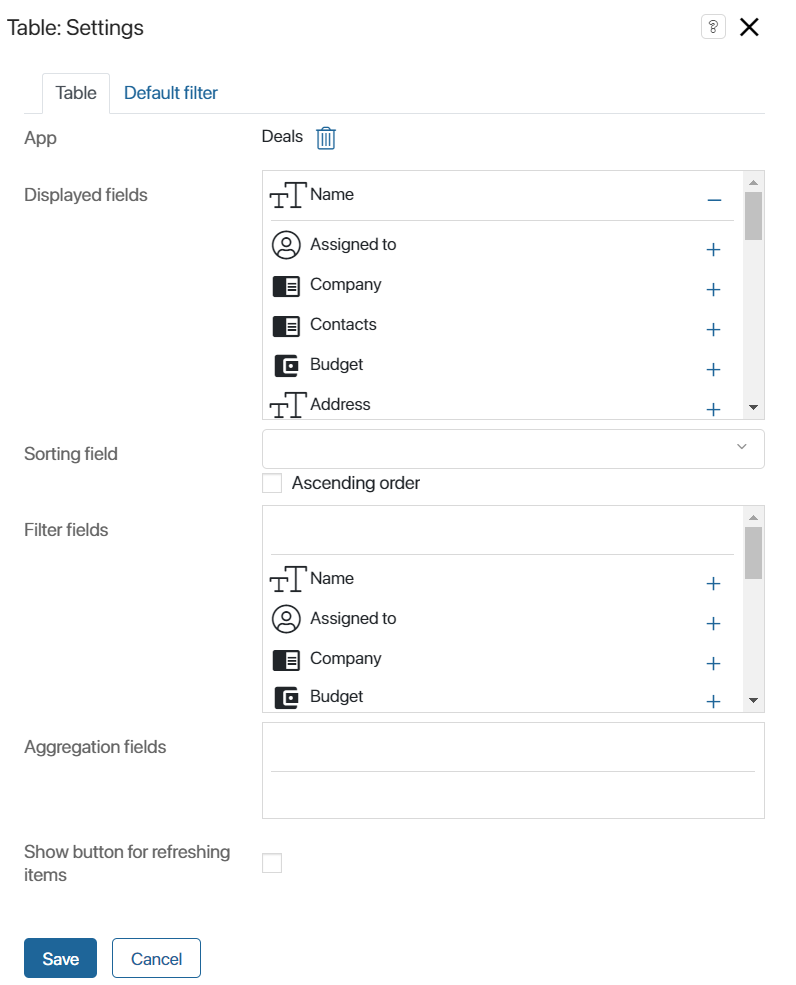
- Displayed fields. Select the app fields to be displayed as columns.
- Sorting field. Select the app field that determines the order of items in the list.
- Ascending order. Enable this option to sort the values of the field in ascending order. If you specified a String type field, the records will be sorted in alphabetical order. If this option is disabled, the values of the field will be sorted in descending order.
- Filter fields. Select the app properties that are used to filter items. The user will be able to select the values of these fields over the table.
- Aggregation fields. This field automatically calculates and shows the sum of all values in the column. You can only select the fields you added in the previous step. Note that the sum is calculated only for Money and Number data types.
- Show button for refreshing items. Enable this option to display a button above the report to refresh its data.
When you save the settings, you can see the table draft on the modeling canvas. You can edit the table by clicking on the gear icon.
- On the Default filter tab, you can specify the app properties to be used as automatic filters for the data output in the table. To do this:
- Click + Filter and then on the <Not defined> link that appears.
- From the drop-down list, select the app property.
- Set a value for the property. For example, for the Deals app, you can set filters on the Budget property by specifying its lower and upper bounds.
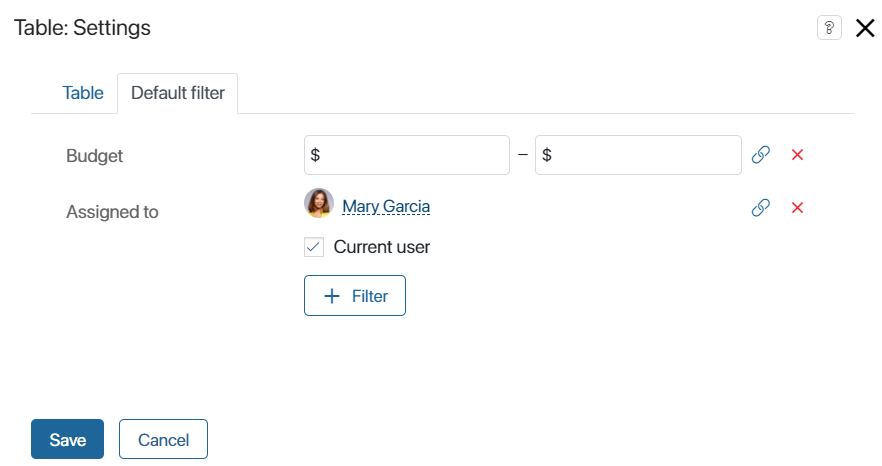
To link a property value to a variable, click the ![]() icon. To remove the filter, click
icon. To remove the filter, click ![]() and confirm the action.
and confirm the action.
- Click Save.
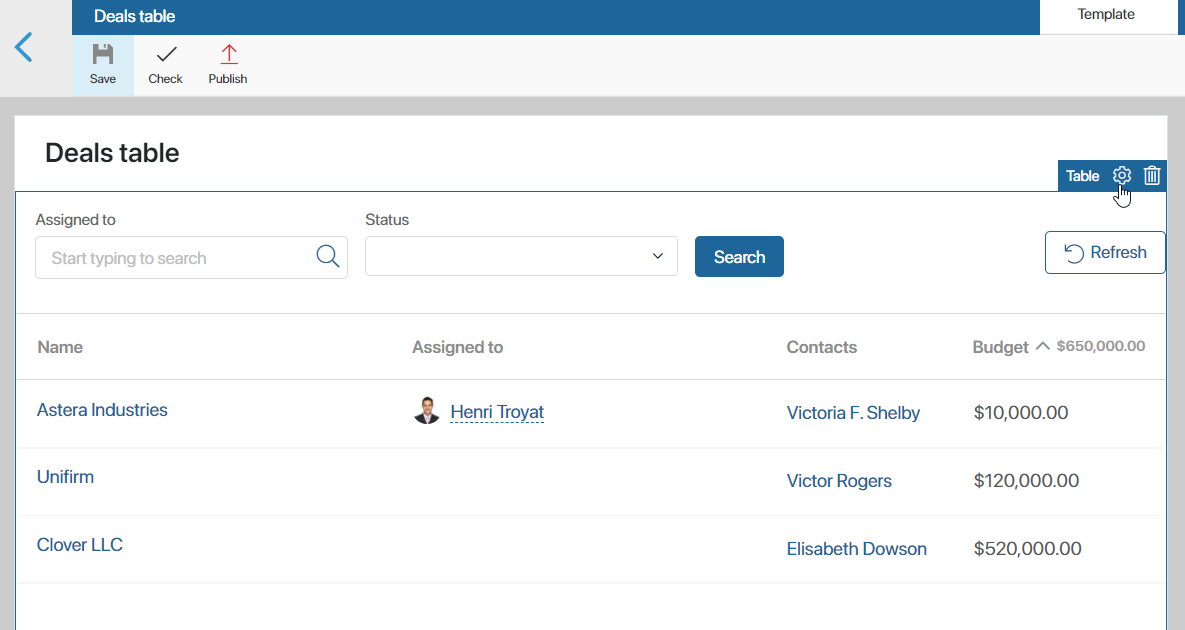
- To finish and make the table available to users, click Save and Publish on the top panel of the interface designer.
Set up access to the report
If the widget is placed on a separate page, you can specify groups of users who have access to it and will be able to view data from the table. To do this, configure access to the page. To the right of its name, click the gear icon and select Page Access.
In the window that opens, specify groups of users who can access the page, for example, Managers.
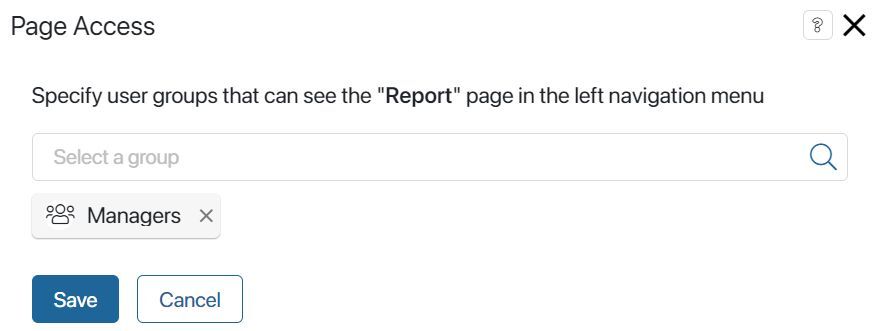
Now the table will be visible only to them.
Found a typo? Select it and press Ctrl+Enter to send us feedback