You can conveniently work with solutions on the Administration > Manage Solutions page. To do this, select Solutions in the left menu of the workspace. Here you will see a list of all created and ready-made solutions imported from the BRIX Store or a file.
If a solution is paid or blocked, information about it will be displayed next to its name.
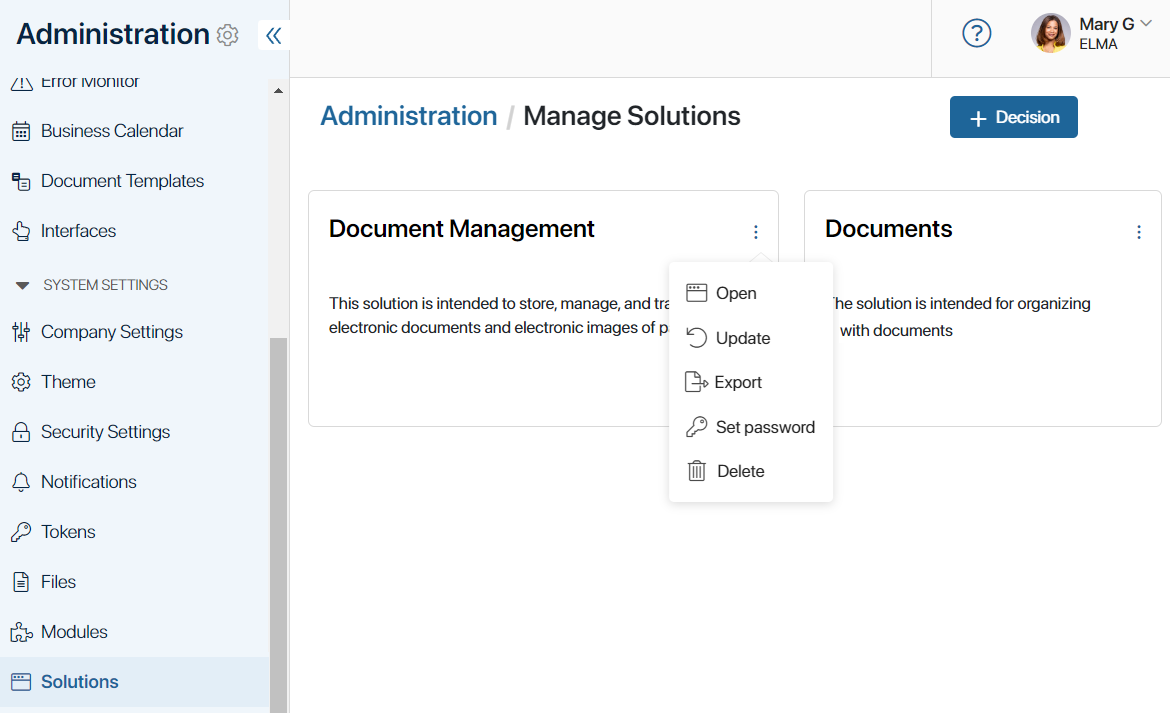
To access the solution settings, to the right of the solution name, click the three dots icon and select:
- Open. Go to editing the solution. You can change the solution name and description, the list of workspaces and modules, and enable the Paid option. The same fields are filled in when creating a solution.
- Update.
- Export. Export the solution to BRIX Store or file.
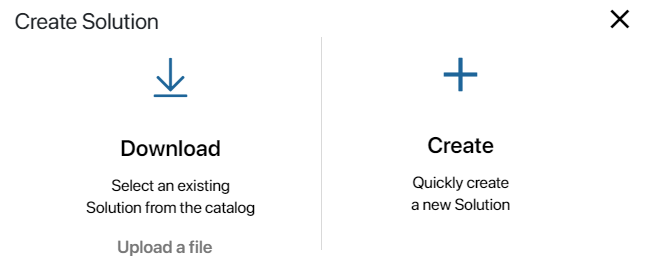
You can also add a new solution. To do this, click +Solution in the top right corner of the page and select in the opened window:
- Download. Import a ready-made business solution from BRIX Store.
начало примечание
Note
BRIX Store will be available soon. Please contact your sales rep to request the .e365 file of a solution and upload it.
конец примечание
- Upload a file. Import the solution from an .e365 file.
- Create. Proceed to create a custom solution from scratch.
For details on all the actions available for solutions, see the articles in the Solution section.
Note that the same options are available if you click the ![]() icon on any page of the system in the left menu and go to the Solutions tab. The difference is that on the Administration > Manage Solutions page you can:
icon on any page of the system in the left menu and go to the Solutions tab. The difference is that on the Administration > Manage Solutions page you can:
- Quickly find the desired solution to go to its settings.
- Specify its description on the solution creation page and enable the Paid option. These settings are necessary for exporting the solution if you plan to allow using it in other companies. The specified values will be automatically used on the solution export form.