After adding a Table-type field to the context, you can configure column display options and user interactions with them. These options vary depending on the form on which the table is placed.
Let's look at how to customize table column display:
- In the Advanced Mode of app forms.
- In the interface designer when customizing a form template, such as a widget or page.
- In the business process designer when customizing a task form.
Customize table display in Advanced Mode
If the app has the Advanced Mode enabled in its form settings, you can add a table from the context to create, view, or edit forms. You can set different table display options for each form. For example, you can hide columns on the app create form and leave them visible on the app view form.
To do this:
- To the right of the app name, click the gear icon and select Form Settings.
- In the window that opens, click Advanced Mode and go to the Create, View, or Edit tab.
- From the Context column, drag and drop the Table-type property you want to configure to the field on the right. Click the property name.
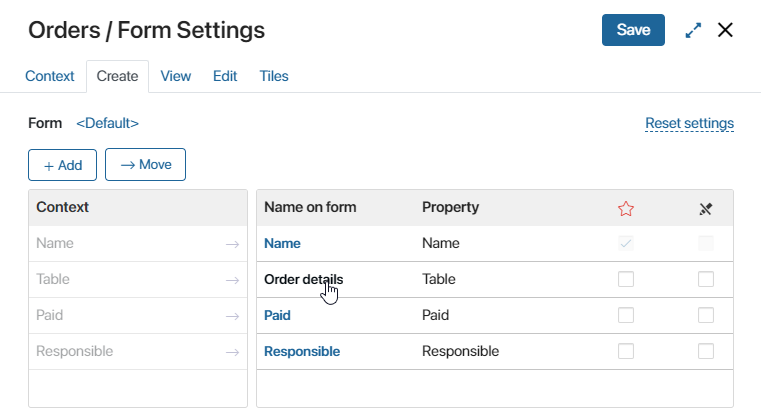
- In the window that opens, go to the Columns Display tab and configure the following options:
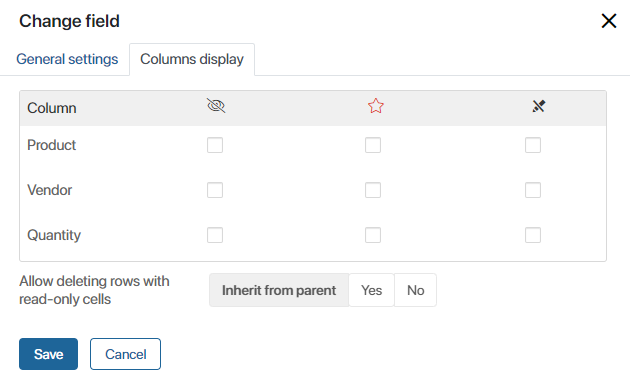
- Hide a column:
 .
. - Make cells in a column required:
 .
. - Make cells in a column read-only and restrict editing:
 .
. - Allow deleting rows with read-only cells. Enable this option to allow users to delete rows when filling out a table that contains non-editable columns. In the settings window, enable the following option:
- Inherit from parent. Save the option value specified when creating the Table field in general settings.
- Yes. Users will be able to delete rows.
- No. Users will not be able to delete rows.
- Disable adding rows. Select Yes to prevent users from adding rows while filling out the table in the new version.
- Hide a column:
- Save the settings.
Customize table display in the interface designer
In the interface designer, you can add a Table-type property from the context to a specific form template in the Field widget and configure the field display settings. The settings apply only to the current template.
To do this:
- Open the form template in the interface designer.
- Add a Table-type property from the context to the modeling area and click the gear icon in the property header.
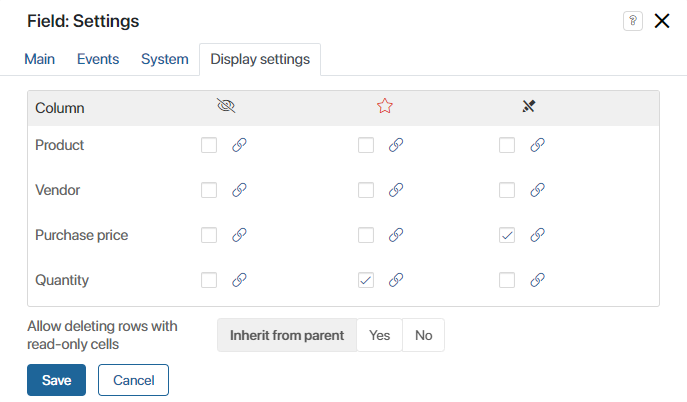
- In the window that opens, go to the Display Settings tab and configure the settings as for an app form in Advanced Mode.
- Save the settings.
Instead of manually checking the Hide Column, Read-only, and Required options, you can specify a Yes/No switch context variable. Column constraints will be enabled or disabled depending on the value of the associated variable. To do this, click the ![]() icon next to the column name in the specific option column and select the variable from the list.
icon next to the column name in the specific option column and select the variable from the list.
Example of binding column display settings to a variable
On the form that shows materials in stock, the External customer property will appear. If an employee selects it before sending the form, Purchase price will be hidden for the recipient. |
Customize table display on a task form in a business process
You can place a Table-type variable from the process context or a linked app on a task form and configure its display. These settings apply only to the current task and do not affect the table display on forms for other process tasks.
To configure the table display:
- In the process diagram, double-click the Task graphic element and go to the Form tab.
- In the Name on form column, select a Table-type field.
- In the window that opens, go to the Columns Display tab and configure the settings as for an app form in Advanced Mode.
- Click Save.