The Email Notification graphical element allows you to inform others about the progress of a business process.
Emails are sent from the corporate email address.
Several recipients can be selected.
начало внимание
You can use this element only if the administrator has enabled the company’s corporate email in the Email settings.
конец внимание
For instance, you can set up automatic order shipment notifications or send your customer a contract right after it is approved by your legal department. Also, you can use it to let your staff know when they are assigned an important task.
If the company uses the Email workspace, it is possible to send emails from the user’s address during the process. In this case, the email is sent using the Send Personal Email activity. Such messages will be saved in the user’s email and can be viewed in the built-in BRIX email inbox.
Set up a notification
Let’s consider the Order fulfillment process as an example. Once the order is packed and ready to be shipped, a notification is sent to the customer’s email.
Open the business process designer and model the order route. To use the Email Notification element, in the toolbar to the right of the modeling canvas, click the Integrations tab. Drag and drop it onto the diagram and place it where you want the notification to be sent when the process is executed.
In our example, the element is placed after the Pick and pack order task assigned to a stock employee.
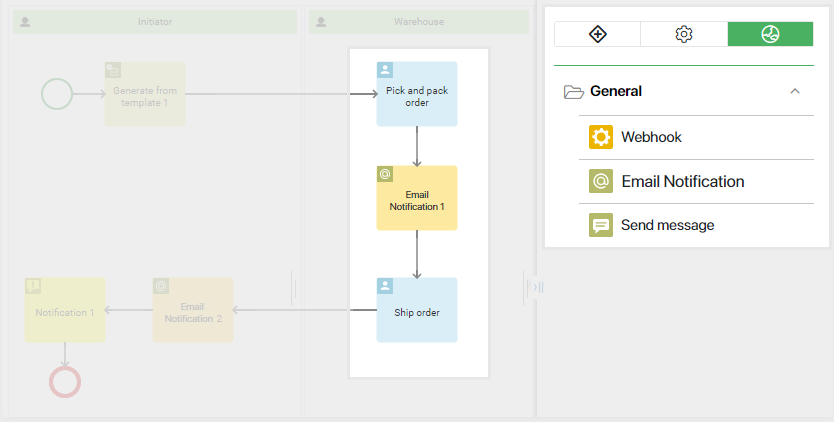
Double-click on the element and configure the General, Error Handling and Description tabs.
General tab
Fill out the main parameters:
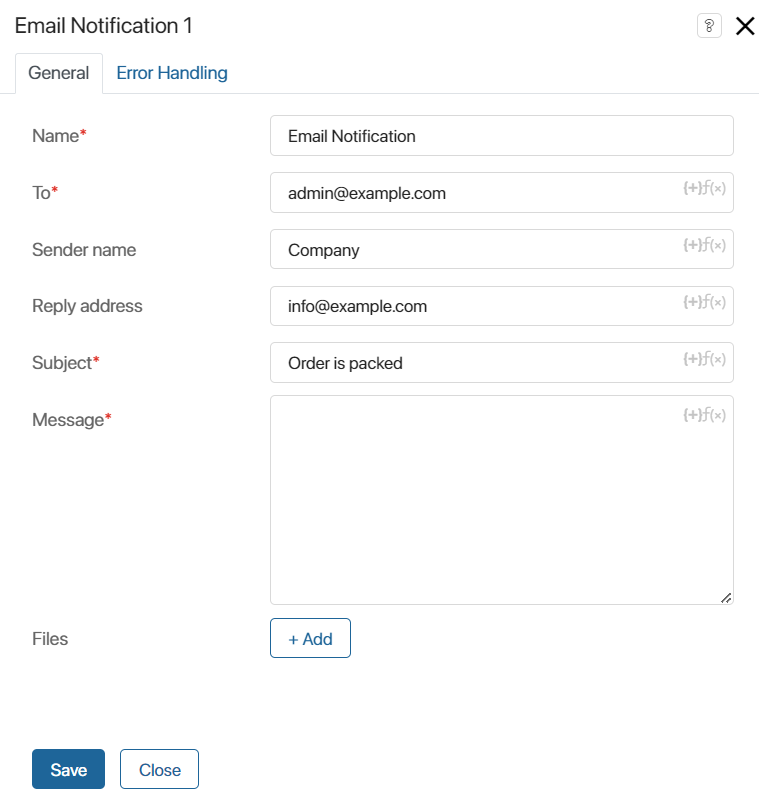
- Name*. Enter text that will be displayed on the process diagram.
- To*. Specify the address to which the notification should be sent. You can add several addresses, as well as use a context variable, for example, contractor’s email. In this case, the system will send the notification to the address specified on the page of the contractor who placed the order. To add a variable, click {+} in the right corner of the field. You can list multiple addresses, separating them with a comma.
- Sender name. Fill in this field if you want notifications to come not from the address specified in the system settings, but, for example, from BRIX or your company name.
- Reply address. Specify the sender’s address to which you want to receive replies. If you leave this field blank, the email address from the system settings is used.
- Subject*. Enter a short and informative subject, for instance, Order is packed and awaiting shipment. Using a context variable, you can, for example, add the order’s number. To add a variable, click {+} in the right corner of the field. If you wish, you can add conditions and functions as for the name of the template item. This will allow you to generate a more informative email subject.
- Message*. Enter all the necessary details. Using process variables, you can add a list of purchased products, the total cost, the expected delivery date, and so on. To do this, click {+} in the right corner of the field. You can also add conditions and functions. If you want to apply formatting, use HTML tags.
- File. Add a document used in the process, for example, a route sheet or a delivery note. To do this, select a context variable of the File type from the drop-down list.
Error Handling tab
An error may occur when sending the notification, for example, if BRIX fails to determine the recipient’s address. Decide how the system should behave in this case. Go to the Error Handling tab and fill out the fields:
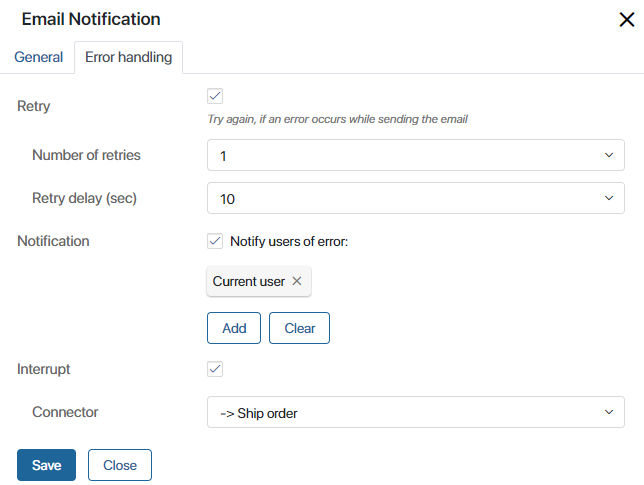
- Retry. Enable this option if you want the system to try sending the notification again.
- Number of retries. Specify how many attempts should the system make.
- Retry delay (sec). Determine the attempt frequency.
- Notification. Enable the option to notify responsible users in case of an error. They will receive a notification once all attempts to send the email have been completed. You can select:
- Current executor. The person who completed the task preceding the Email Notification element on the process diagram.
- Context variable, for example, the Initiator.
- Group.
- Org chart item.
- Interrupt. In case of an error, the process will go through the selected connector.
Description tab
Specify service information about the block's operation. System administrators and employees modeling the process will be able to access the tab and review this data.
After you have specified all the settings, click Save and publish the process.
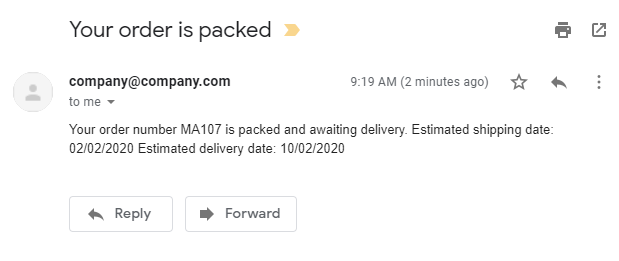
Once the order is packed and ready for shipment, a notification will be sent to the customer’s email. It might look like this in the email service:
Found a typo? Select it and press Ctrl+Enter to send us feedback