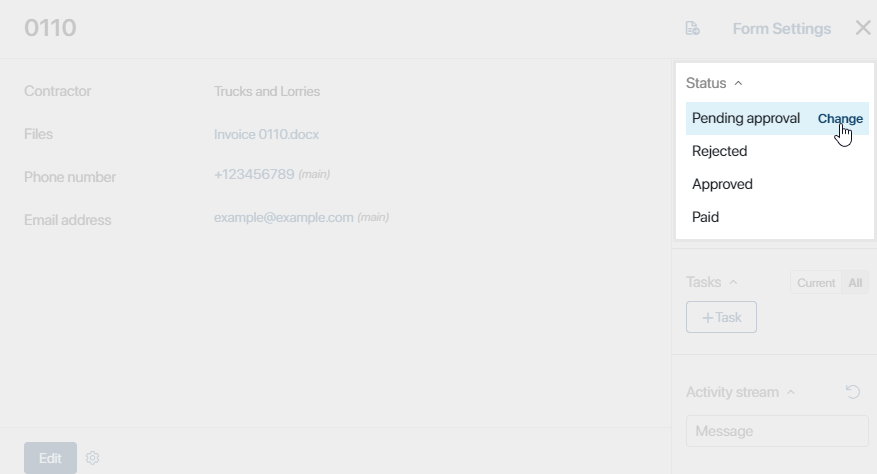
With statuses, you can track the current state and progress of an app item.
For example, the Invoices app can have the following statuses: Pending approval, Approved, Rejected, and Paid. At any moment you can see where the invoice is in its life-cycle.
Users can change statuses manually when completing a corresponding task or automatically within a business process.
Create status
начало внимание
Only the users included in the Administrators group can create and edit statuses.
конец внимание
This can be done in two ways:
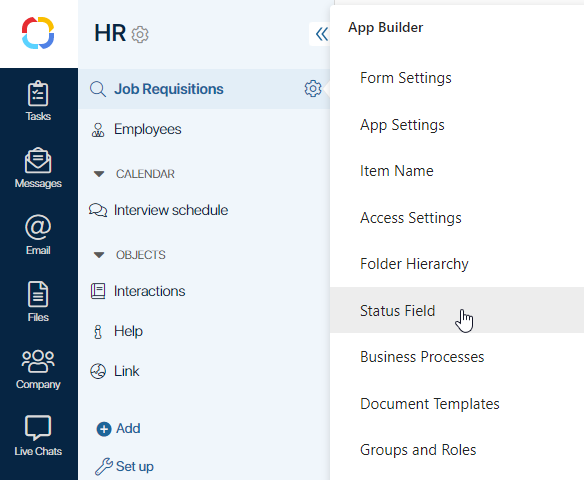
- Click the gear icon
 next to the app's name and select Status Field.
- If you have created a business process at the app level, open the process designer and click the Statuses tab.
The statuses configured from the app page and in the business process designer are linked. If you make changes in the designer, they are reflected in the status settings of the app where the process was created, and vice versa.
The Configure App Status page opens.
- On the opened page, enable the Add Status field option.
- In the Status field enter a name and to the right of it click the Add button or press Enter on your keyboard.
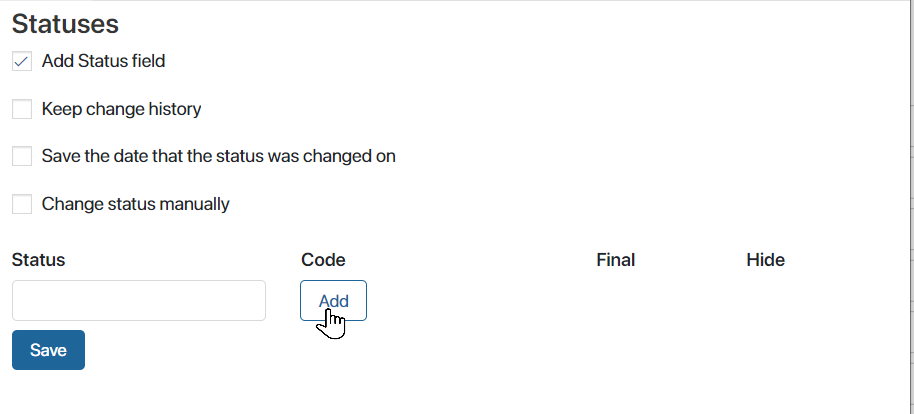
- The status will be added to the list with a special code that is used for working with API. You can edit the value in the Code field to refer to the status in scripts more easily.
- Create the rest of the statuses for this app by naming them and clicking Add.
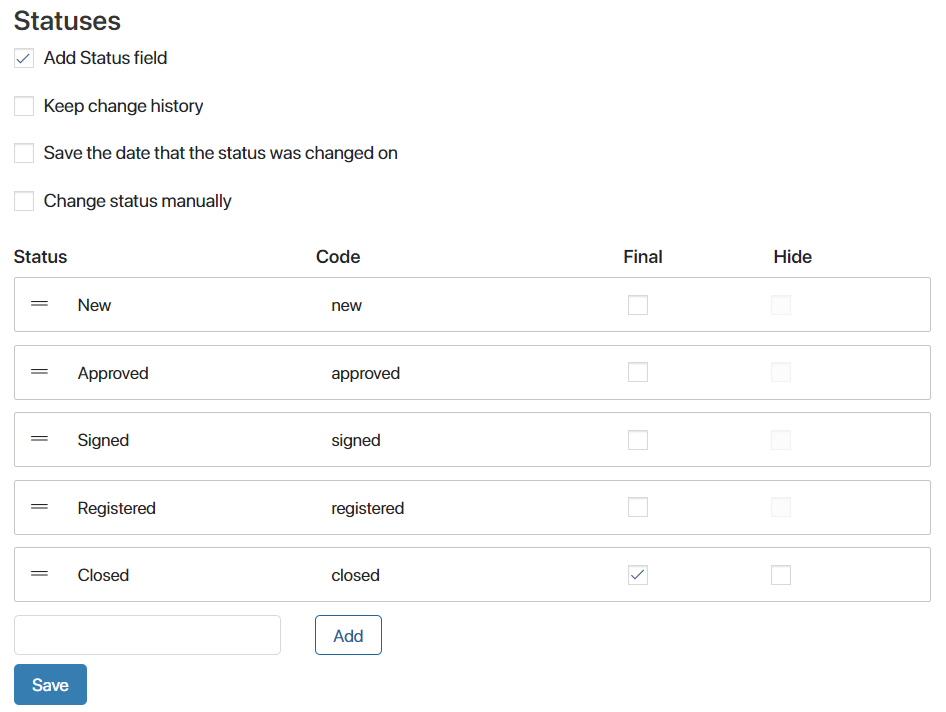
The Kanban board will show the statuses in the same order as they are added to the list. The first status listed will be assigned to all new items.
- Check the Final option next to the final statuses in the app item lifecycle. A final status cannot be changed to the next status in line
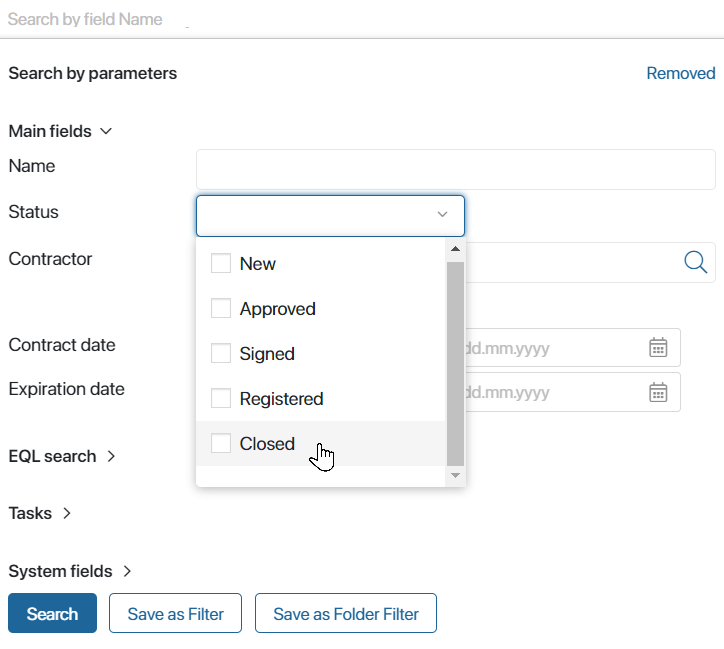
- For final statuses, you can check the Hide box. Enable it to prevent items with this status from being displayed on the Kanban board. You can find the hidden items by selecting the status in advanced search parameters.
Edit and delete status
To change the name and the code of a status, click on the field that you want to edit and make the necessary changes. Also, you can check and uncheck the Final box at any moment.
Drag and drop the statuses to rearrange them in the list.
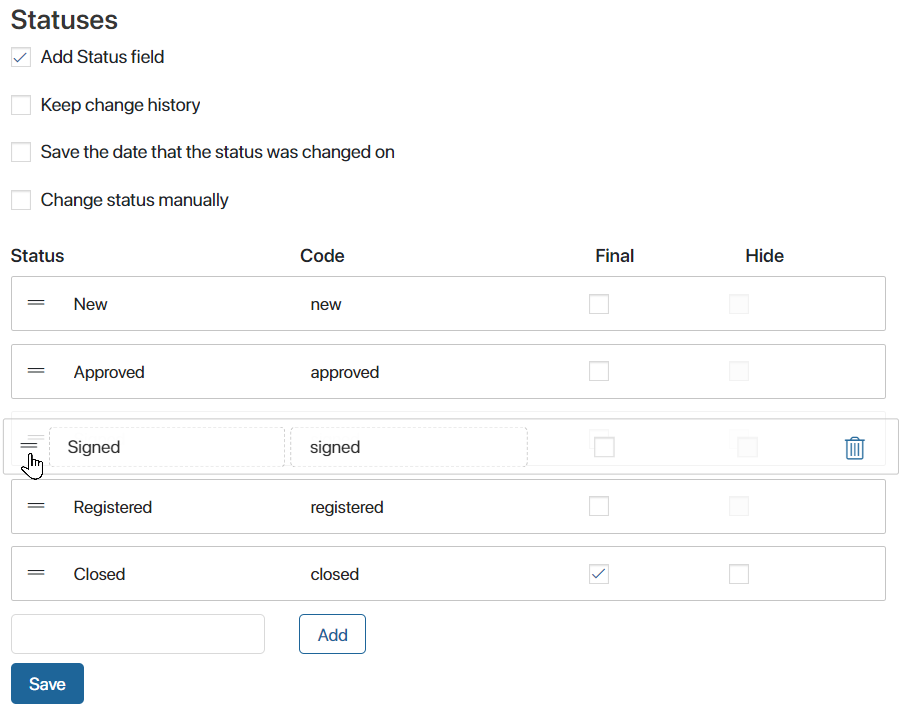
If you want to delete a status, click the recycle bin icon ![]() on the right-hand side of the status field and confirm it.
on the right-hand side of the status field and confirm it.
Status options
On the status configuration page, you can enable additional options for changing and tracking statuses:
- Keep change history. If the option is enabled, data about changes in the status of app items is recorded in the system. You can access this information in scripts using the
statusHistory()method. For example, to display in a widget the items that received a certain status during the last day. Read more in BRIX TS SDK. - Save the date that the status was changed on. The date and time of the item status change will be written to a system field in the Date the status was changed app context. You can display the field on the item form or on its page on the Kanban board. You can use the field to keep track of items that are at a certain stage of work for a long time.
- Change status manually. Users will be able to change the status of an item on its page or by moving it on the Kanban board.
Set up manual change of a status
To allow users to manually change statuses on the item page, follow these steps:
- On the status settings page, enable the Change status manually option.
- The Transitions column will appear in the table with statuses. In it, the sequence of status changes is defined for each status, except for the final ones.
- The default value for all statuses is Next. Click on it if you want to select a different option.
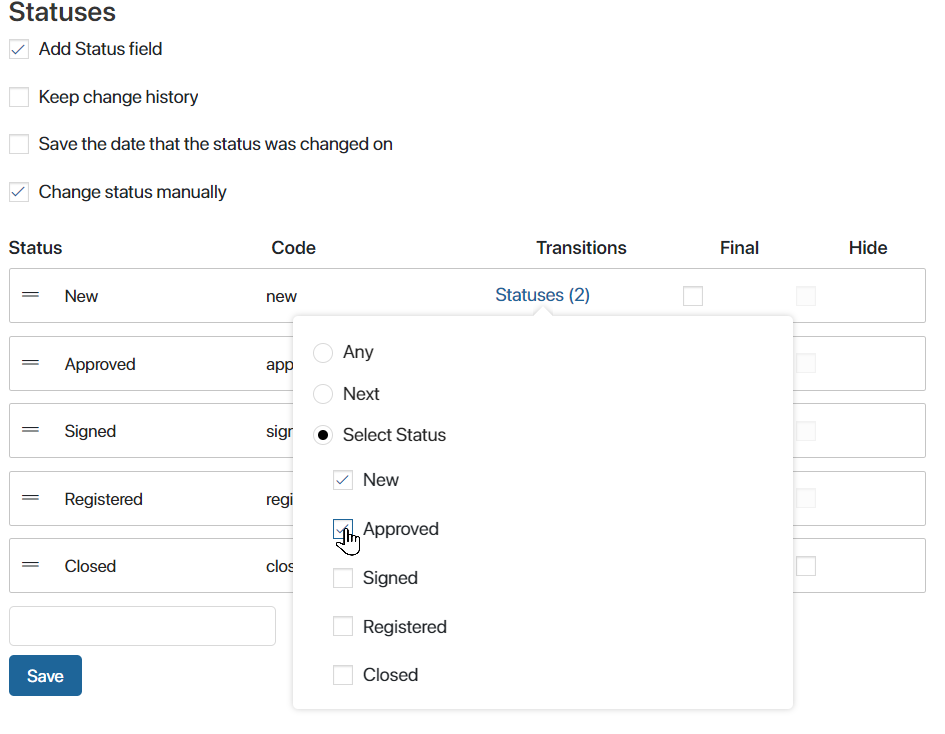
Any. Users will be able to select any status from the list when changing the current one.
- Next. Users will be able to change the current status to the one that stands next in the list. Drag and drop the statuses in the list to define the desired order.
- Select Status.Select the option and check the statuses that will be available to users when the current one is changed.
For statuses marked as final, you cannot configure the change order.
Ways to manually change item status
- Change the status from the page using the App item status widget.
The widget is added to the app view form automatically when the manual status change option is enabled. To change the current status, open the item page. In the sidebar, click Change and select an available status from the list.
- Change the status by dragging and dropping items on the Kanban board.
Go to the app page and enable the display of items as a Kanban board Drag and drop an item to the desired status on the board. The statuses can be assigned according to the transition settings set for each status.
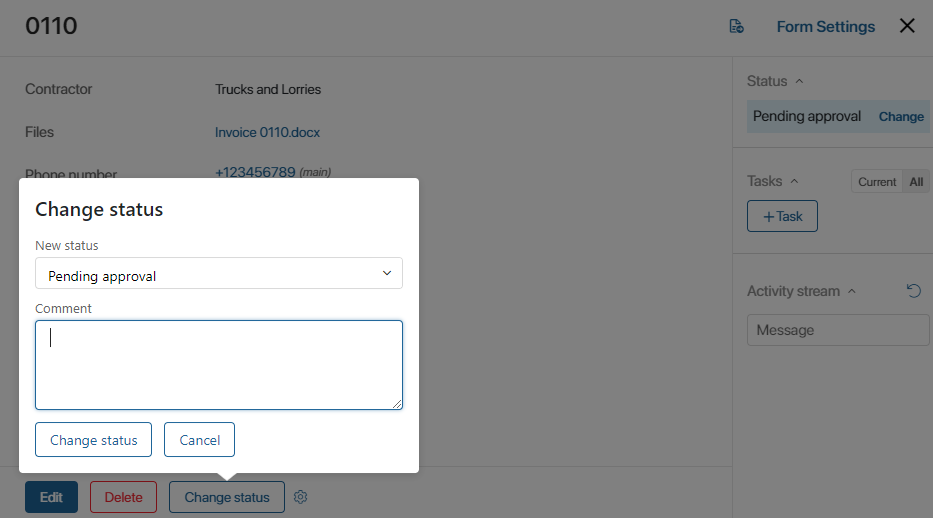
- Add a Change status button to the form.
Open the page of any app item, click on the gear icon in the bottom left corner, and add a Change status button. To learn more about configuring the button, read Manage buttons on app item pages.
To change status using the button, you don't need to enable the option to manually change status in the app. Using the Change Status button does not require you to enable manual change of statuses..
Users can click the button, select any of the app statuses, and leave a comment, which will be displayed in the activity stream on the item sidebar.
Change status in a business process
Statuses can change automatically during the execution of a business process. Depending on what stage the process is in, the app item gets one or another status. This is done by means of the Manage status element.
For example, when the accountant pays an invoice in the Invoice Approval process, the status of the invoice item automatically changes from Approved to Paid.
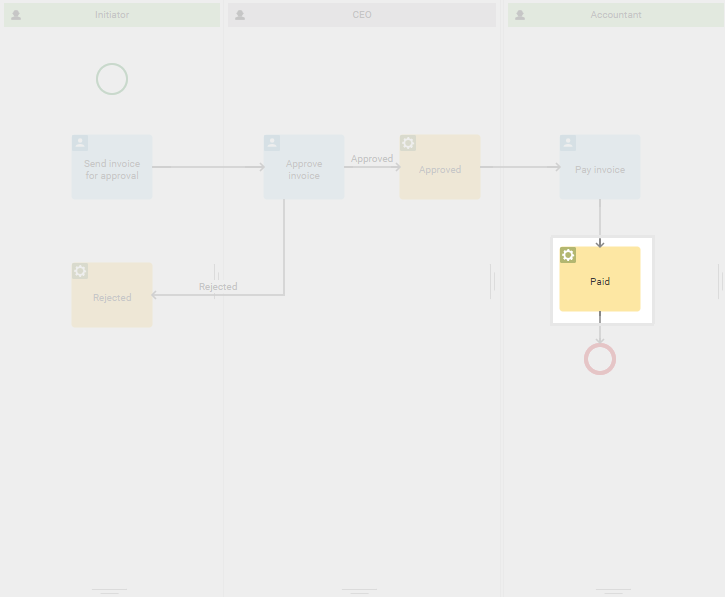
The new status is displayed in the app on the item page.
Found a typo? Select it and press Ctrl+Enter to send us feedback
