Once the folder tree is configured, users can perform the following actions:
- When creating or editing an item, add it to a folder.
- Use a folder filter.
- View an app’s folder tree on another app’s form.
Add an item to a folder
By default, the Folder Navigation widget is placed in the upper left corner of the item page. The system administrator can change its location.
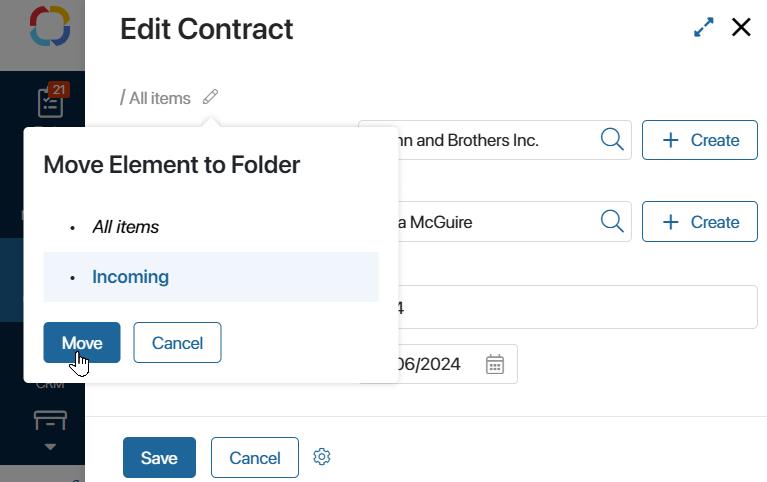
You can use this widget to place an item in a specific folder. To do this:
- Open the form for creating or editing an item.
- Click the pencil and specify the folder.
- Select Move.
- Save your changes.
The item page displays the full path to the folder where the item is located. If the item is not yet defined in any of the folders, you will see All items.
Use a folder filter
In a folder hierarchy, you can quickly navigate to items grouped by certain parameters using a folder filter.
This filter is displayed in the tree, with its name in italics. By clicking on it, you will see all the items available to you that match the search parameters.
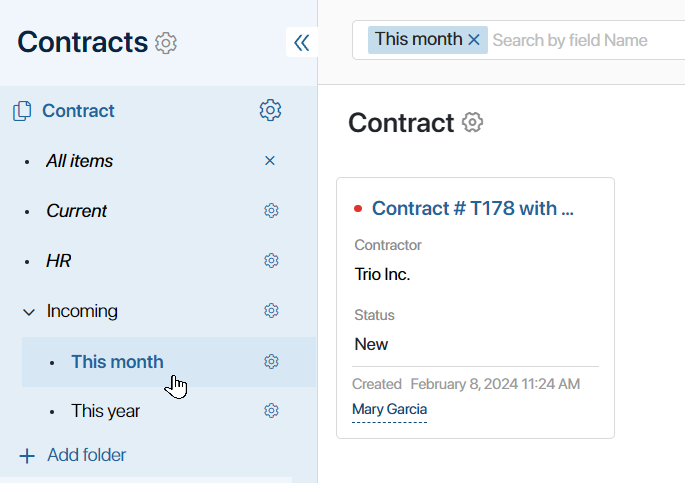
Additionally, you can find app items using standard filters.
View the folder hierarchy on other app’s forms
When an app with a configured folder hierarchy is placed on the form of another app, the folder tree will also be displayed when filling in a field and selecting an item.
For example, when creating an order, you need to add a contract that is stored in an app with a configured folder hierarchy to its form. To do this, click the magnifying glass icon next to the Contract field.
In the opened window, the folder tree configured in the app is displayed on the left side. The right side shows a list of all items in the selected folder.
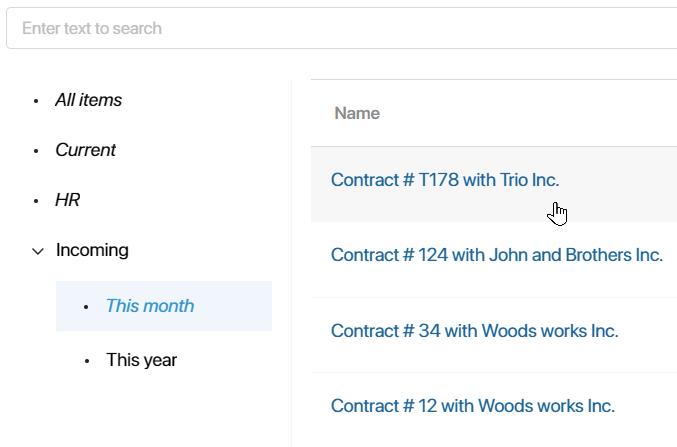
To find an item, specify its name in the search bar on the top panel of the window. The search will be performed among the items in the selected folder.