A Separator helps you visually organize apps in a Workspace menu.
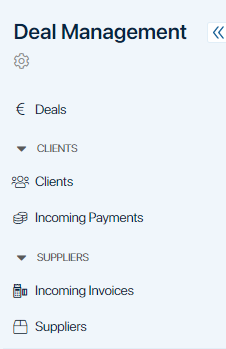
In the example below, we added two separators to the Deal Management workspace: Clients and Suppliers:

начало внимание
Only the users included in the Administrators group can create and edit separators.
конец внимание
Add a new separator
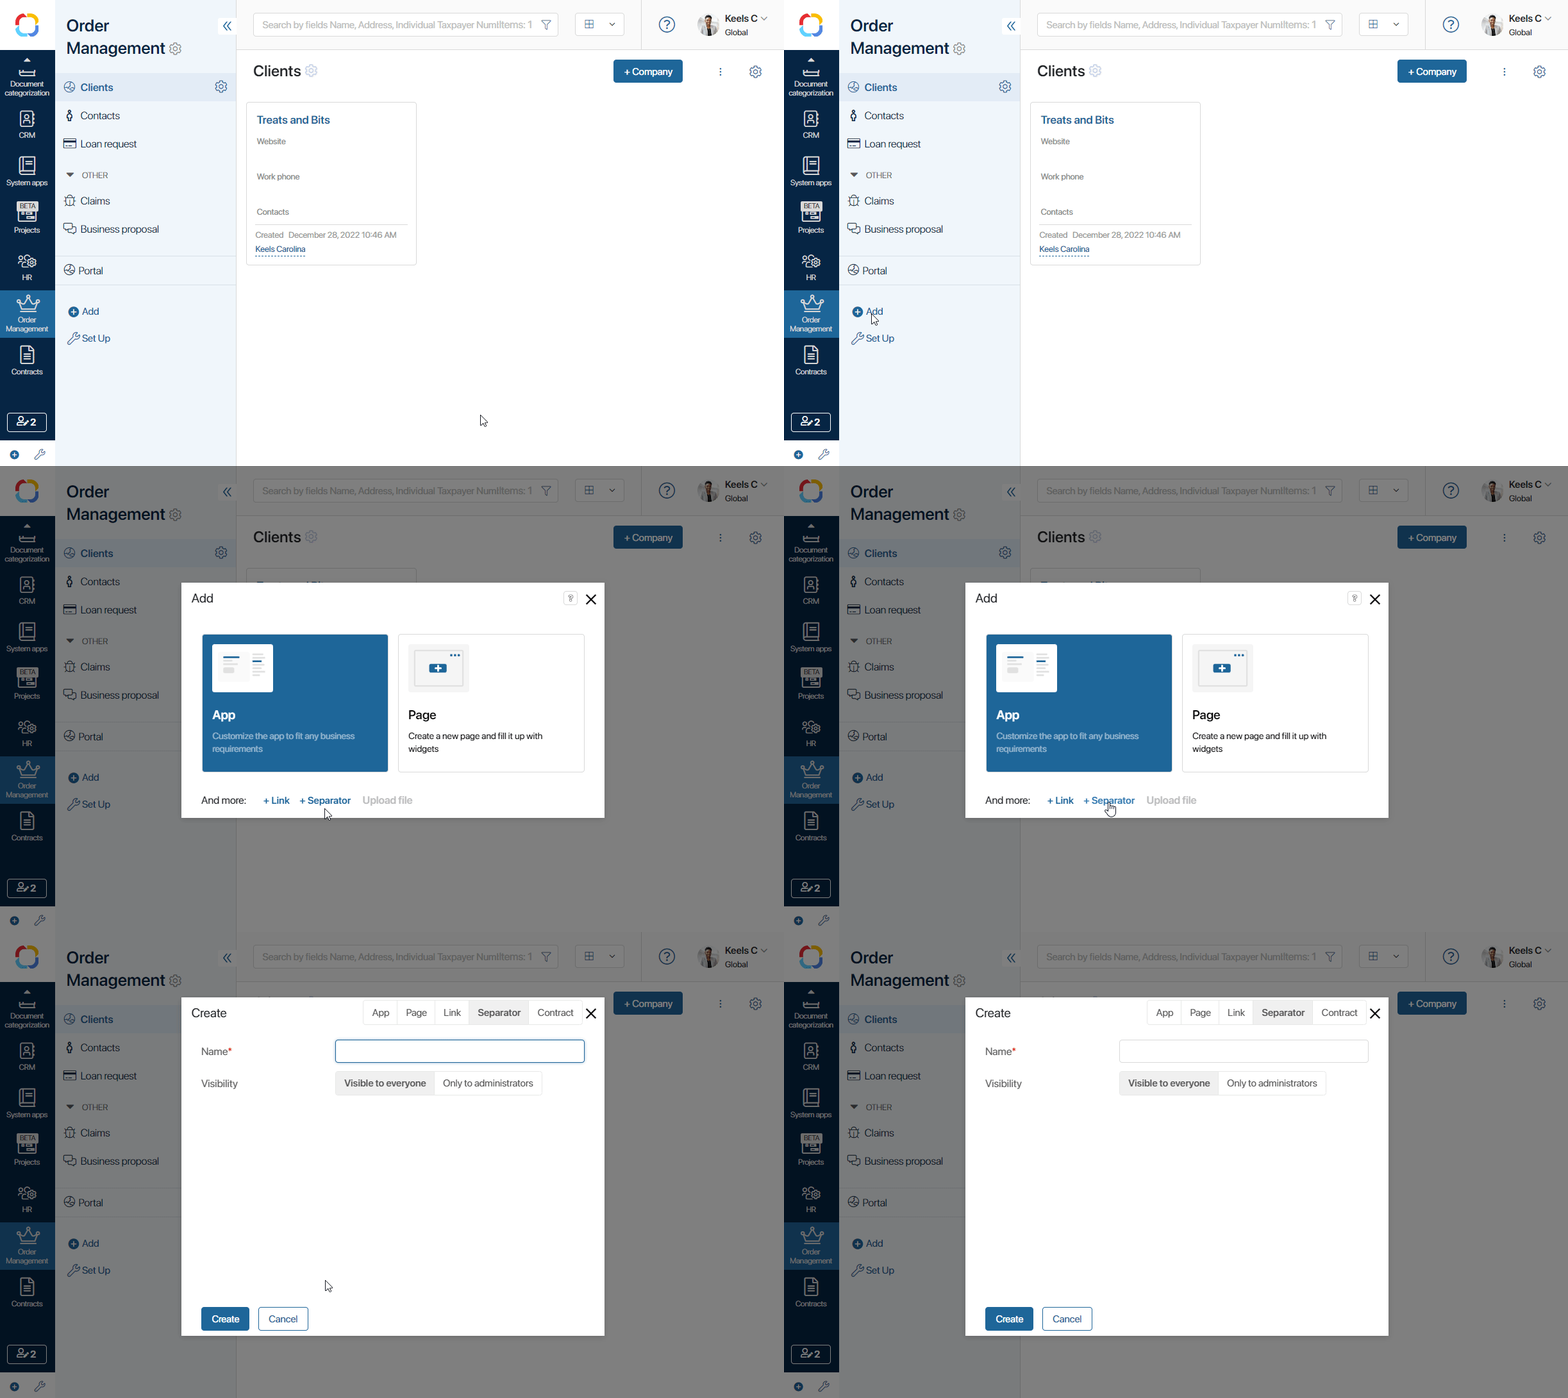
- Go to the left menu of a workspace and click Add.
- In the provided window select the Separator option.

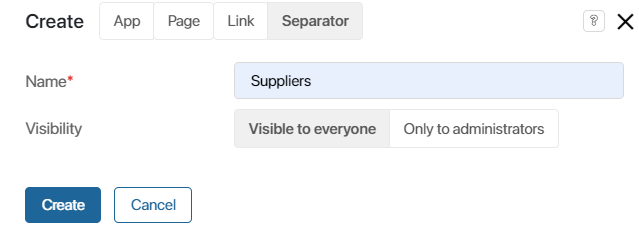
- Fill out the form:

- Name*. The name of the separator that will be shown in the workspace menu.
- Visibility. Specify the users who will be able to see the separator in their left menu. Later on, you can change the visibility settings if necessary.
- Visible to everyone. All users with access to the workspace will see the separator
- Only to administrators. Only users included in the Administrators group will see the separator.
- After having filled out the form, click Save to apply changes. The separator will appear in the menu.
- To position the separator in the menu, click Set Up at the bottom the workspace's menu.
- In the provided window you can drag the separator up or down and place it where you need to.
Separator settings
You can edit a separator's visibility and name, and delete it from the menu. To do that, click the gear icon ![]() to the right of the separator's name and select the required option.
to the right of the separator's name and select the required option.
- Separator visibility. Select groups of users who must be able to see the separator in the menu. Click Save to apply changes.
- Separator settings. Change the separator's name and click Save.
- Delete separator. The separator will be moved to the Recycle Bin. It will disappear from the menu and become unavailable to users.
To restore a deleted separator, go to the Recycle Bin and click Restore next to the separator's name.
Was this helpful?
Found a typo? Select it and press Ctrl+Enter to send us feedback