When assigning a CRM task, the author enters information that the sales manager needs to complete the job. This information is displayed on the task page.
The system administrator can:
- Customize the set of fields that are displayed when creating, viewing, and editing a CRM task.
- Customize buttons for editing and completing the task.
- Specify which fields of the task will be displayed on the page of the item for which it is assigned. This allows employees to see general information about all tasks associated with an item without going to their pages.
You can customize pages for default and custom CRM tasks. To do this:
- Go to the Administration > CRM > Types of CRM Tasks workspace.
- Click the gear icon next to the task type.
- On the General tab, in the Form field, click Set Up.
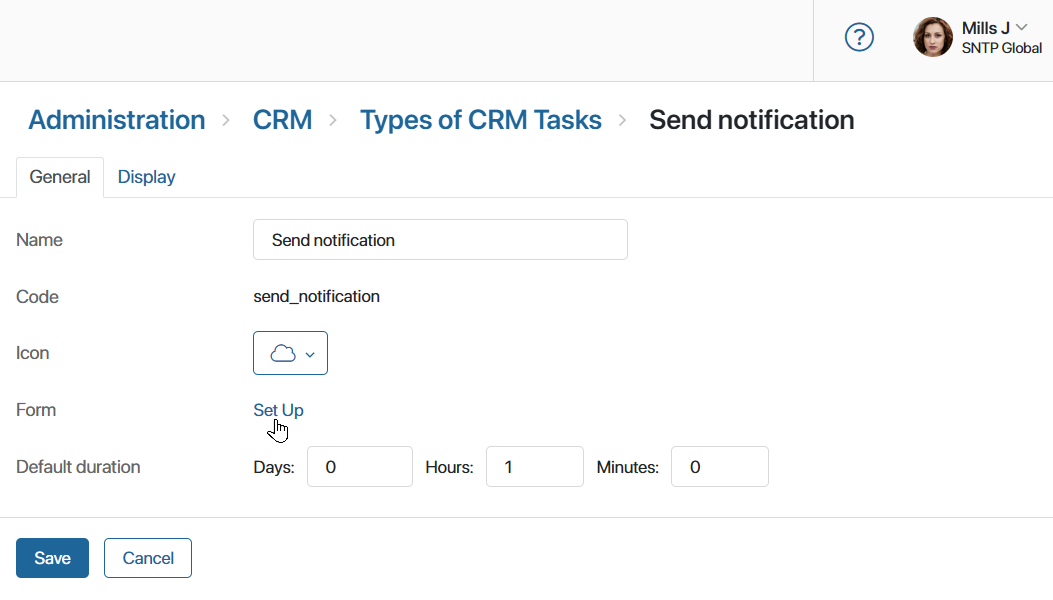
In the opened window, customization is performed on the Context, Create, View, Edit, Buttons, and Widget View tabs.
Context
The Context tab displays all the properties of a CRM task. You can add a new property to display it when creating, viewing, or editing a task. To do this, click the +Add button and fill in the fields.
For more information on how to customize properties, see the Context tab article.
Create
You can create a CRM task in two ways:
- In the Tasks > CRM Tasks workspace.
- On the page of an app item using the Associated Tasks widget.
On the Create tab, you can:
- Fully customize the create page to create a task from the Tasks > CRM Tasks workspace.
- Specify the required fields to create a task from a widget. The set of fields that will be displayed in the widget is customized on the Widget View tab.
The CRM task create page is customized in the same way as the app item create form. Add fields from the Context column to the Name on Form column and specify which fields are mandatory.
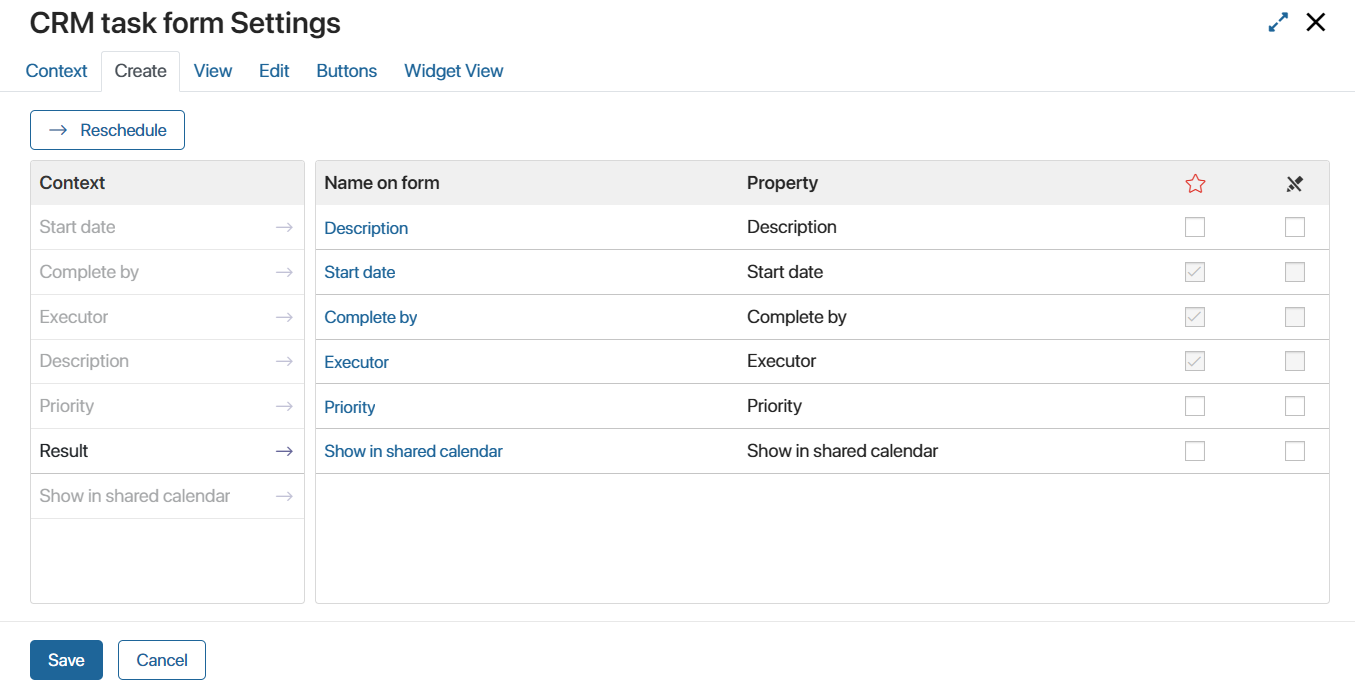
Please note that when customizing a CRM task page, you cannot mark fields as read-only. It is also impossible to customize the creation of an app item when creating a task by clicking the ![]() button. For example, when creating a CRM task for a lead, you cannot add a new contact to the system and specify it in the field right away.
button. For example, when creating a CRM task for a lead, you cannot add a new contact to the system and specify it in the field right away.
The default fields Start date, Complete by, and Executor cannot be edited or deleted.
Customizing the form template in the interface designer for CRM tasks is not available.
To apply the customizations, click Save in the lower-left corner of the window, then click Save again on the CRM task settings page.
View
The fields added on this tab are displayed when an executor or other employee opens a CRM task.
The setting is performed in the same way as for the CRM task create page.
Please note that when viewing a task, the user cannot fill out its fields. This means that the user will not be able to enter data in them when they close the task. If a field needs to be filled in, add it when configuring the button with the Done action.
Edit
On the Edit tab, define which fields are displayed when the user clicks the Edit button on the task page. The customization is performed in the same way as for the task create page.
Buttons
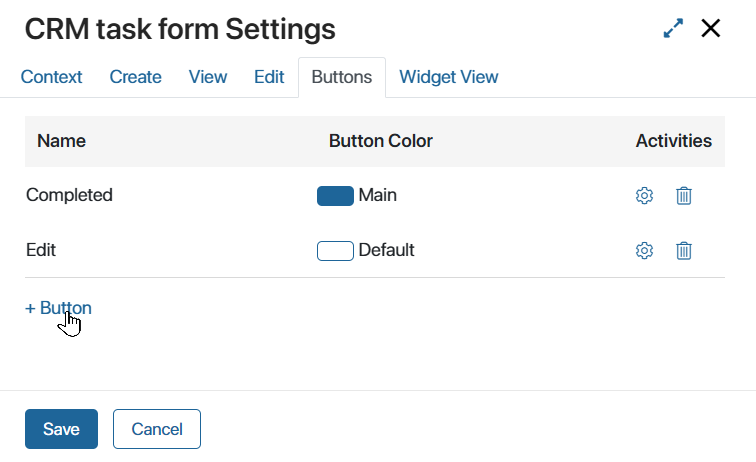
On the Buttons tab, you can manage the buttons that the executor sees on the CRM task page. For any task type, two buttons are added by default: the Done button for completing the task and the Edit button for editing it. Additional buttons are added to the preconfigured Call and Email CRM tasks. Read more in CRM tasks.
You can edit a button by clicking the gear icon next to it or delete it by clicking the recycle bin icon. You can also add a new one by clicking +Button.
When creating or editing a button in the settings window, fill in the fields:
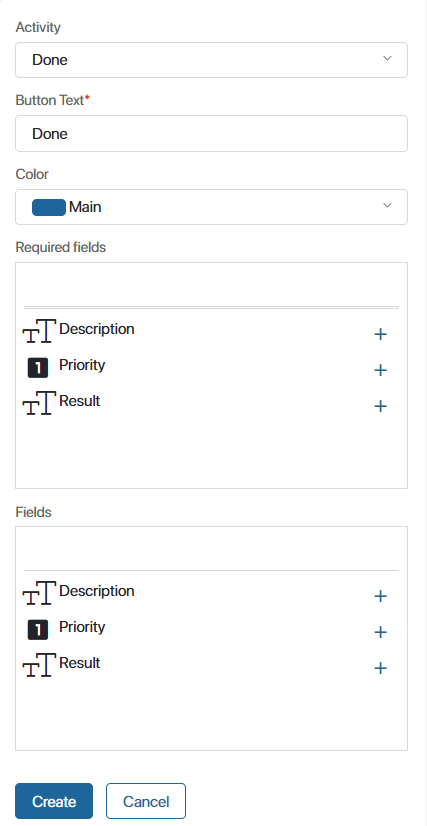
- Activity. Select the action when a user clicks on the button:
- Done. A pop-up window will open to confirm the closing of the task. In it you can display fields available for editing, for example, to allow the user to specify a comment in the Result field. In the Required fields section, specify the properties that the user will have to fill in before closing the task. In the Fields section, choose the optional properties. To add fields, click the plus icon next to them, to remove them click the minus icon.
- Edit. The CRM task edit page will open, where the user can reschedule the task, change the executor, etc.
- Close and Create New One. The user must select the reason why the task cannot be completed. The current CRM task will be closed. The user will be able to set a new task for another period.
- Close Lead or Deal. The button is displayed on the page only if the task is assigned to a lead or a deal. The task will be completed; the status of the associated lead will change to Unqualified, and the status of the deal to Lost. When closing, the user specifies a reason from the list. Reasons can be set in the settings of the pipeline of leads or deals.
When the user closes the deal or lead, all other planned CRM tasks are automatically canceled. - Send Email. The button is displayed on the page only if the task is assigned to a contact with the Work email field filled in and the user has a mailbox connected to the Email workspace. When the user clicks on the button, the window for composing an email opens, in which the recipient’s address is filled in automatically. After sending the email, the task is terminated.
- Start Business Process. A business process is launched for the item associated with the CRM task. Click Select Process and specify the required option.
A process can be started for an item of any app. However, you can only pass input data to the process context if the task is assigned for a deal. To do this, in the Link to field option, select the process context variable referring to the Deals app. You can then configure the data transfer from the deal to the process by clicking Configure Input Parameters and matching the process variables and properties from the app context.
- Button text*. Enter the text to be displayed on the button.
- Color. Select the color of the button.

To apply the settings, click Save in the lower-left corner of the window, then on the CRM task settings page, click Save again.
Widget View
CRM tasks are displayed on app item pages in the Associated Tasks widget. It is added by default to the pages of leads, deals, companies, and contacts, as well as to the sidebar of all other system apps.
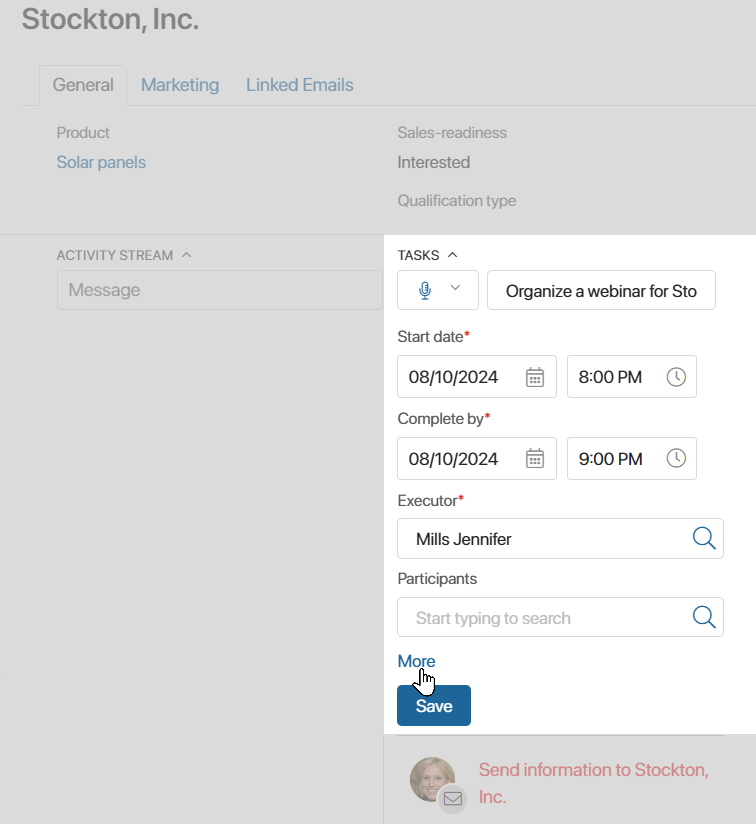
Using the widget, you can assign a new CRM task, as well as edit an existing one without opening its page.
When the user creates or edits a task through the widget, the same set of fields are used, which you define on the Widget View tab. Add fields in two sections:
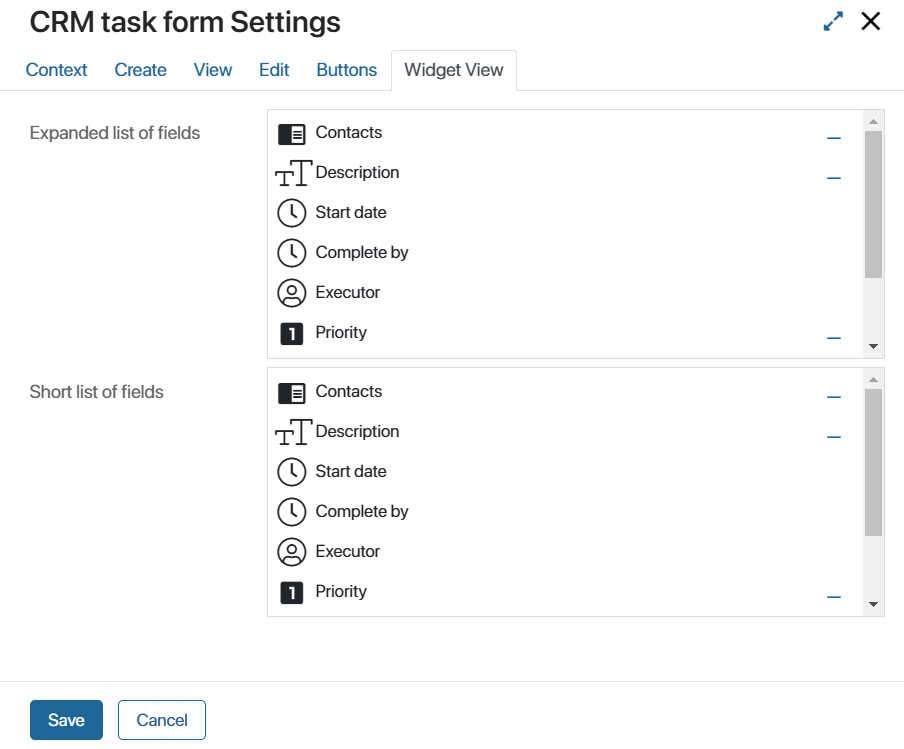
- Extended list of fields. Fields that are displayed when the user expands the details of a task.
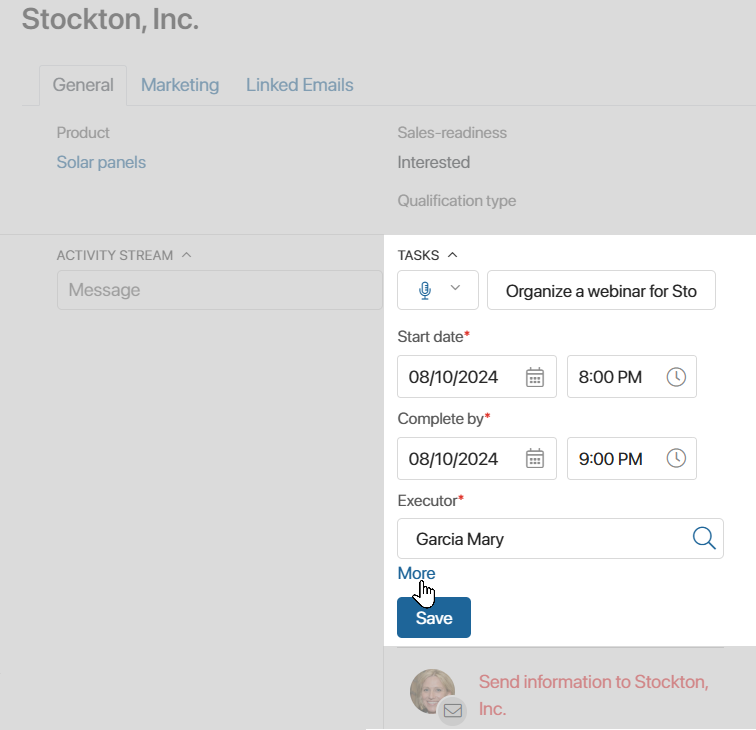
- Short list of fields. The main fields that are always visible. Please note that these fields should also be added to the extended list so that they are displayed when viewing full information about the task.
The mandatory fields to be filled in when creating and editing a CRM task are set on the Create and Edit tabs.
To apply the settings, click Save in the lower-left corner of the window, then click Save again on the CRM task settings page.
Found a typo? Select it and press Ctrl+Enter to send us feedback