There are three ways to send an email in the system.
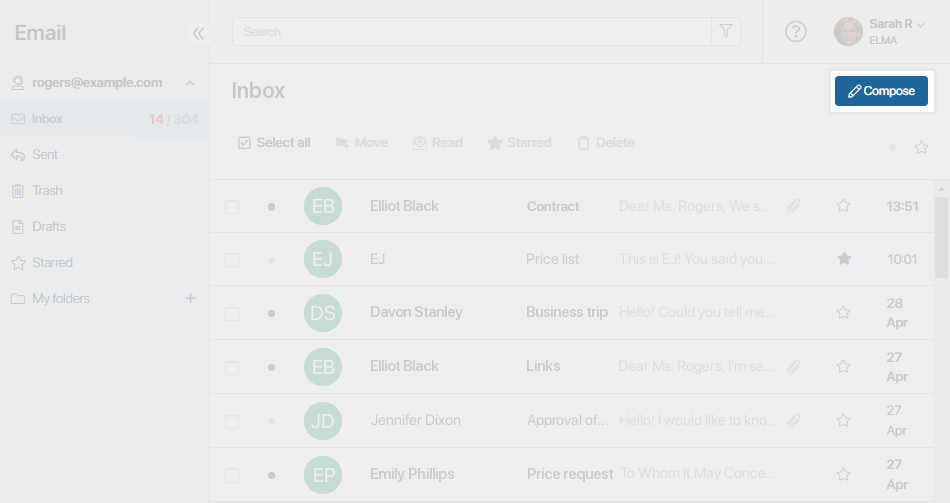
- Open the Email workspace. In the top right corner, click Compose.

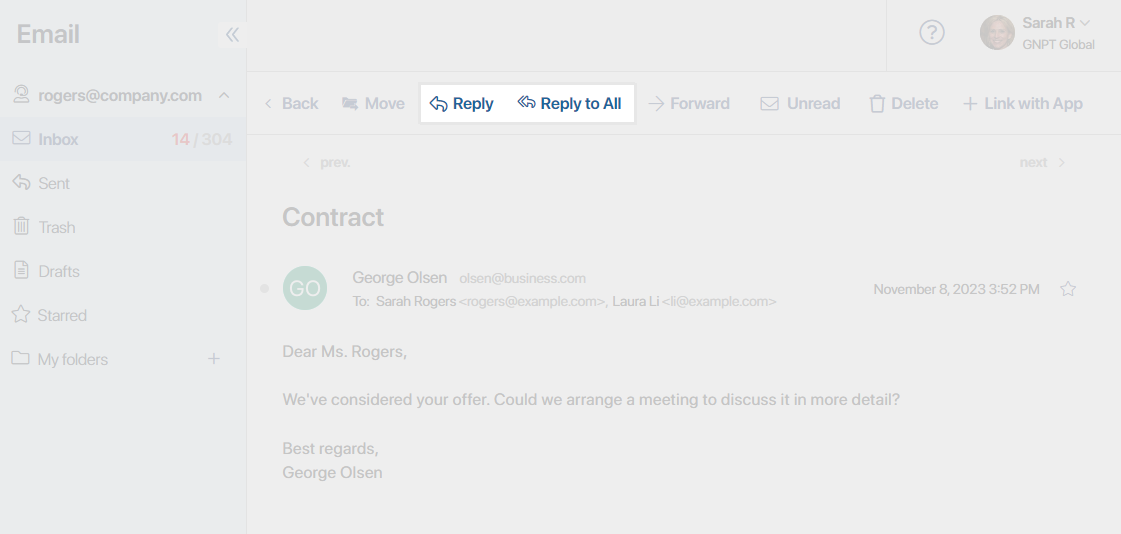
- Open an email you received by clicking it in the list. On the top panel, click Reply or Reply to All. All subsequent emails will be threaded.

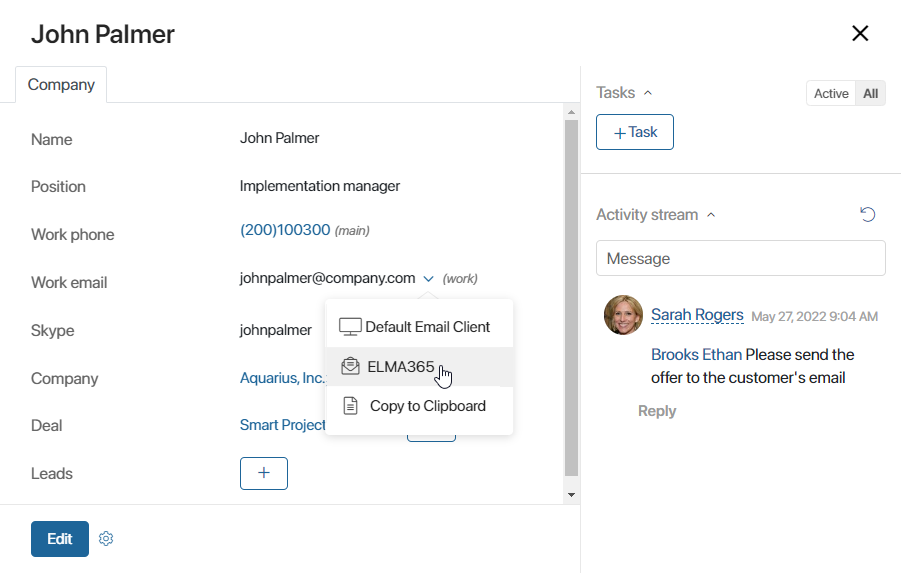
- If a field of the Email address type is added to an BRIX app, you can quickly move to composing an email from an app item’s page. To do that, open an app item page and click
 next to the email address. In the drop-down list, select BRIX365.

Here you can also select the Default Email Client option to open the email client on your computer and compose your email in it. It is also possible to copy the email address to clipboard.
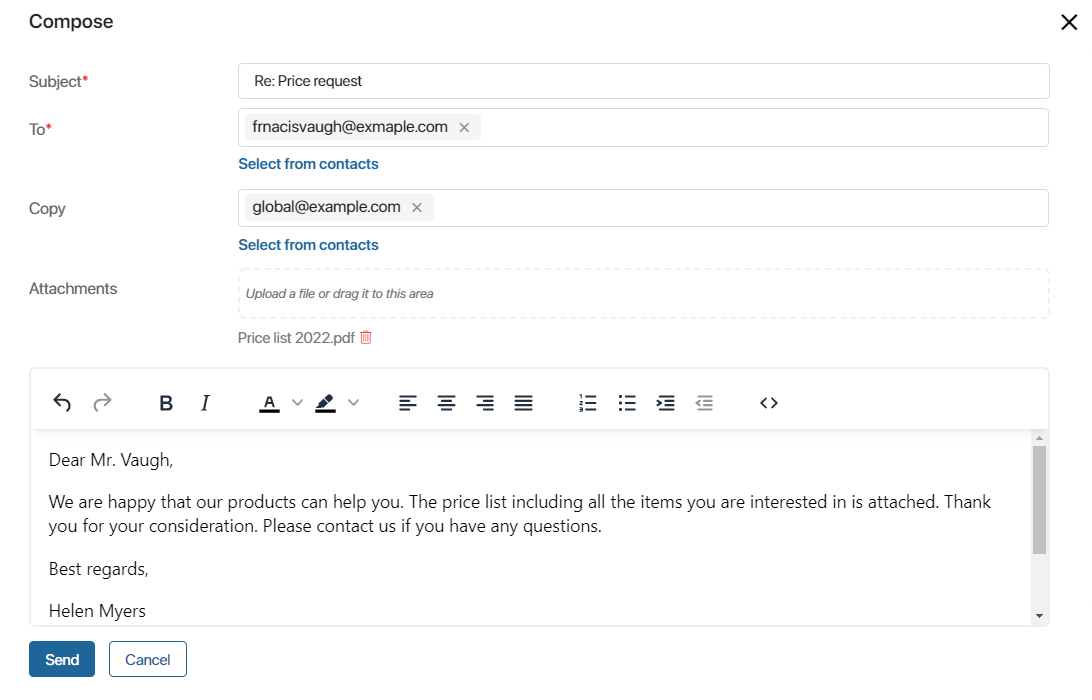
Any of these three ways to compose an email in BRIX will result in opening the Compose window.
Compose window
To create an email, fill out the fields in the Compose window.

- Subject*. Enter the subject of your email. It will be pre-filled if you clicked the Reply or Reply to All button on an email’s page.
- To*. Enter the email address you are sending the email to. If you need to send it to several addresses, separate them with spaces or commas. To specify an address from the Contacts app, start typing their name or email address or click the magnifying glass icon. The field will be pre-filled if you clicked the Reply or Reply to All button on an incoming email’s page.
- Copy. Enter the email address you want to CC your email to. To specify multiple addresses, separate them with spaces or commas. To add an address from the Contacts app, start typing their name or email address or click the magnifying glass icon.
- Attachments. Click the field and select a file on your computer or drag and drop it into the area to upload it. You can also attach an BRIX file. To do that, hover over the upload area, click the three dots that appear on the right, and click Select from the Files Workspace.
начало внимание
The maximum attachment size is 25 MB. In BRIX On‑Premises, the system administrator can increase this limit using the ELMA365_POSTMAN_MAX_FILE_SIZE_MB parameter. For more information, see the Modify BRIX Enterprise parameters and Modify BRIX Standard parameters articles.
конец внимание
Note that when you open received and sent attachments in the system, they are saved to the Files workspace. When you delete an email in the Trash folder, all files attached to it are deleted from the workspace as well.
When you fill out the fields, type your message.
Format text
You can apply formatting, organize your text, create bulleted and numbered lists, change the color of your text or background, cancel actions, and add links, tables, and HTML templates.
The toolbar includes buttons for quick formatting.

![]() Undo or redo the last change.
Undo or redo the last change.
![]() Bold or italicize the text.
Bold or italicize the text.
![]() Change the color of text or background.
Change the color of text or background.
![]() Align the text left, center it, align it right, or justify it.
Align the text left, center it, align it right, or justify it.
![]() Add a numbered or a bulleted list or configure the indentation of a paragraph.
Add a numbered or a bulleted list or configure the indentation of a paragraph.
![]() Open the Source Code window to manage the text’s HTML model.
Open the Source Code window to manage the text’s HTML model.
To add a link, select the caption and press Ctrl+K. In the window that opens you can specify the way the link will open: in the current window or in a new window.
Send or save an email
When you finish composing the email, click Send. You can also save your email to the Drafts folder and send it later. To do that, click Cancel and confirm saving the email as a draft.
Found a typo? Select it and press Ctrl+Enter to send us feedback