Setting up the Customer Service solution involves several steps. First, you configure general settings and live chat connections. Then, you can fill out the directories. Let's look at each step in more detail.
- Contact your BRIX sales rep to get an installation file with the solution.
- The solution is locked by default. Unlock it to access workspace and app settings.
- Set up user groups and roles in the Customer Service workspace and its apps.
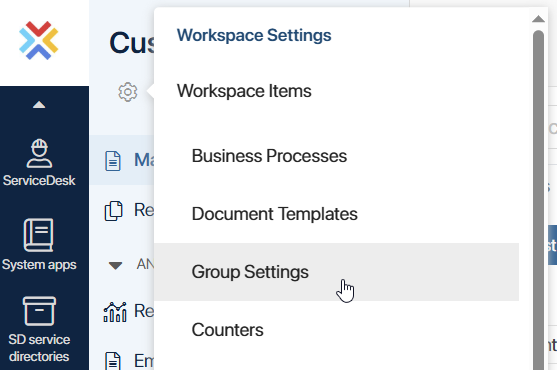
Groups help restrict access to apps and define business process participants.
Click + Group, fill out the form, and add participants. - Set up access rights and page visibility for users. Depending on their position, employees may have different access rights to the same app. For example, a lawyer only needs to view the request page and does not need permissions to create or edit it. You can find more information on assigning app access rights in Access to an app and Access to app data.
- Go to Administration > Modules. This is where the pre‑configured modules of the Customer Service solution are located. For the solution to function correctly, the Markdown editor for CS, CS change history, and Feedback processing in CS modules must be enabled.
Important: The CS change history module is enabled by default, but you must restart it during the initial solution setup. To do this, disable it and then enable again. This is necessary for the built-in process to function correctly.
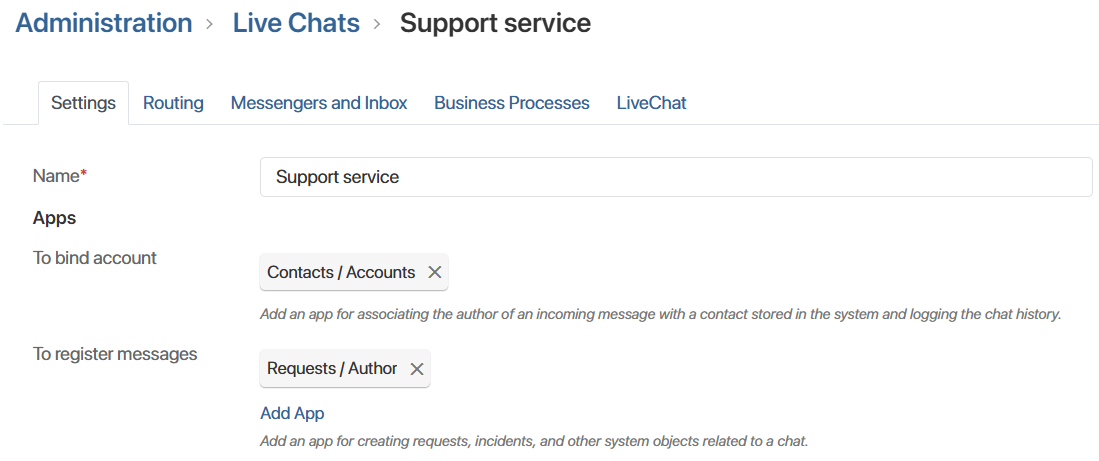
Also, be sure to configure the logging table in the CS change history module. This is necessary to ensure that updates are displayed in requests. - Configure request collection from a live chat. Create a live chat and in its settings:
- Specify the Request app in the To register messages field.
- On the Business Processes tab, for the new session creation event, select the Create a request from a live chat process. This process is part of the Customer Service solution and will automate the creation of requests when a new request is received in the live chat.
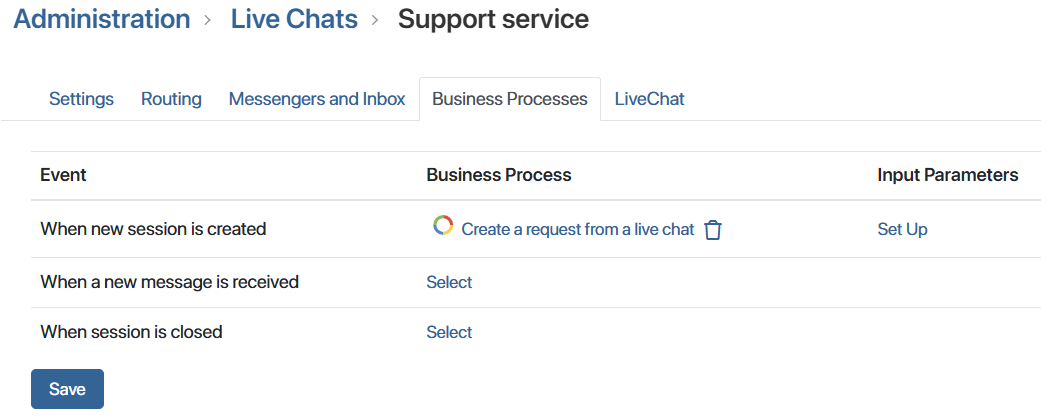
- In the Input Parameters column, click the Set Up button and map the live chat and process context variables to ensure data is transferred correctly.

- Specify the Request app in the To register messages field.
- Configure sending emails to users on behalf of the company. Read how to do this in the Customer Service workspace on the Setting up Email page.
- Fill out the directories.
The directories are filled out in the following order:
- Directories for processing requests: customer categories, request types, services, SLAs, etc.
- Directories defining the operator work schedule.
- Additional directories for portal configuration.
Directories for processing requests
Customer Categories
In this directory, create a list of customer categories for which you want to use different service schedules and SLA parameters. For example, create Standard and VIP categories.
Click + Customer Category, enter its name, and specify which companies belong to this category. If such a company is specified when creating a request, the category will be automatically determined, and the corresponding settings and SLA parameters will be applied to it.
Request Types
Here, specify the request types that incoming requests belong to. These can be:
- Question.
- Incident.
- Complaint.
- Improvement Suggestion.
For each type, set the priority level: High, Medium, or Low.
To create a new request type, go to the directory, click + Request Type, enter a name, and set the priority. Now, when you specify a new request type, it will be immediately assigned the appropriate priority.
Service Schedules
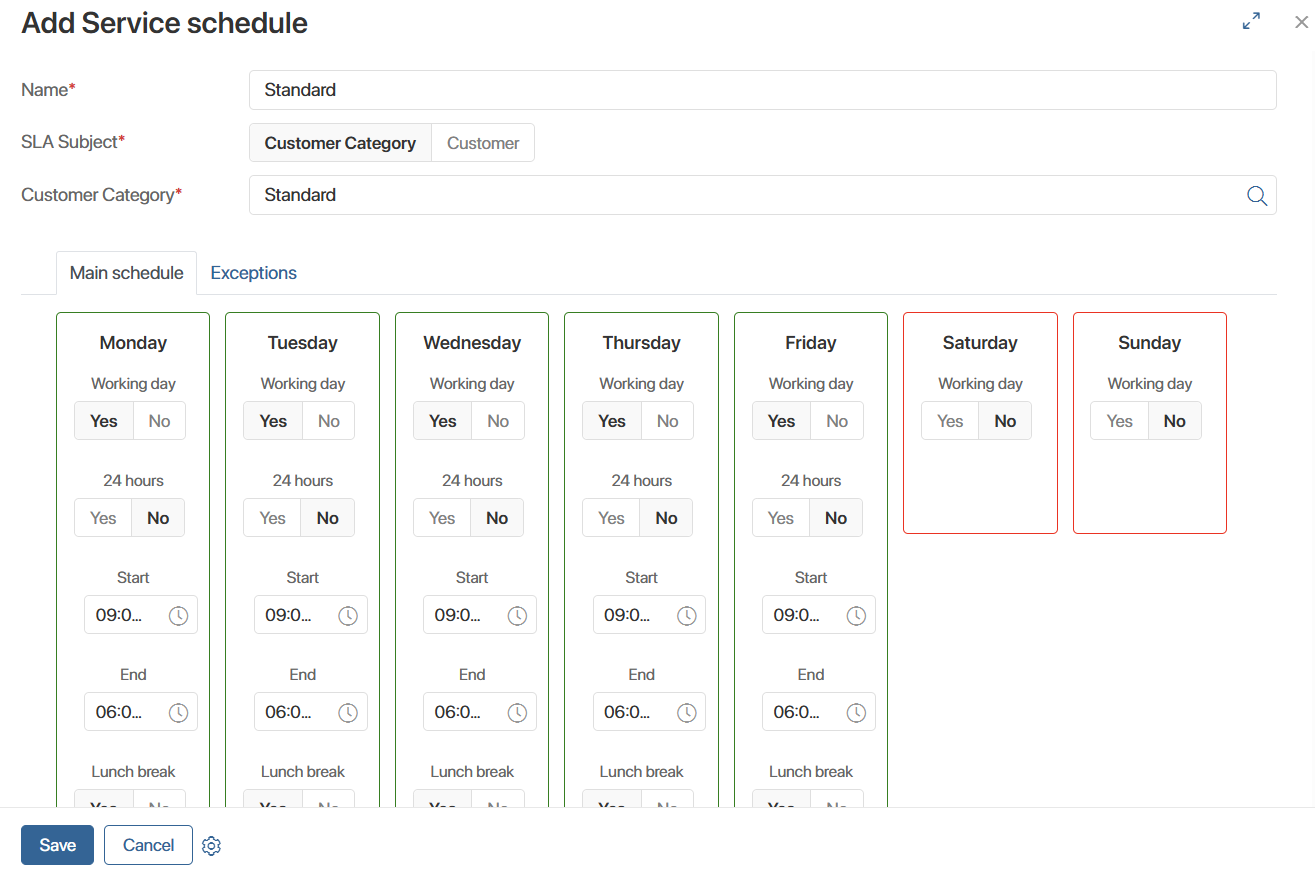
In this app, you can create a service schedule for each customer category or a specific company. Schedules are used to calculate SLA parameters. For example, if a request is received outside of scheduled business hours, the SLA calculation timer will not start.
To create a schedule, click + Service Schedule, enter its name, select a customer category or company, and set the schedule. You can specify shortened days and holidays on the Exceptions tab.
Services
In this directory, create a list of services your company provides. For example:
- Support.
- Access.
- Implementation.
- Warranty service.
To create a service, go to the directory. Click + Service, enter the service name and description. Select responsible persons to automatically route requests. Responsible persons can be users, groups, or org chart items.
An SLA is required for a service. If the SLA directory is not yet filled out, you can create a new SLA directly from the service page.
How to fill out the SLA standard is described below.
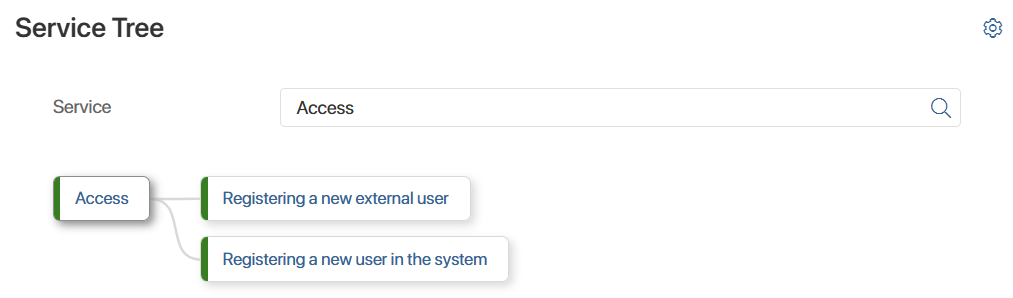
You can also specify a parent service on the service creation page. This allows you to group services by topic. For example, the parent Access service may contain child Registering a new user in the system and Registering a new external user services. The structure will be displayed on the Service Tree page.
SLA
You work with SLAs in two directories: SLA and SLA Standards.
In the SLA directory, you can set individual service standards for each customer or company category, as well as for each service.
To create a record, click + SLA Level, and in the window that opens:
- Enter a name and select the service for which you are setting the SLA. If you are creating an SLA directly from the service page, you do not need to specify a name. They will be linked automatically.
- Set the parameters:
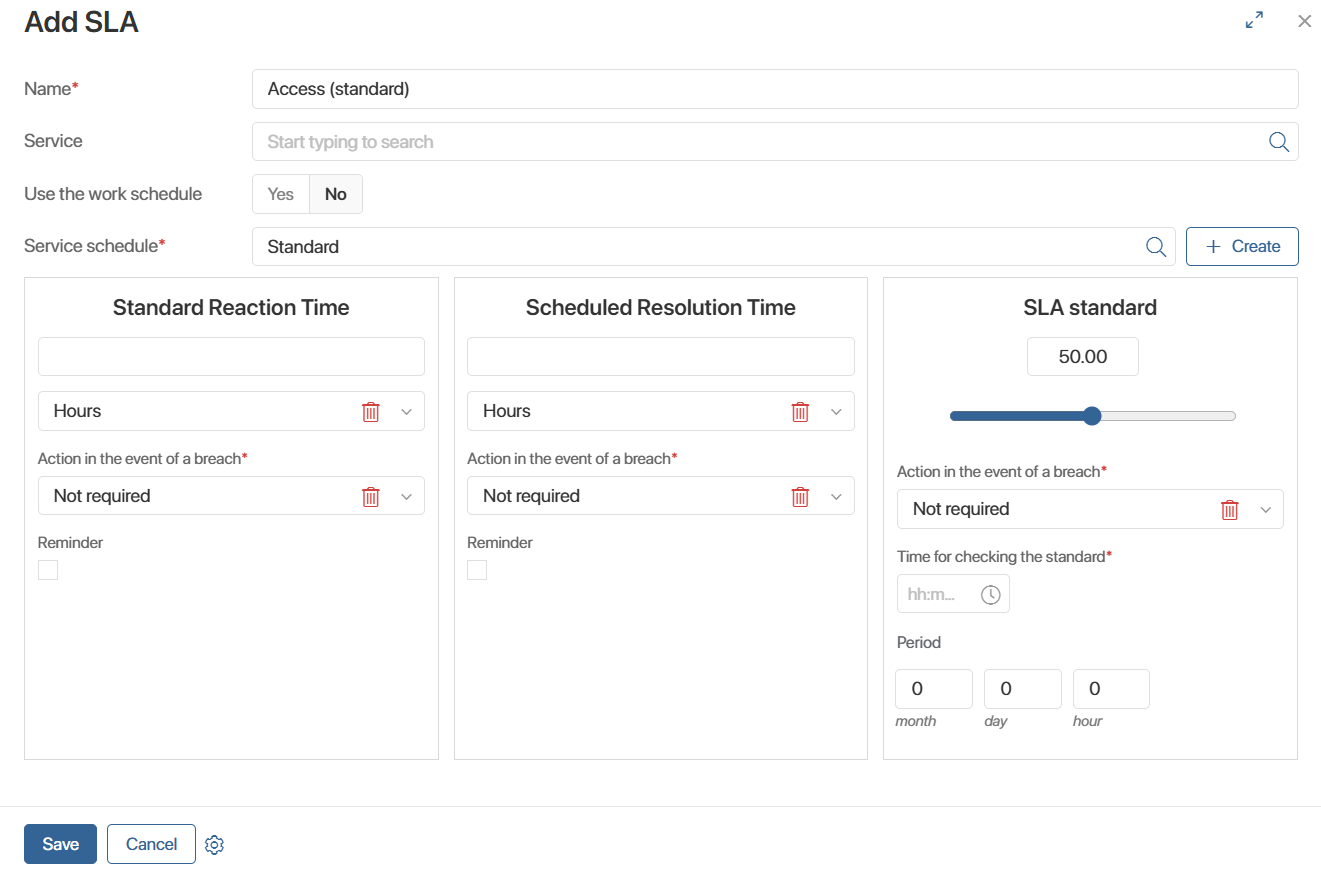
- Standard Reaction Time. This is the maximum acceptable time within which an operator must handle a request. Select the system action to take if this standard is violated. This could be a notification in the #Activity stream, an email notification, or a task in the system. Specify who should receive this notification. Set up a reminder. Specify how long before the standard time expires the operator should receive the reminder. Also specify where the reminder should be sent — to the system or by email.
- Scheduled Resolution Time. This is the maximum time an operator must find a solution. It is counted from the moment the request is accepted for processing. As with response time, here you can set a reminder and the action to be performed if the SLA is violated.
- SLA standard. Set up compliance checks. Set a threshold percentage of requests for which the SLA parameters must be met. Specify the time and period for checking, for example, at 6:00 PM every 24 hours. Define the system action in case of a standard violation, for example, a system notification to the service team lead. Thus, if at 6:00 PM the percentage of requests processed on time over the past 24 hours is below the set threshold, an escalation will occur and the system will send a notification to the team lead.
SLA Standards
You can create additional SLA standards. These are used to apply special conditions within the primary SLA, for example, for high-priority requests.
You can add additional standards only on the primary SLA page.
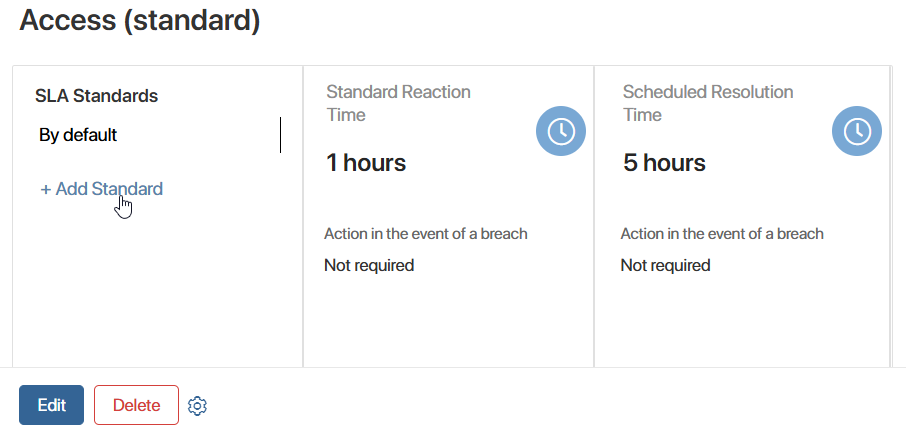
Click + Add Standard, specify the company or customer category, and set the response and resolution times. Created additional standards are displayed on the primary SLA page and are stored in the SLA Standards app. There, the standard can be viewed and edited.
Support levels
You can create multiple support levels, such as First Line and Second Line. This allows you to distribute existing requests between different groups of operators.
For example, the First Line of support is responsible for resolving common issues, while the Second Line handles complex technical questions. An operator classifies the request and assigns it to the First Line. After reviewing the issue, the employee forwards the request to the Second Line, as the matter requires a higher level of expertise.
Levels are assigned in the sidebar on the request page.
To add a level, click + Support Level. In the window that opens, enter a name and specify the operators who will handle requests at this level.
Service catalogs
Catalogs allow you to categorize services on the portal so customers can quickly find the service they need in the list.
To add a new catalog, click + Service Catalogs. In the window that opens, fill in the following fields:
- Name*. Enter the catalog name.
- Services. Select the services to be added to the catalog.
- SLA. Specify the SLA for the services in this catalog.
Directories defining the operator work schedule
Determine the employees who will handle requests and configure their work schedules.
Internal users
This directory appears in the System apps workspace when you install the Customer Service solution. You manually add employees who will handle requests.
Activities
Activities are the types of work employees can perform during the workday, such as meetings, customer visits, lunch breaks, and technical support. On the main page of the Customer Service workspace, employees indicate the activity they are currently engaged in. This allows them to record the actual time spent on each activity.
- Enter the activity name.
- Specify whether it is tracked during working hours or non-working hours.
- Select a color for the activity by entering its HEX code. This color highlights the activity on the main page of the Customer Service workspace. This allows the operator to immediately see which activity is selected and can switch it if necessary.
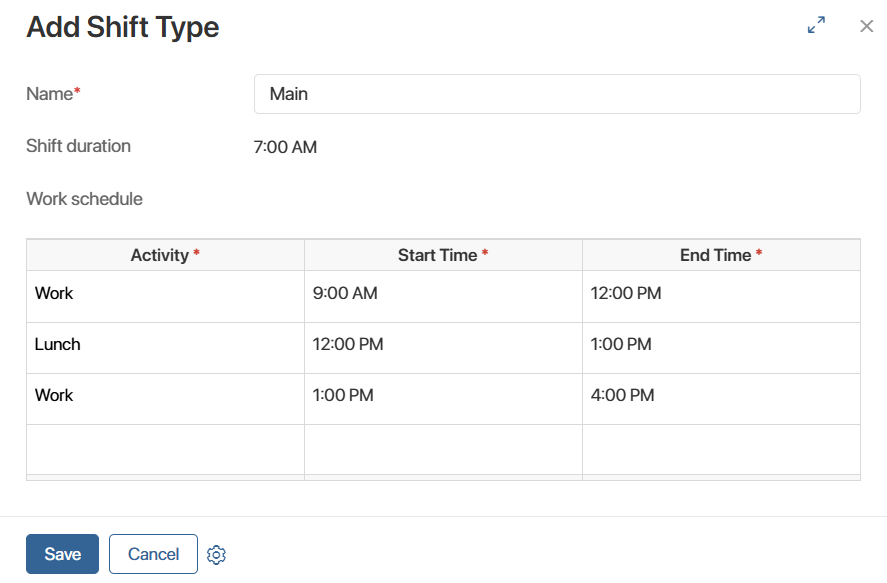
Shift types
Set up shifts for employees based on the specifics of your organization. For example, daytime, night, and 24‑hour shifts. Each shift consists of activities with the time devoted to their completion.
Add activities and specify the planned start and end times for each.
Work schedules
Set up work schedules for your employees. The schedules mirror your company's production calendar. If departments work on different schedules, create multiple schedules. For example, technical support works 12 hours a day on a two-on-two schedule, while other employees work eight hours on a standard five-on-two schedule.
Click + Work Schedule and fill out the form:
- Name. Enter a descriptive name to easily select a schedule from the list.
- Schedule period. The default is one year. You can select a different schedule period.
- Description. Add a description of the schedule if needed.
- Scheduling method. Select how the schedule will be generated, by day of the week or by shift:
- Weekly. Use this format if the schedule depends on specific days of the week. For example, Monday through Friday are workdays, and Saturday and Sunday are weekends.
- By shift. Select this format if the schedule is created for shift work, for example, two workdays and two weekends. Enter the value in the Form the schedule with a cycle* field. For a two-on-two shift, this is four days.
- Holidays. Specify how official holidays are included in the schedule:
- Yes. Holidays are excluded from the schedule as non-working days. If you select this option, you will also need to specify the customer service schedule.
- No. Holidays are included in the schedule as regular days.
- Template. If the schedule is by week, the table will be presented as a list of days of the week. If you select the shift method, the list will be numbered based on the number of days in the cycle. For each day, select the shift type.
Save the schedule.
Now you need to assign it to customer service operators.
- Go to System apps > Internal users.
- Select the employees for whom the schedule will apply.
- Click the Selected Items button on the top panel and select Edit Work Schedule. Specify the created schedule and save the changes.
Employee work schedule information will be available to the team lead in the Employee Schedule app.
The solution also uses directories for knowledge management and portal settings, which do not affect request processing. They allow you to create a convenient workspace for customers and employees.
Now, after you've configured the directories and parameters, requests will be automatically assigned to the person responsible for the corresponding service. If multiple responsible persons are assigned, the request is assigned to the one with the fewest requests currently in progress. The SLA set for the service is automatically monitored — the operator receives a reminder when the time devoted to handling a request expires. If the work is not completed on time, the request is escalated.
Customer service performance data can be viewed on the reports pages.
For more information on how operators process requests, see Work with requests in the Customer Service solution.