In the Service Desk solution, company employees can create articles for customers and partners. For example, based on their experience working with requests, operators can add an article with information that will allow customers to find a solution to a typical incident on their own.
To add a new article, follow these steps:
- Go to the ServiceDesk > Articles workspace.
- In the upper right corner, click the + Article button.
- In the opened window, fill out the fields:
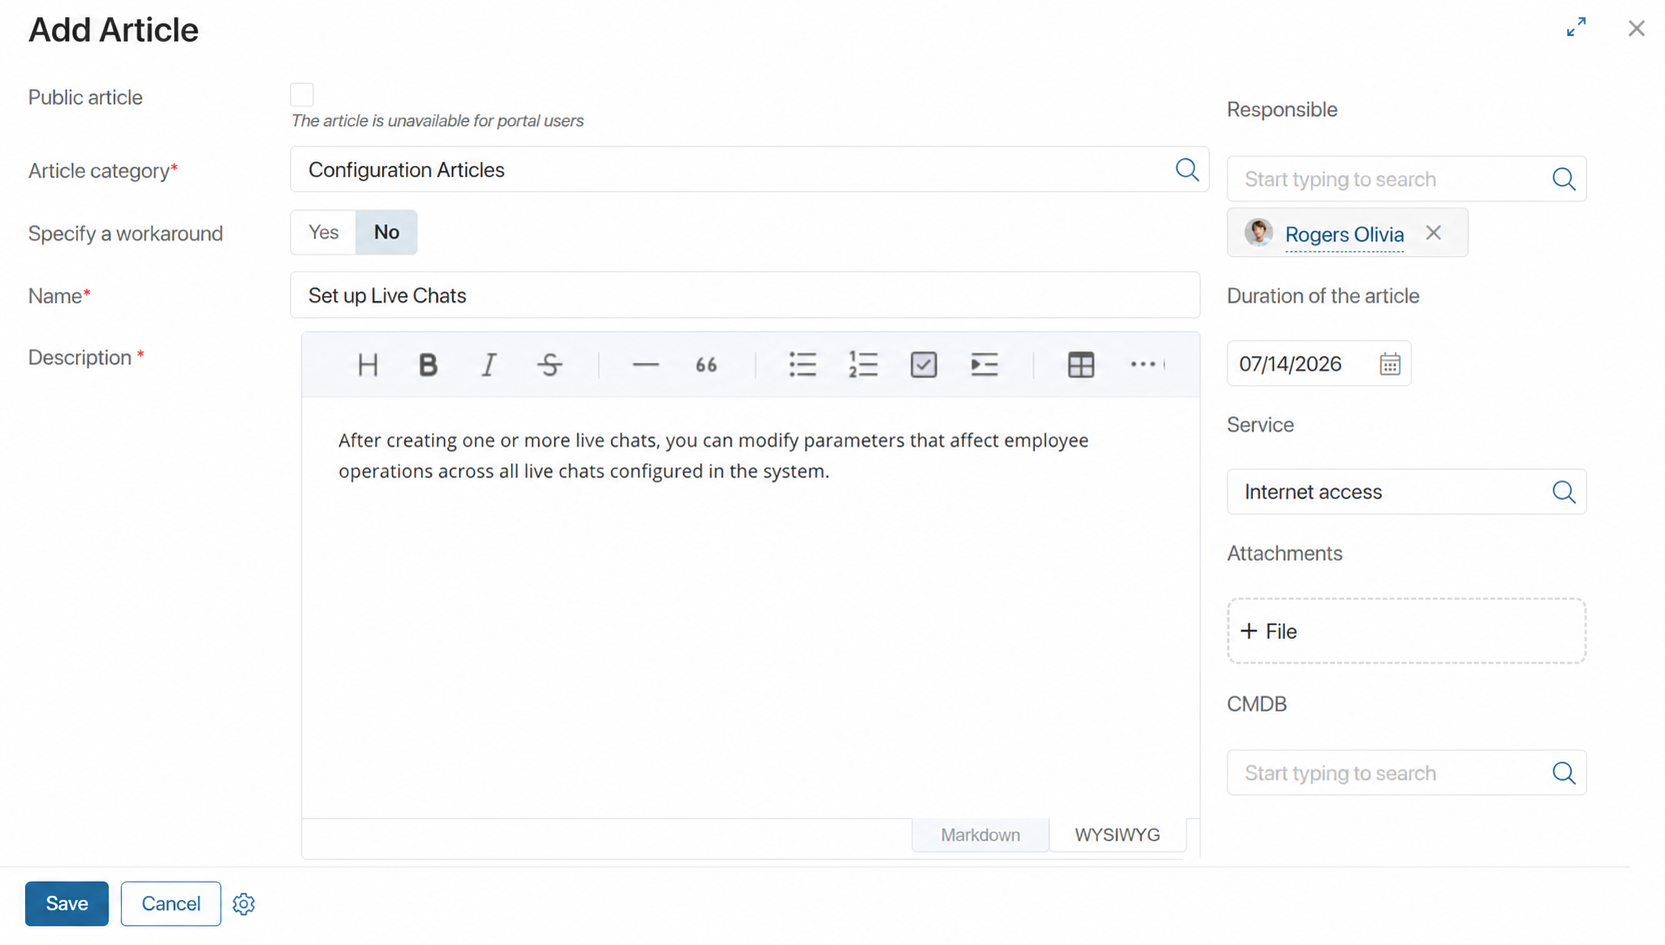
- Public article. This option controls the article display on the external Service Desk portal.
- Article category*. In the Article Categories directory, select the topic group to which the article belongs.
- Specify a workaround. Select Yes to supplement the article with a problem resolution description. In the Related problems* field that appears on the side panel, specify the desired item.
- Name*. The article name.
- Description*. The article text. When describing the article, you can use Markdown markup language or a WYSIWYG editor.
- Responsible. The employee who monitors the article relevance and can make changes to it.
- Duration of the article. The date when the article will be removed from publication on the external portal.
- Service. The service associated with the article. For example, this could be instructions for operating or installing equipment.
- Attachments. Additional files. For example, sample equipment return forms.
- CMDB. Specify the configuration item related to the article, for example, if the article describes its setup.
- Click Save.
After that, the created article will be saved in the app. The public article will be displayed on the external portal and will also be automatically copied to the Live Chats workspace in the Articles directory.