Response Templates are directories located in the Live Chats workspace. Operators can fill them with entries that provide answers to frequent questions asked by customers.
Templates help operators respond to common questions faster. To do that, they simply need to select a ready-to-use response from the list and send it to the user.
The Response Templates section includes two apps:
- Articles. It contains links to the web resources of your company, for example, to your website or reference materials.
- Templates. Ready-to-use responses to most common questions asked by users.
Add a new entry
Since Response Templates are apps, there are three ways to create new items in them: manually, using the Web API, or by importing data from a file.
In this article we will take a look at how to add entries manually:
- Go to the Live Chats workspace, open one of the apps in the directory, and click the +Item name button, for example, +Article.
- Fill out the provided form:
- For an Article:
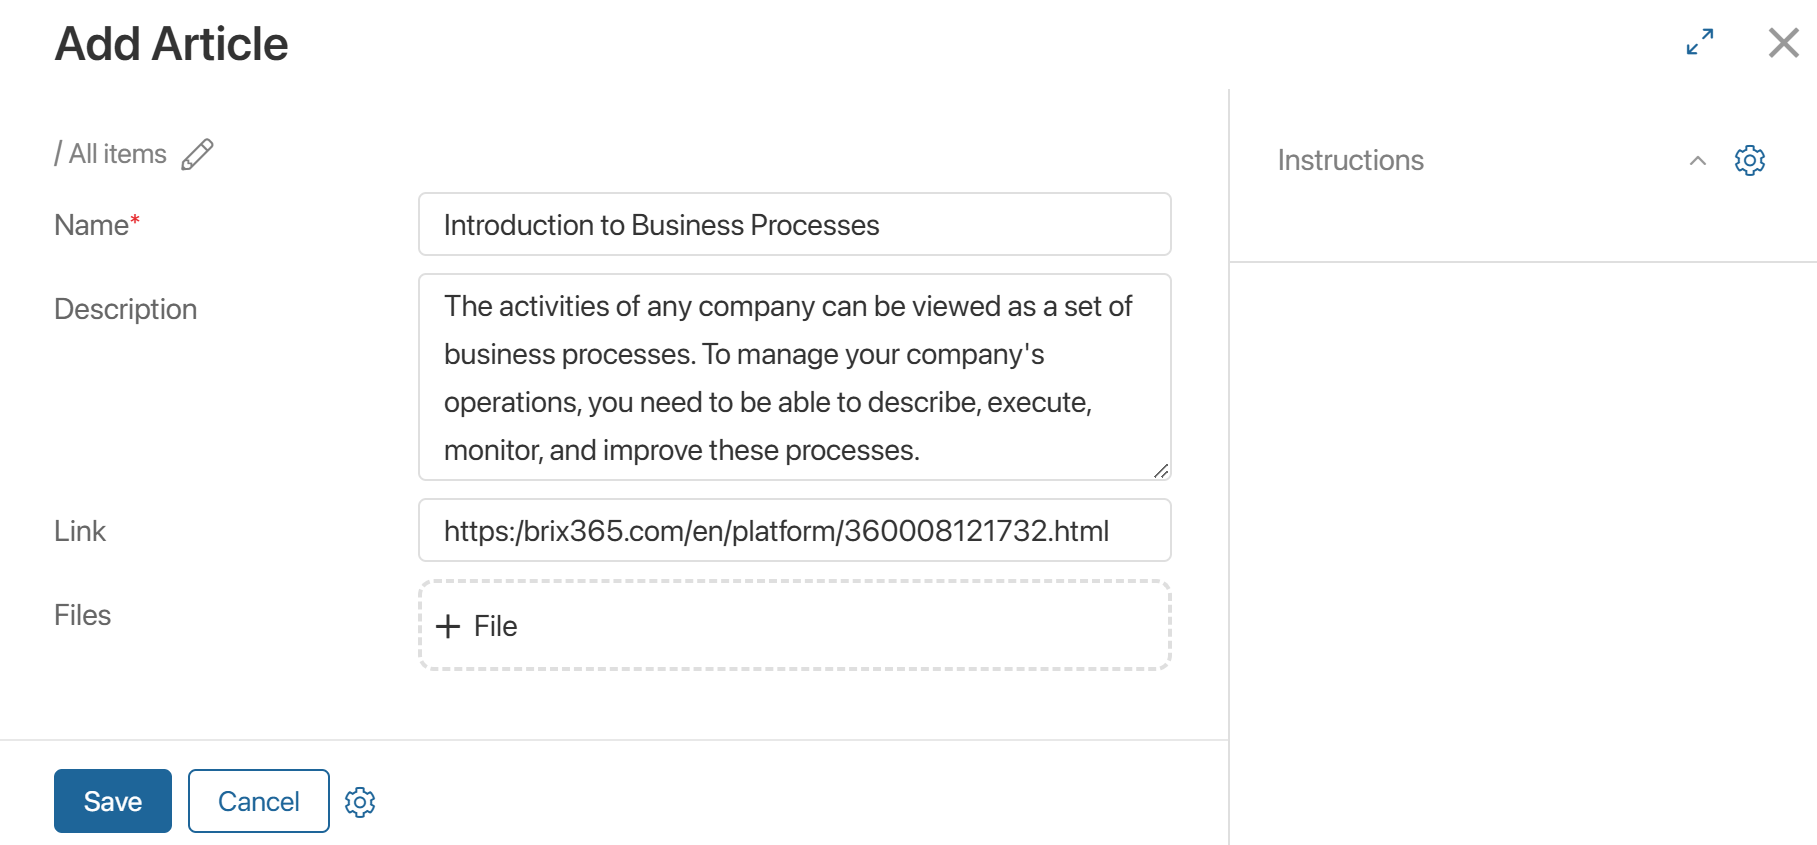
- Name*. Enter the name of the new article.
- Description. Add information about the page the link leads to. When the operator selects the article, its description is shown in the entry field next to the link.
- Link. Enter the web page address.
- Files. A custom field of the Files type created by the system administrator when configuring the form of the Articles app. You can add files supporting the article in this field.
- For a Template:
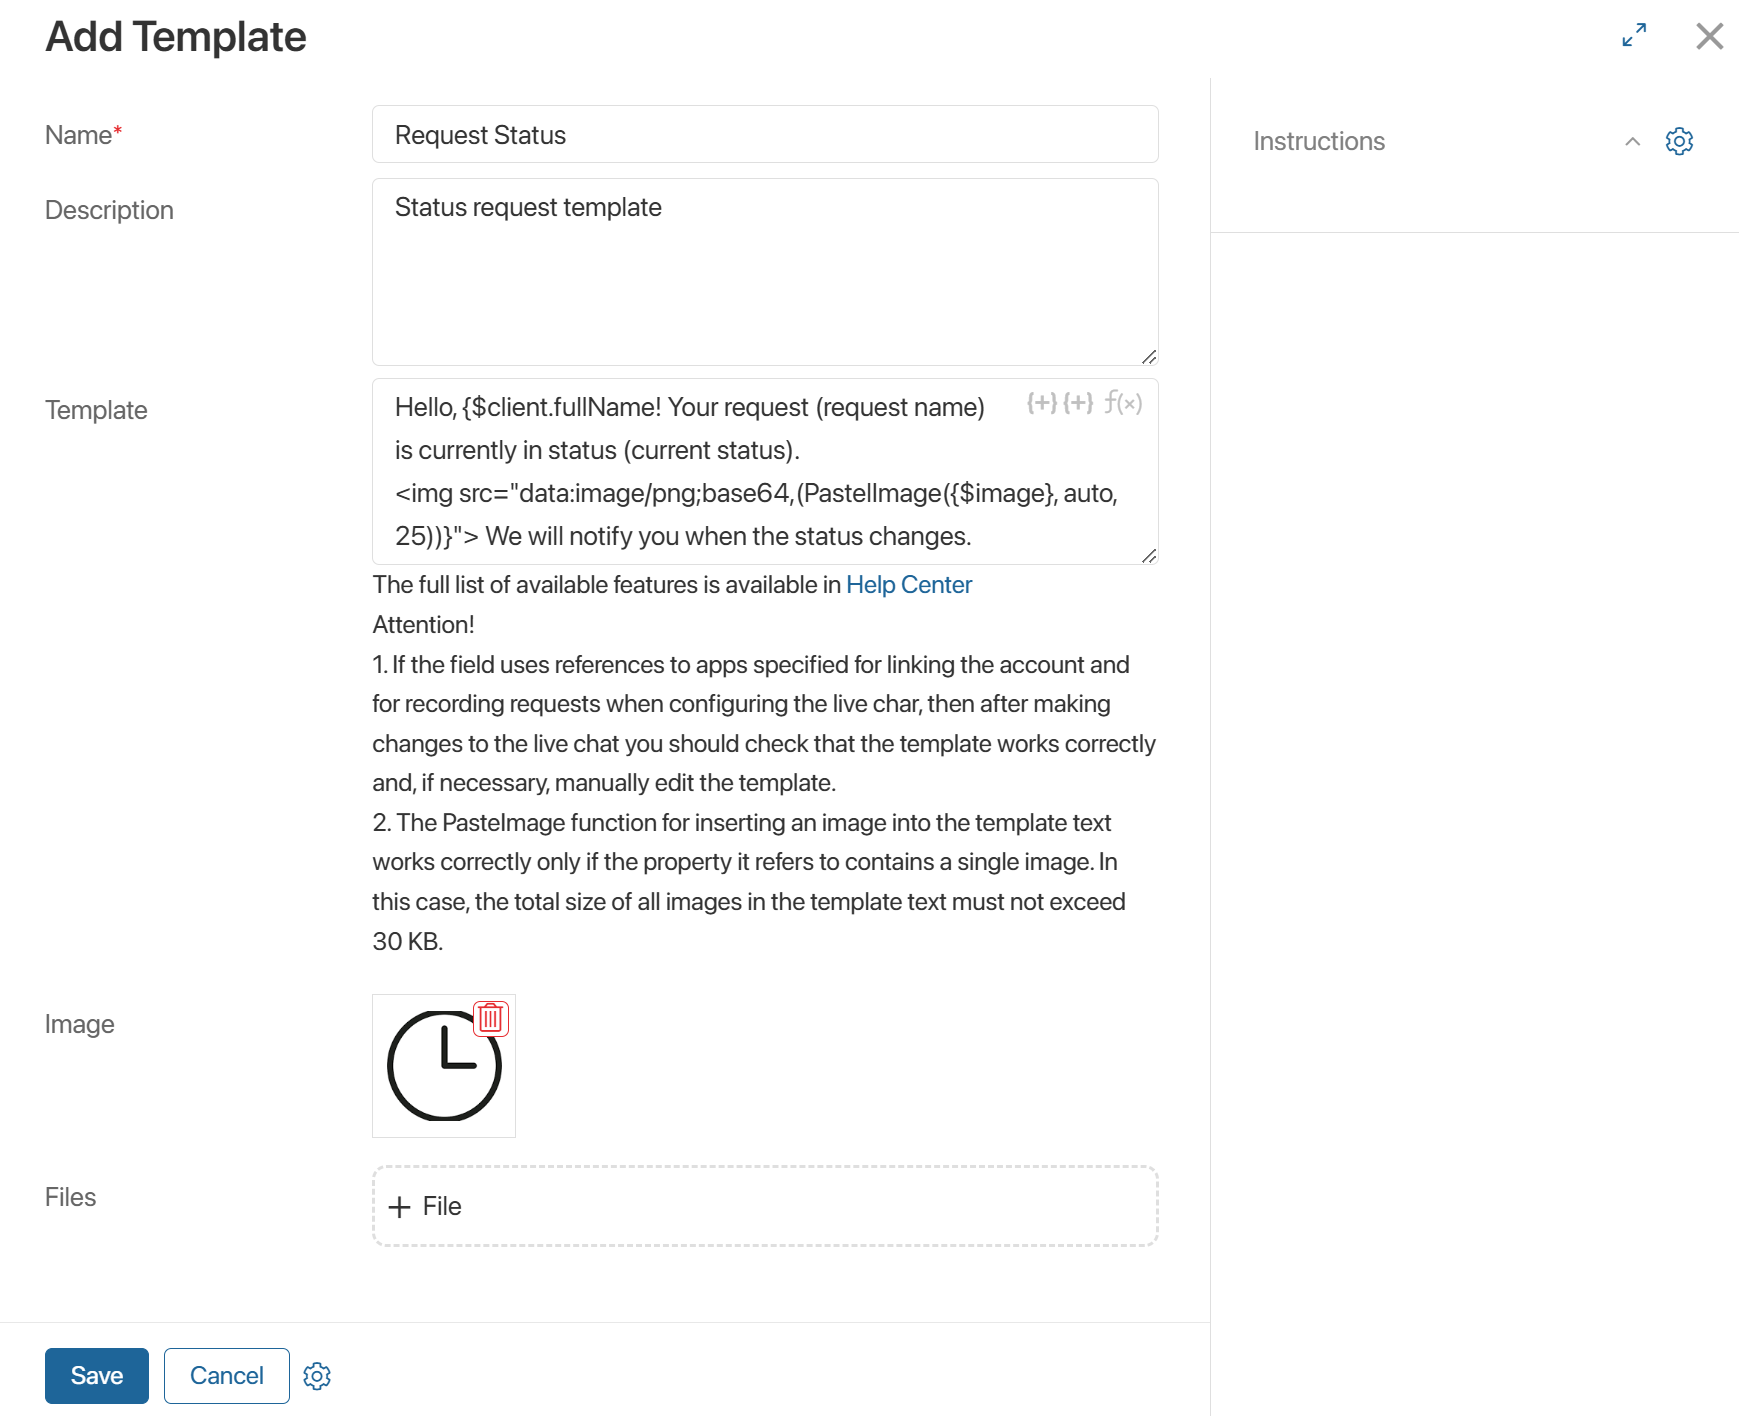
- Name*. Enter the name of the new template.
- Description. Briefly describe the template.
- Template. Enter the text of the message that the operator will send to users. In the message text, you can use context variables, for example, the variable that stores the name of the customer or the name of the live chat. To do that, click {+} in the right corner of the field. You can also add a function, for example, DateTime(), by clicking f(x). You can insert an image into the message text using the PastelImage() function. For details on its usage features and limitations in the template, see the example below.
When you select a template in a client conversation, the values from the variables will be automatically substituted into the operator’s message For the complete list of available functions, see Template syntax. - Image. A custom field of the Image (One) type created by the system administrator when configuring the form of the Templates app. You can store an image in this field to display it in the message text.
Example of adding an image to a message text using the PastelImage() function
Let’s walk through how to add an image to a message template:
Where:
The
Now, in a live chat connected to email or LiveChat, as well as in the internal live chat, the operator can apply this template and send a message with an image to the client. |
- Files. A custom field of the Files type created by the system administrator when configuring the form of the Templates app. You can add supporting files to the message in this field.
- Click Save.
The entries created in Articles and Templates can be viewed as a table or tiles.
The Articles app also has a pre-built folder tree with the default All items folder. If needed, you can add other folders to categorize entries. To learn more about folder hierarchy, see Create a folder tree.
How to use articles and templates
When communicating with a customer in a live chat, the operator can select an entry from the template app and paste it as a quick reply. This means that the operator doesn’t need to manually type in the response. They can just select an appropriate option from the list of available templates.
To select an entry, do the following:
- On the session page, click the
 icon in the entry field, and select either Articles or Templates.
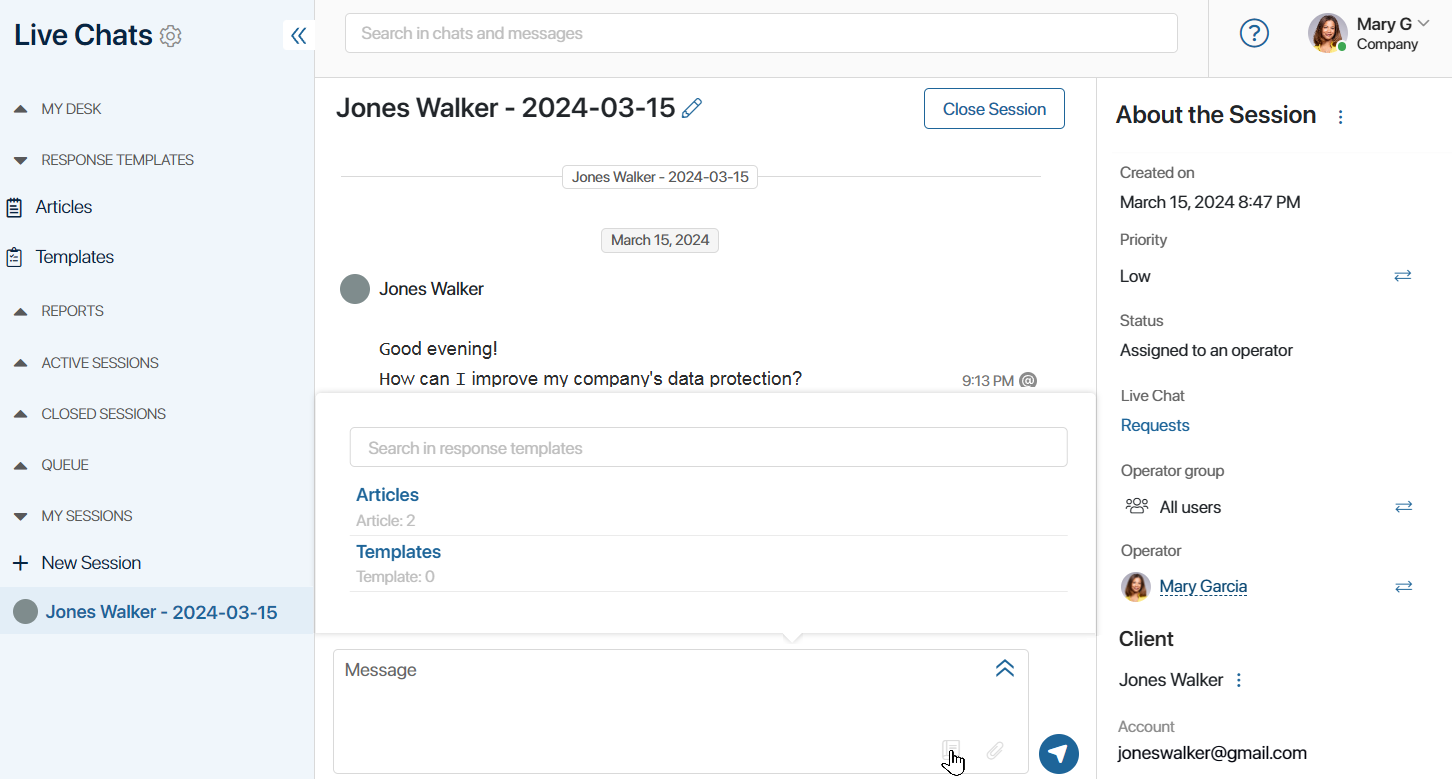
- The list of available entries from the app opens. To find the response you need, use the search field above the list: type some key words and press Enter. All the appropriate entries will be shown.
- Select an entry. Articles are inserted in the response field together with their Description, while templates are inserted without it.
The template text may contain:
- Files. In the upload window that opens, select the files you want to add to the response. You can:
- Send all files.
- Keep only one or several files you need. To detach a file from the message, click the close icon next to its name.
- Cancel file upload by clicking Cancel and send the message without them.
- Images. If the current channel does not support sending images within the text, you will see a warning about this. To use the template, remove the image from the text. You can also save the image and attach it to the message using the paperclip icon in the input window.
- You can edit the response if necessary and send it to the user by pressing Enter.