The Incoming Payments workspace includes preconfigured pages with the All Incoming Payments and My Incoming Payments reports. They consist of separate tabs and widgets.
You can configure these pages to meet your company’s specific requirements. For example, you can change widget settings, delete widgets, and use them multiple times to display different data. You can also add other system widgets to the report page.
The All Incoming Payments and My Incoming Payments reports include the following widgets:
- Revenue Items.
- Estimated and Received Payments.
- My Incoming Payments.
- Receipts.
- Distribute Sales Goals.
These widgets can be reconfigured and added to other system pages.
Начало внимание
Only users of the Administrators group can change the pages with the reports and set up the widgets.
Конец внимание
Configure the report page
To change the current settings, follow these steps:
- Go to the Incoming Payments workspace and in the left menu, select All Incoming Payments or My Incoming Payments page.
- Click the gear icon next to the page name and select the Widget Builder option.
- In the opened interface designer, select the required tab: Metrics/My Metrics, Incoming Payments or Sales Goals.
You can configure properties that control data filtering in reports, as well as widgets.
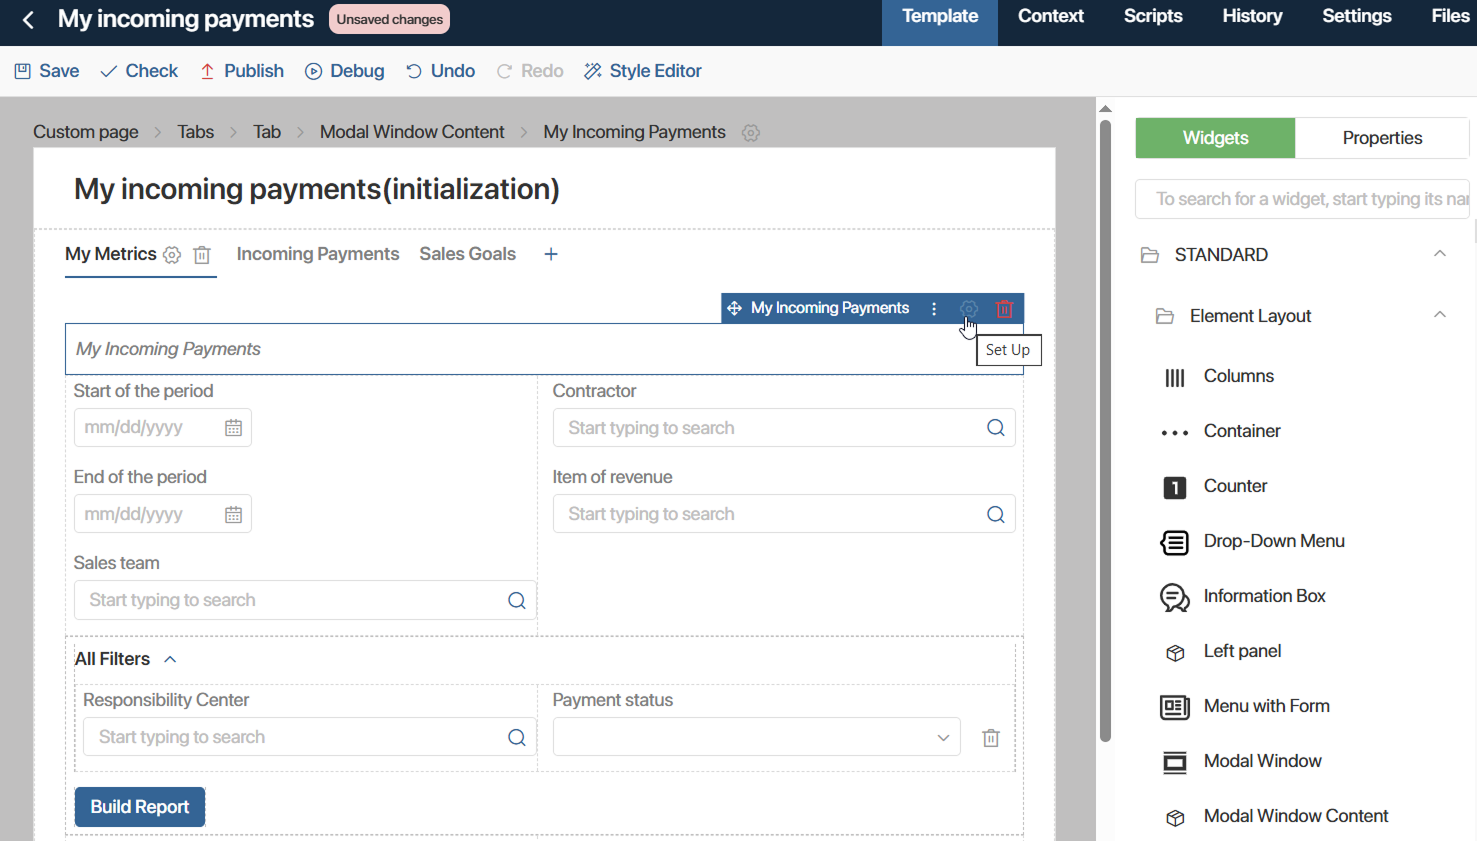
- Select a widget and click the gear icon next to its name.
- In the window that opens, you can change the following settings:
- Fields defined by default and required to build the report correctly.
- Options that define how the built graphs and lists look like.
The options in preconfigured widget settings are linked to variables added to the widget context by default. Variable values depend on the data specified in the corresponding filters when the report is built.
You can change the settings by selecting other variables that were manually added in the interface designer on the Context tab. To do this, click the field value and select a property from the list. Data type requirements for the variables of each widget are provided below.
- To finish configuring the widget, click Save.
- To make the configured page available to users, click Save and Publish on the top toolbar of the interface designer.
Let’s take a closer look at the widgets that make up the report pages.
Revenue Items widget
The widget is placed on the All Incoming Payments and My Incoming Payments pages on the Metrics and My Metrics tabs. It displays the number of estimated or received payments grouped by revenue item.
For example, using this widget on the All Incoming Payments page, a sales rep can see which revenue item the selected sales team used most often for transactions in the current month.
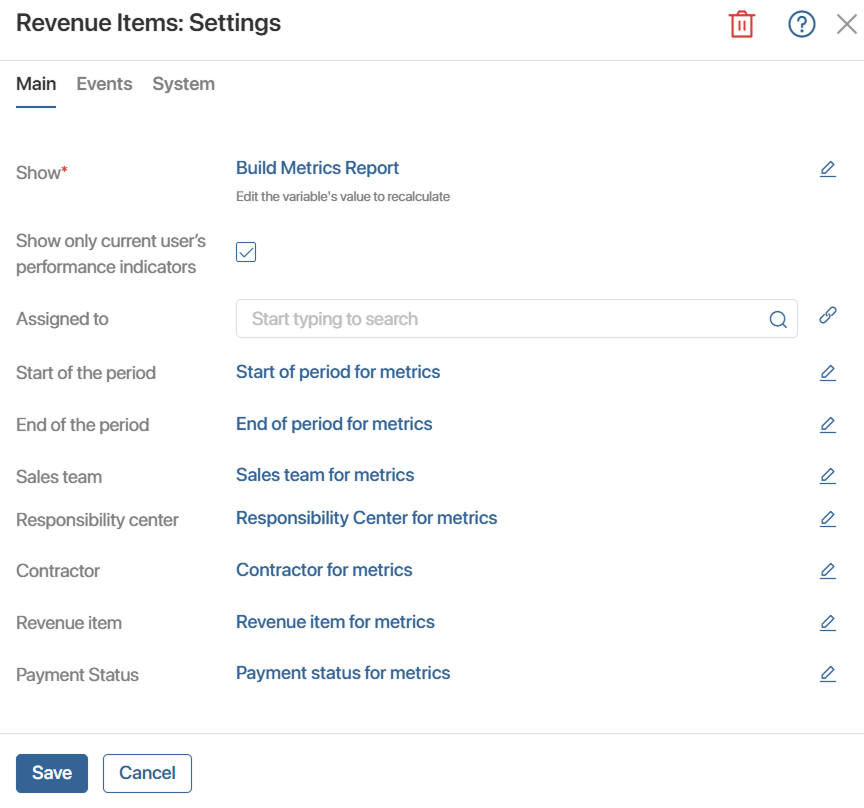
- Show*. This option is linked to the Build Metrics Report variable of the Yes/No switch type. When the user clicks the Build Report button on the report page, the variable value changes, and the widget automatically displays statistics based on the parameters specified in the filters.
- Show only current user's performance indicators. This option builds the chart using the current employee’s data.
- Assigned to. This option is linked to a variable of the Users type. When a sales rep fills in the Assigned to filter on the report page and clicks Build Report, the variable value changes. The widget automatically displays statistics for the selected employees.
In the settings of widgets placed on the My Incoming Payments page, the Assigned to field can be left empty.
- Start of the period, End of the period. These options are linked to variables of the Date/time type.
- Sales team, Responsibility center, Revenue item. These options are linked to variables of the App type which reference the Sales Teams, Responsibility Centers and Revenue Items apps.
- Contractor. This option is linked to a variable of the App type which reference the Companies app in the CRM workspace.
- Payment status. This option is linked to a variable of the Category type which contains two values: Received with the received code and Not received with the missed code.
Estimated and Received Payments widget
The widget is placed on the All Incoming Payments and My Incoming Payments pages on the Metrics and My Metrics tabs. This widget displays a chart comparing scheduled payments with received payments. Statistics for the entire specified period can be displayed by day, week, or month.
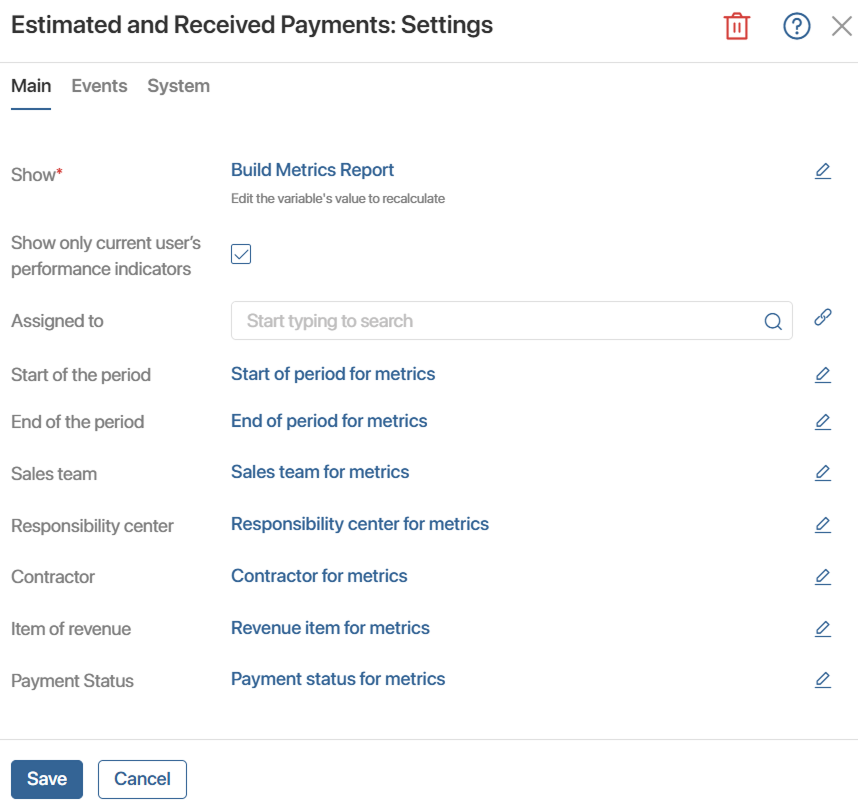
The data type requirements for this widget’s variables are the same as those described for the Revenue Items widget.
My Incoming Payments widget
The widget is placed on the My Incoming Payments page on the My Metrics tab. It displays a report for the current employee showing target, planned, and actual amounts. Based on a comparison of these figures, the widget calculates and displays the percentage of completion for both the plan and the current target. It also shows the current status of the target and the remaining income amount needed to achieve it.
- Show*. This option is linked to the Build Metrics Report variable of the Yes/No switch type. When the user clicks the Build Report button on the report page, the variable value changes, and the widget automatically displays statistics based on the parameters specified in the filters.
- Start of the period, End of the period. These options are linked to variables of the Date/time type.
Receipts widget
The widget is placed on the All Incoming Payments and My Incoming Payments page on the Receipts tab. It is a table of estimated and received payments from contractors. You can filter data in the table and create new received payments without opening the Register of Incoming Payments app.
Note that the widget can also be added to the forms of payment allocation apps. In this case, the widget uses a different set of settings. For more information, see Receipts.
Settings of the widget added to the page:
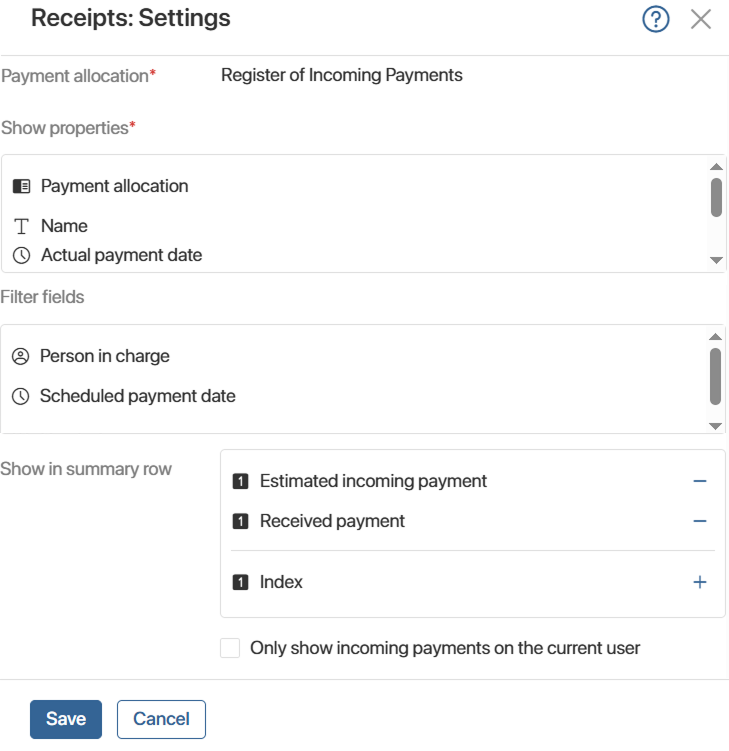
- Payment allocation*. The field automatically contains the Register of Incoming Payments app used as the data source for the report.
- Show properties*. Select the fields from the Register of Incoming Payments app that you want to display in the widget table. Fields selected by default cannot be removed from the table, for example: Payment allocation, Name, Scheduled payment date, Payment amount.
- Filter fields. Select the fields from the Register of Incoming Payments app that you want to use to filter data in the table. The Actual payment date and Status fields cannot be removed from the filter.
- Show in summary row. Select the fields from the Register of Incoming Payments app for which total amounts will be displayed at the bottom of the table. By default, the Received payment and Payment amount fields are set by default. You can add custom fields of the Number and Money types.
- Only show incoming payments on the current user. Enable this option to let users view only the payments for which they are responsible in the table.
Distribute Sales Goals widget
The widget is placed on the Incoming Payments and My Incoming Payments page on the Sales Goals tab. It displays a table with income targets and planned and actual payment data. Target completion percentages are calculated based on a comparison of these indicators.
Users with permission to create and edit items of the Sales Goals app can add new goals or edit existing ones directly in the table.
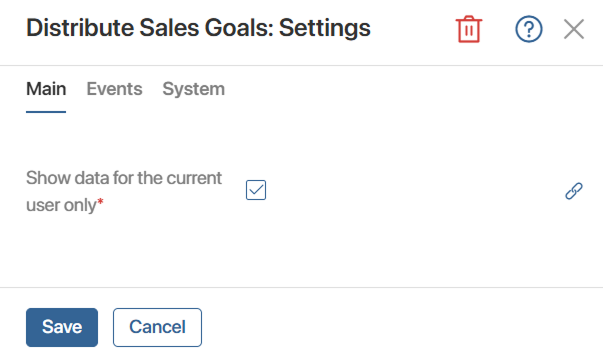
Enable the Show data for the current user only* option to let users view only the targets for which they are responsible in the table.
Settings on the Events and System tabs
These tabs are the same for all widgets and contain system settings. They let you control widget visibility and access, configure widget behavior when the pointer hovers over it, and more. For more information, see System widget settings.