When creating complex interfaces, you can quickly find elements added to the template, as well as move, copy, delete them, and perform other available actions.
Navigation on the modeling canvas
Navigation becomes available when a widget contains two or more elements. It allows you to quickly navigate to the desired item on the modeling field. This is useful when creating complex interfaces with a large number of widgets.
To quickly find any nested form element, hover over the widget name in the upper left corner and click the gear to the right of it. Then select the desired element. It will be highlighted on the field with a blue frame.
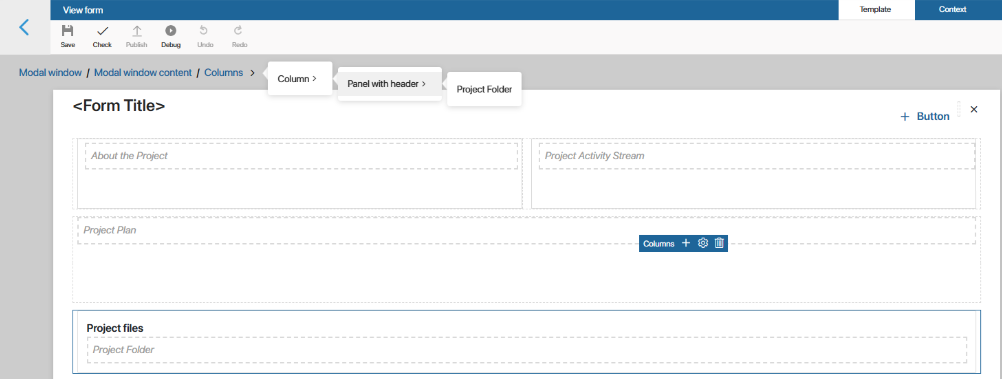
Actions with widgets on the modeling canvas
Click a widget to display a panel of available actions. You can:
- Move the widget on the form by holding the
 icon.
icon. - Copy a widget to the clipboard by clicking the
 icon.
icon. - Paste a copied widget from the clipboard into any widget template, including in another company, using the
 icon.
icon. - Extract an element into a new custom widget, which is created when you perform this action, using the
 icon.
icon. - Duplicate the widget with its set values and settings on the current form. To do this, click the
 icon and confirm the action.
 - Add a nested widget if available. To do this, click the plus icon.
- Access the widget settings by clicking the gear icon.
- Delete the widget.
Bulk actions with widgets
You can apply bulk actions to multiple widgets. To do this, hold down the Ctrl key and select the desired elements with the left mouse button and choose one of the available actions from the toolbar that appears:
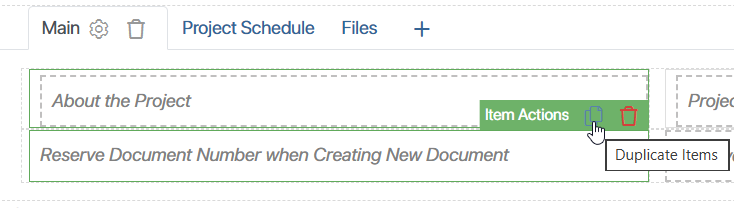
- Copy to clipboard.
- Paste a copied element into multiple widgets at once.
- Extract the selected template fragment into a new widget.
- Duplicate or delete elements.
Extract a template fragment into a new widget
After configuring a complex template, you can select several elements and create a new widget with a ready-made template from those elements. This saves you from having to build a widget from scratch for a fragment that could be useful for developing other interfaces.
To do this:
- In the current template, select the desired widgets by holding down the Ctrl key. Then click the icon.
- In the window for creating a new custom widget, fill in the following fields:
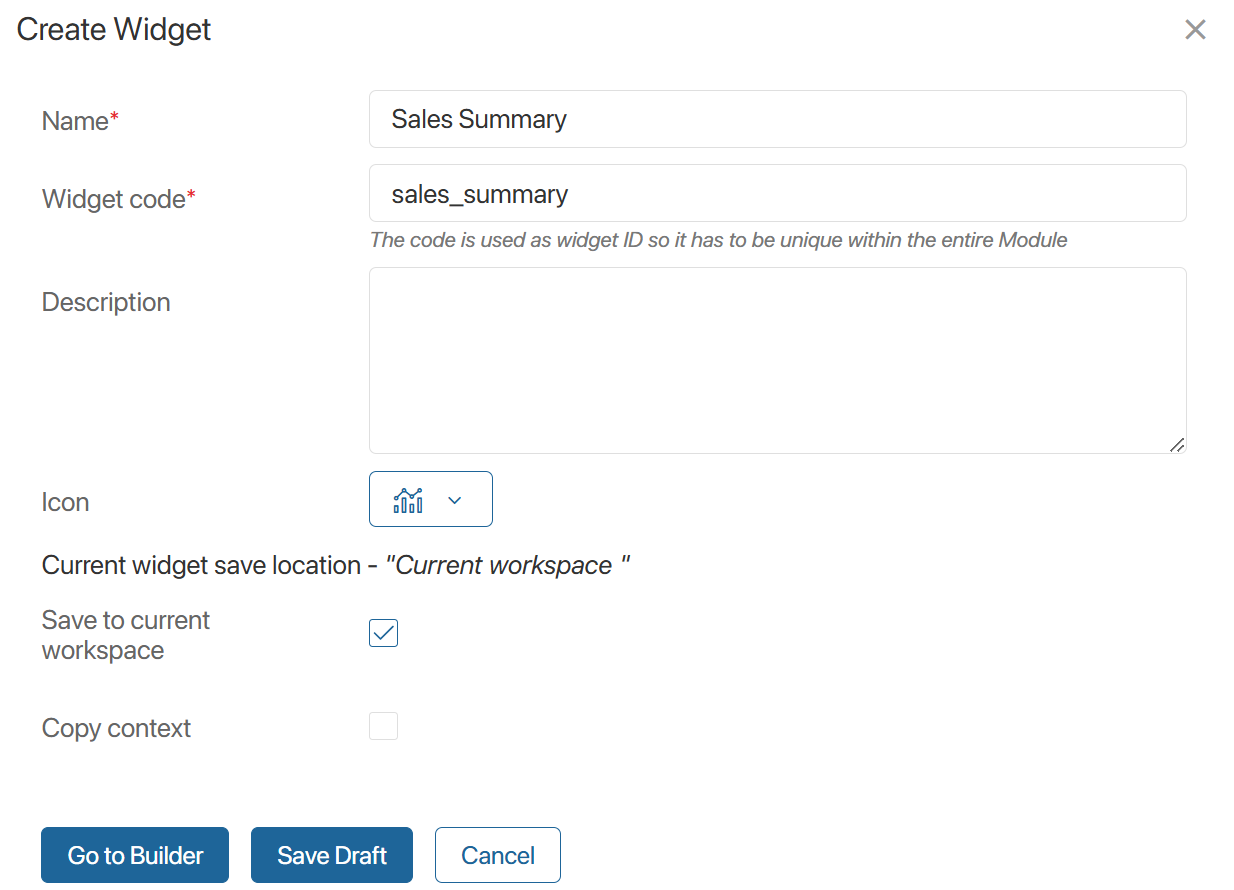
- Name*, Widget code*. Enter the widget name, which will be used to generate the code for scripts. The code can be changed at the creation stage.
- Description. Add a brief description of the widget.
- Icon. Select an image for the widget.
- Save to current workspace. By default, the new widget is saved to the same workspace or app as the current one. You can disable this option and select a different location from the list.
- Copy context. Enable this option to preserve the context used in the selected fragment within the new widget.
- After filling in the fields, you can:
- Go to Builder. Save the new widget and open its designer for further configuration and publishing.
- Save Draft. Save the new widget as a draft without navigating to its designer.