 The Webhook activity automatically sends information from a process instance in BRIX to an external system.
As an example, let’s consider a company that sells and ships equipment. A sales rep receives an order from a customer and sends it to the warehouse where the order is processed. After invoicing, the order is shipped, and the Webhook automatically sends the order's details to the inventory management software.
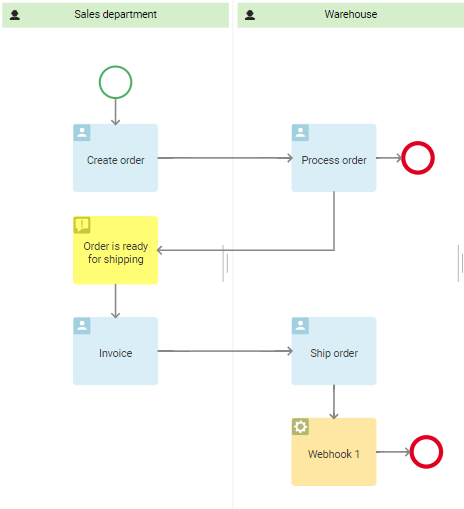
This way the company saves time on entering data and avoids human mistakes, such as specifying a wrong serial number.
начало внимание
Only users included in the Administrators group can configure the Webhook activity.
конец внимание
Add a webhook to the process
On the right side panel, go to the Integrations tab and drag the Webhook activity to the process diagram. Place the Webhook activity in the part of the diagram where BRIX must send data to the external system.

Double-click on the webhook shape in the diagram to open its settings.
General tab
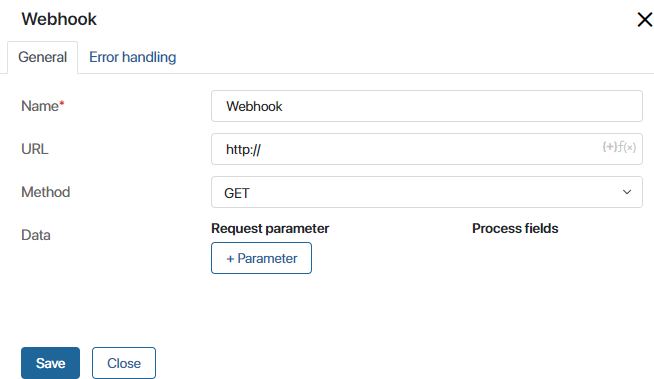
This tab is for creating the HTTP request. Fill out the form:
- Name*. Enter the text that will be displayed in the activity on the process diagram.
- URL. Specify the request URL for addressing an API method of the external system, for example, http://example.com/api/create-order/. In this field, you can use process context variables and the DateTime function. To add a variable, click {+} on the right-hand side of the field. To use the
DateTime()function, click the f(x) symbol. You can read more about using theDateTime()function in the Template syntax article. - Method. Select either
GETorPOST. IfPOSTis selected, the additional Request Type field appears. - Request Type. For the
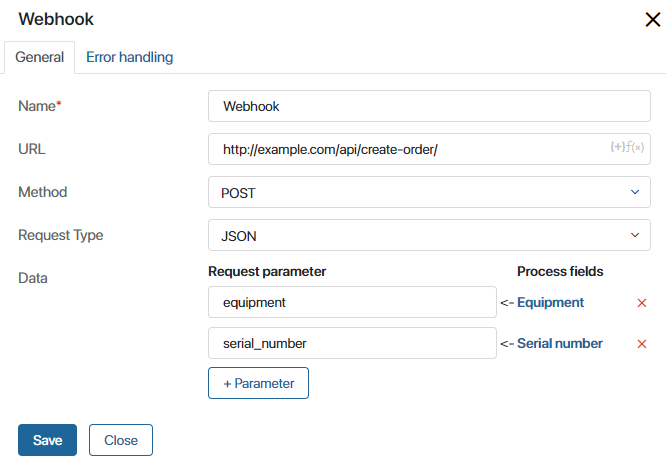
POSTmethod the JSON, FORM and TEXT types are available. - Data. Here you can link the process properties and request parameters. Click +Parameter and select a field in the Process field column, for example, Serial Number. The Request parameter field will be filled in automatically.
If you have selected TEXT in the Request type field, then in the Data field you will need to enter a text template that will be passed in the request. To create the template you can use text, process context variables, and the DateTime() function.
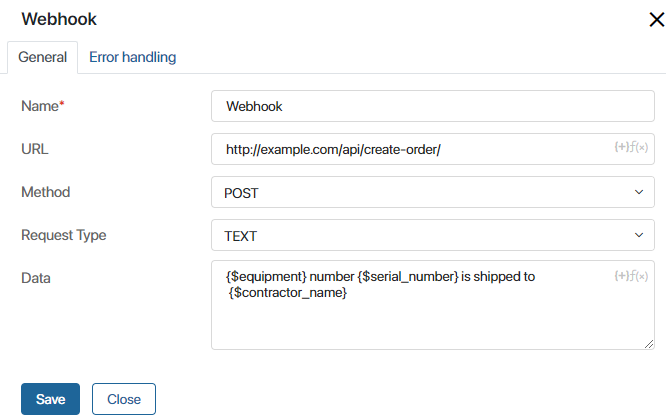
To add a context variable, click the {+} sign on the right-hand side of the field. To use the DateTime() function, click the f(x) symbol. You can read more about using the DateTime() function in templates in the Template syntax article.
Error Handling tab
On this tab, you can configure what actions will be performed if the external system returns an error when sending a request.
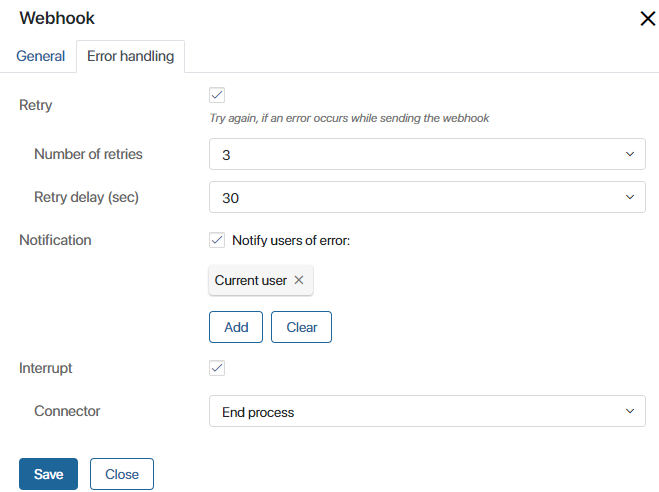
- Retry. Enable this option if you want BRIX to try sending the notification again.
- Number of retries. Specify the number of attempts to send the notification.
- Retry delay (sec). Determine the frequency of attempts.
- Notification. Enable this option to notify responsible users in case of an error. They will receive a notification once all attempts to send the request have been completed. You can select:
- The current user. The person who completed the task assigned to the Webhook activity in the process diagram.
- User group.
- Org chart item.
- A context variable, for example, the process initiator.
- Interrupt. Check the box to interrupt the operation in case of an error. Next, select the connector that the process will follow, for example, End process.
Description tab
The tab is available in system versions 2025.10 and higher.
Indicate service information about the block's operation. System administrators and employees modeling the process will be able to access the tab and review this data.
After having configured all the settings, click Save.