The Outgoing Invoices app is used to create and store invoices issued to contractors. In this app, you can generate payment invoices based on the entered data, as well as track invoice statuses.
By default, all invoices are displayed as a table that includes the name, payment term under the contract, invoice creation date, and status:
- New. Invoice data has been entered into the system, but the invoice hasn't been generated yet.
- Pending payment. The invoice has been generated and attached.
- Paid. The outgoing invoice has been paid by the contractor.
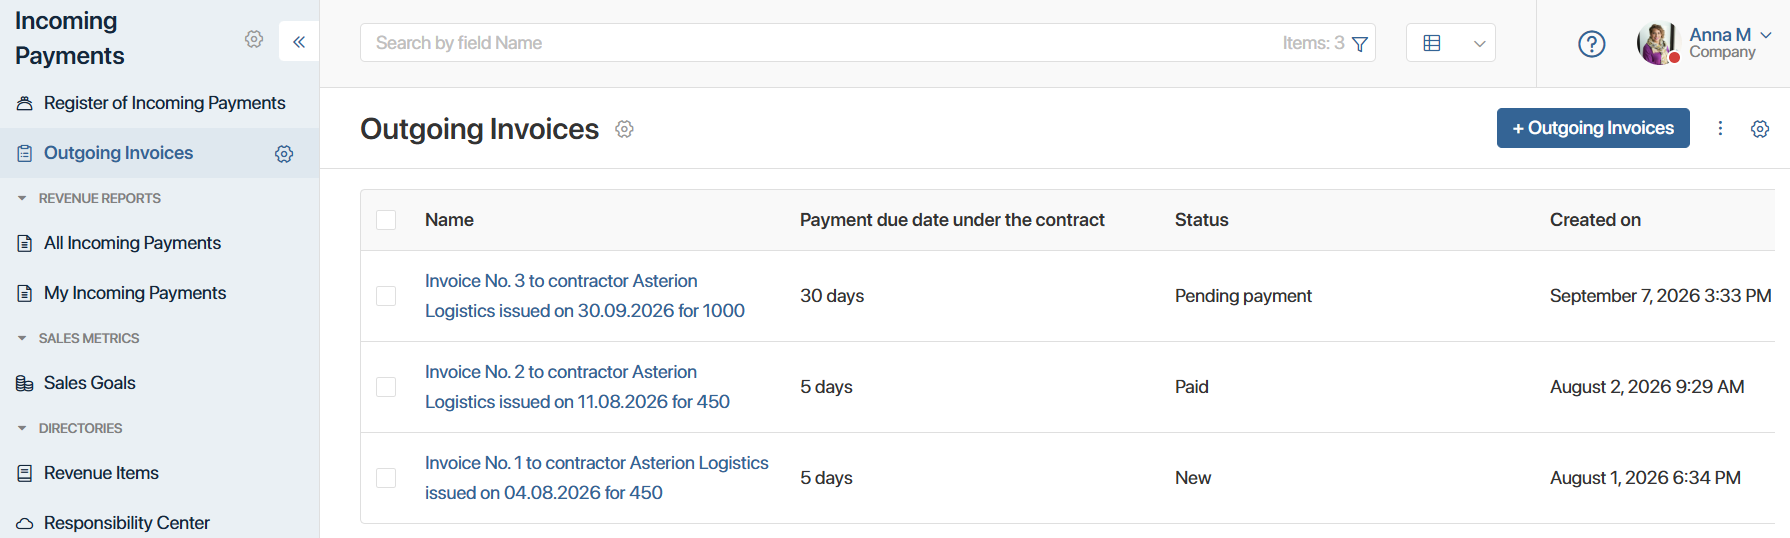
In the table settings, you can choose which app item properties to display, and configure how the data is sorted in the table.
Create an invoice
After creating an estimated payment, add an outgoing invoice to the system that the contractor can use to make a payment. There are two ways to do this:
- From the Outgoing Invoices app.
- From the estimated payment page, on the Invoices tab.
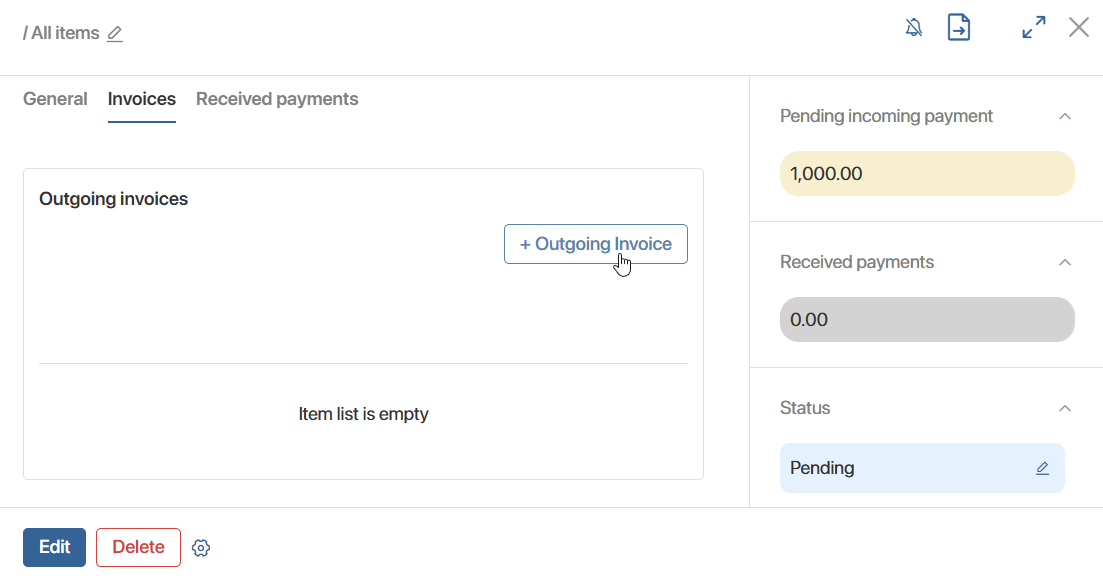
In either case, to create an invoice, click the + Outgoing Invoice button. In the window that opens, fill in the fields:
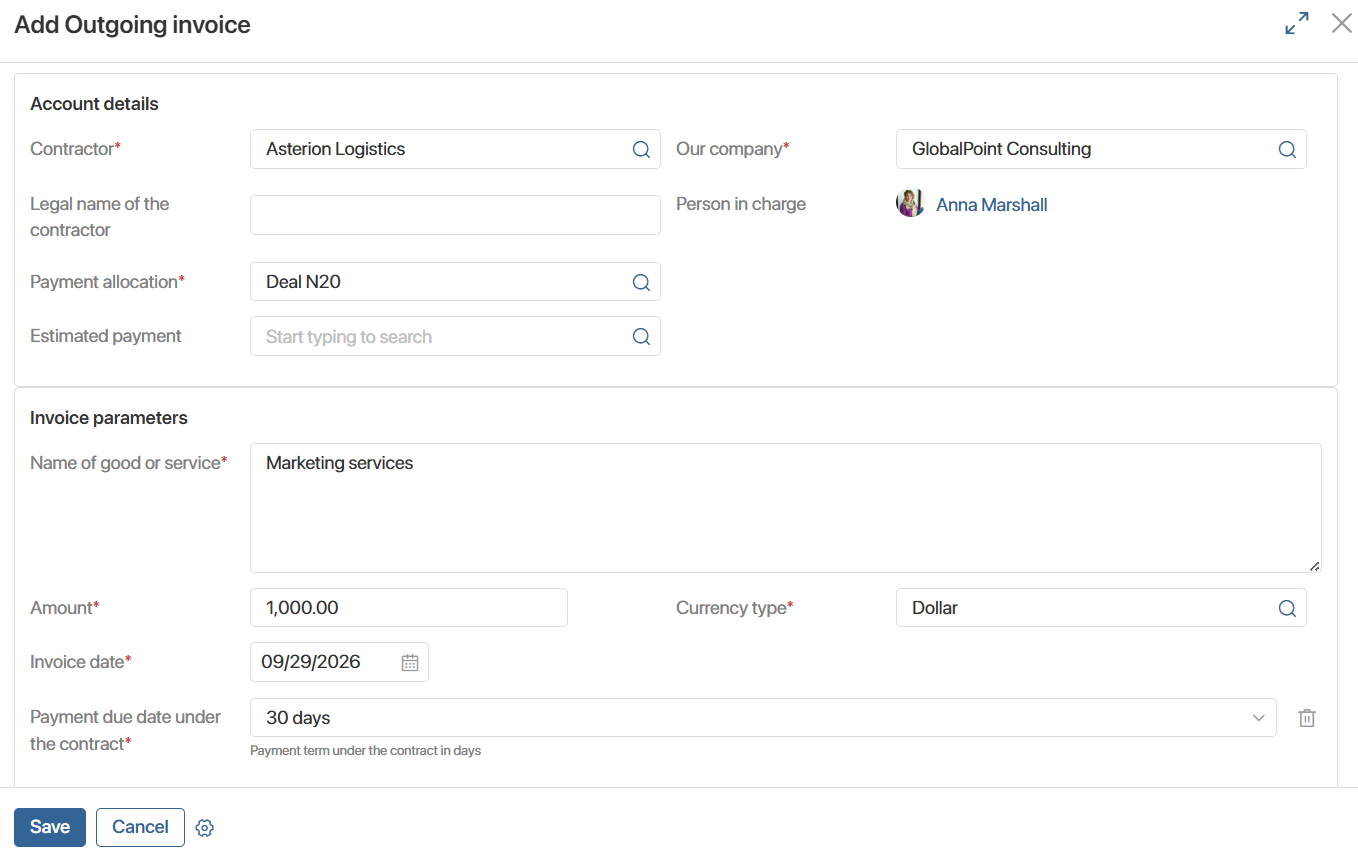
- Account details block. The fields in this block are filled in automatically if the invoice is created from the estimated payment page. If the invoice is added from the Outgoing Invoices app, fill in the fields manually:
- Contractor*. The client from the Companies app that will be invoiced.
- Legal name of the contractor. This field is filled in automatically when you select a contractor. If the contractor's page doesn't specify a legal name, you can enter it manually.
- Payment allocation*. The item from the Payment Allocation app that the invoice is issued for.
- Estimated payment. Specify the estimated payment, created in the Register of Incoming Payments app, that this invoice should be issued for.
- Our company*. Specify the company from the My legal entities system app that is issuing the invoice.
- Person in charge. This field is filled in automatically when you select a payment allocation item.
- Invoice parameters block:
- Name of goods or service*. Describe what the invoice is for.
- Amount*. This field is filled in automatically when you select an estimated payment. You can adjust the amount.
- Currency type*. This field is filled in automatically according to the currency settings. To change the currency, click the magnifying glass icon and select a name from the list.
- Invoice date*. Specify the date the invoice was created.
- Payment due date under the contract*. From the drop-down list, select the payment term under the contract, in days.
- Scheduled invoice payment date. The value for this field is calculated automatically based on the data specified in the Invoice date and Payment due date under the contract fields.
Click Save.
The created invoice will appear in the Outgoing Invoices app, as well as in the estimated payment page on the Invoices tab, with the New status.
Generate an invoice
After creating an outgoing invoice, open its page and attach a file containing the invoice.
There are two ways to do this:
- Click Generate Invoice to automatically generate the invoice based on the entered data.
- Click Add Invoice to add the invoice manually by uploading a file from your computer.
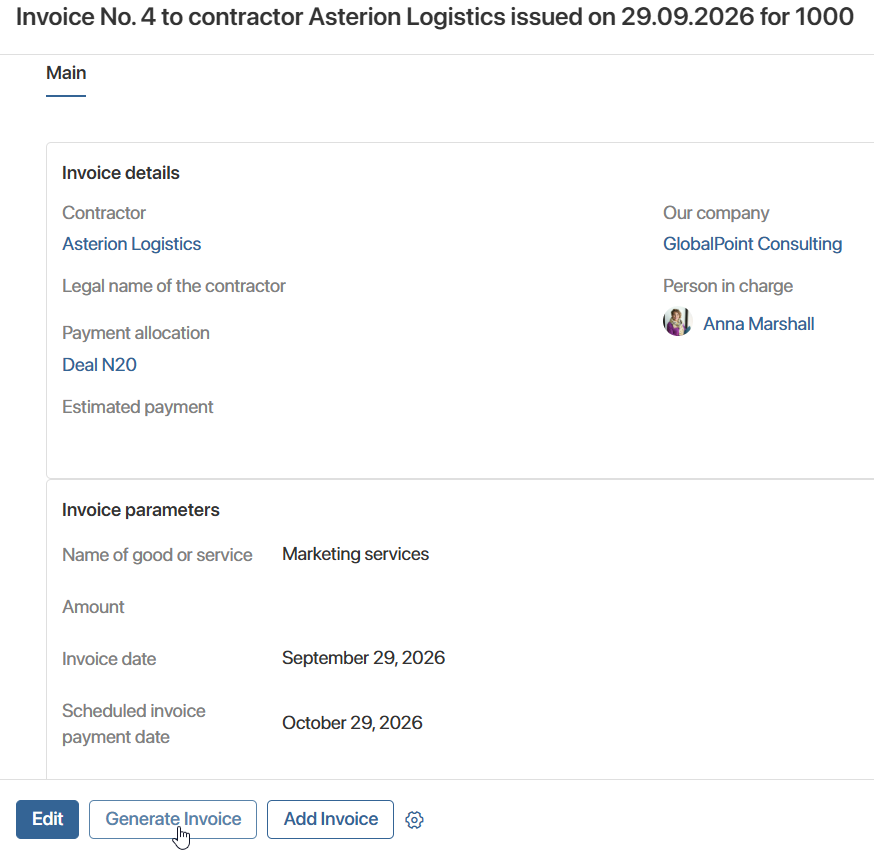
The attached invoice will appear in the item's page on the Invoice tab as a document.
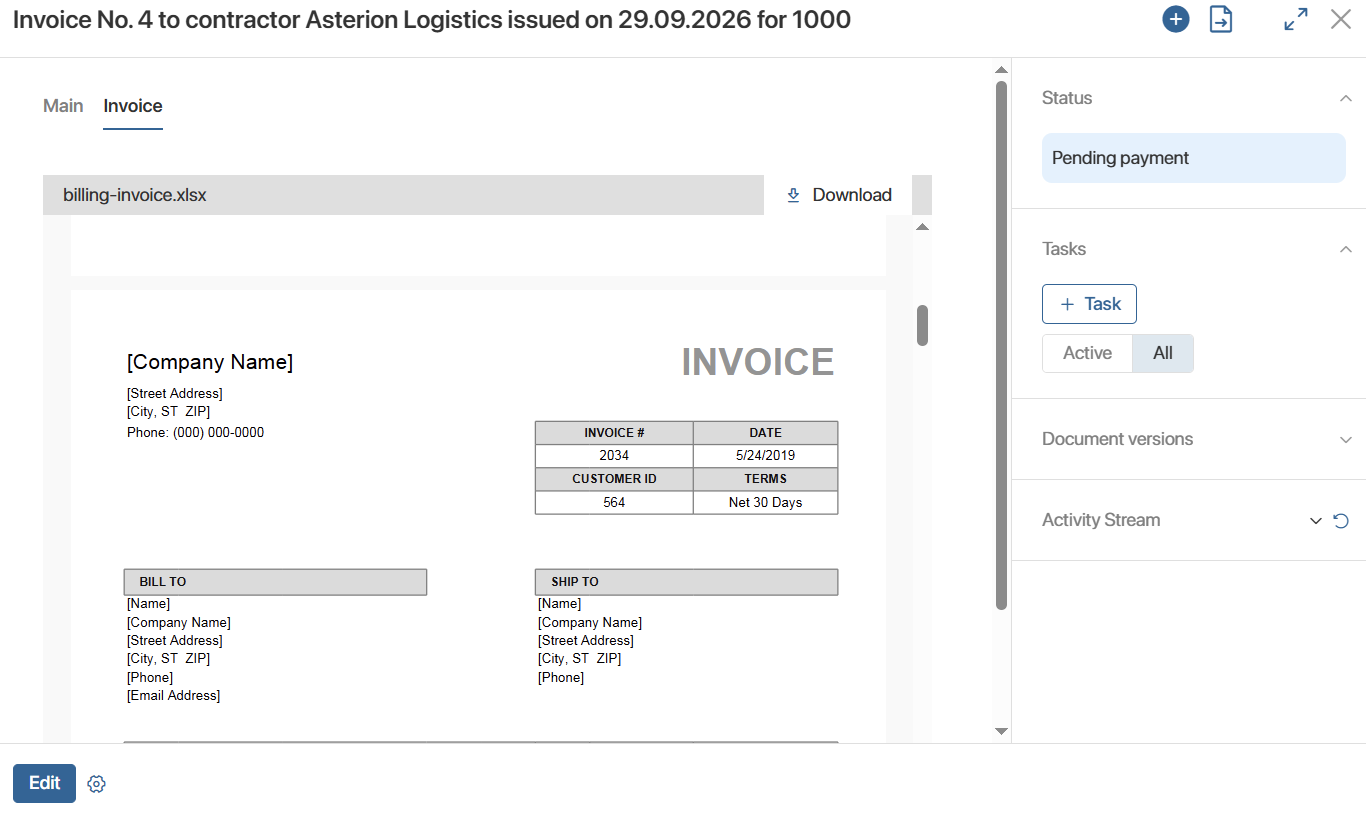
After this, the invoice status will change to Pending payment.
Once the contractor makes the payment, the responsible employee must add a received payment to the workspace and specify the invoice on its creation form. The invoice status will then change to Paid.
Edit an invoice
Users with editing permissions can change the parameters of created invoices. To do this, open the invoice page and click Edit.
You can change any invoice parameter that was entered when it was created.
Note that the file attached to the page isn't updated when you edit the invoice. To add the current version of the document, download and edit the file manually, then add a new version of it to the invoice page.