This article provides a practical guide on creating and configuring an app, which is the core component for data storage and process automation in BRIX.
The system offers three app types for various tasks:
- Standard. For registries and directories.
- Document. For document management.
- Event. For calendars and meetings.
Let's walk through an example of setting up document management in a company:
- Create a Contracts workspace containing three Document apps: Contracts, Addendums, and Certificates.
- Using the Contracts app as an example, configure the fields to display the necessary data in item pages.
- Add app items.
Step 1. Create a workspace and an app
- To create a workspace to group apps related to a single task, go to the home page of the system and in the Build from Scratch area, click Create.
- In the window that opens, enter the workspace name Contracts and select an icon to display in the left menu. Determine the workspace visibility: available to all users or only system administrators.
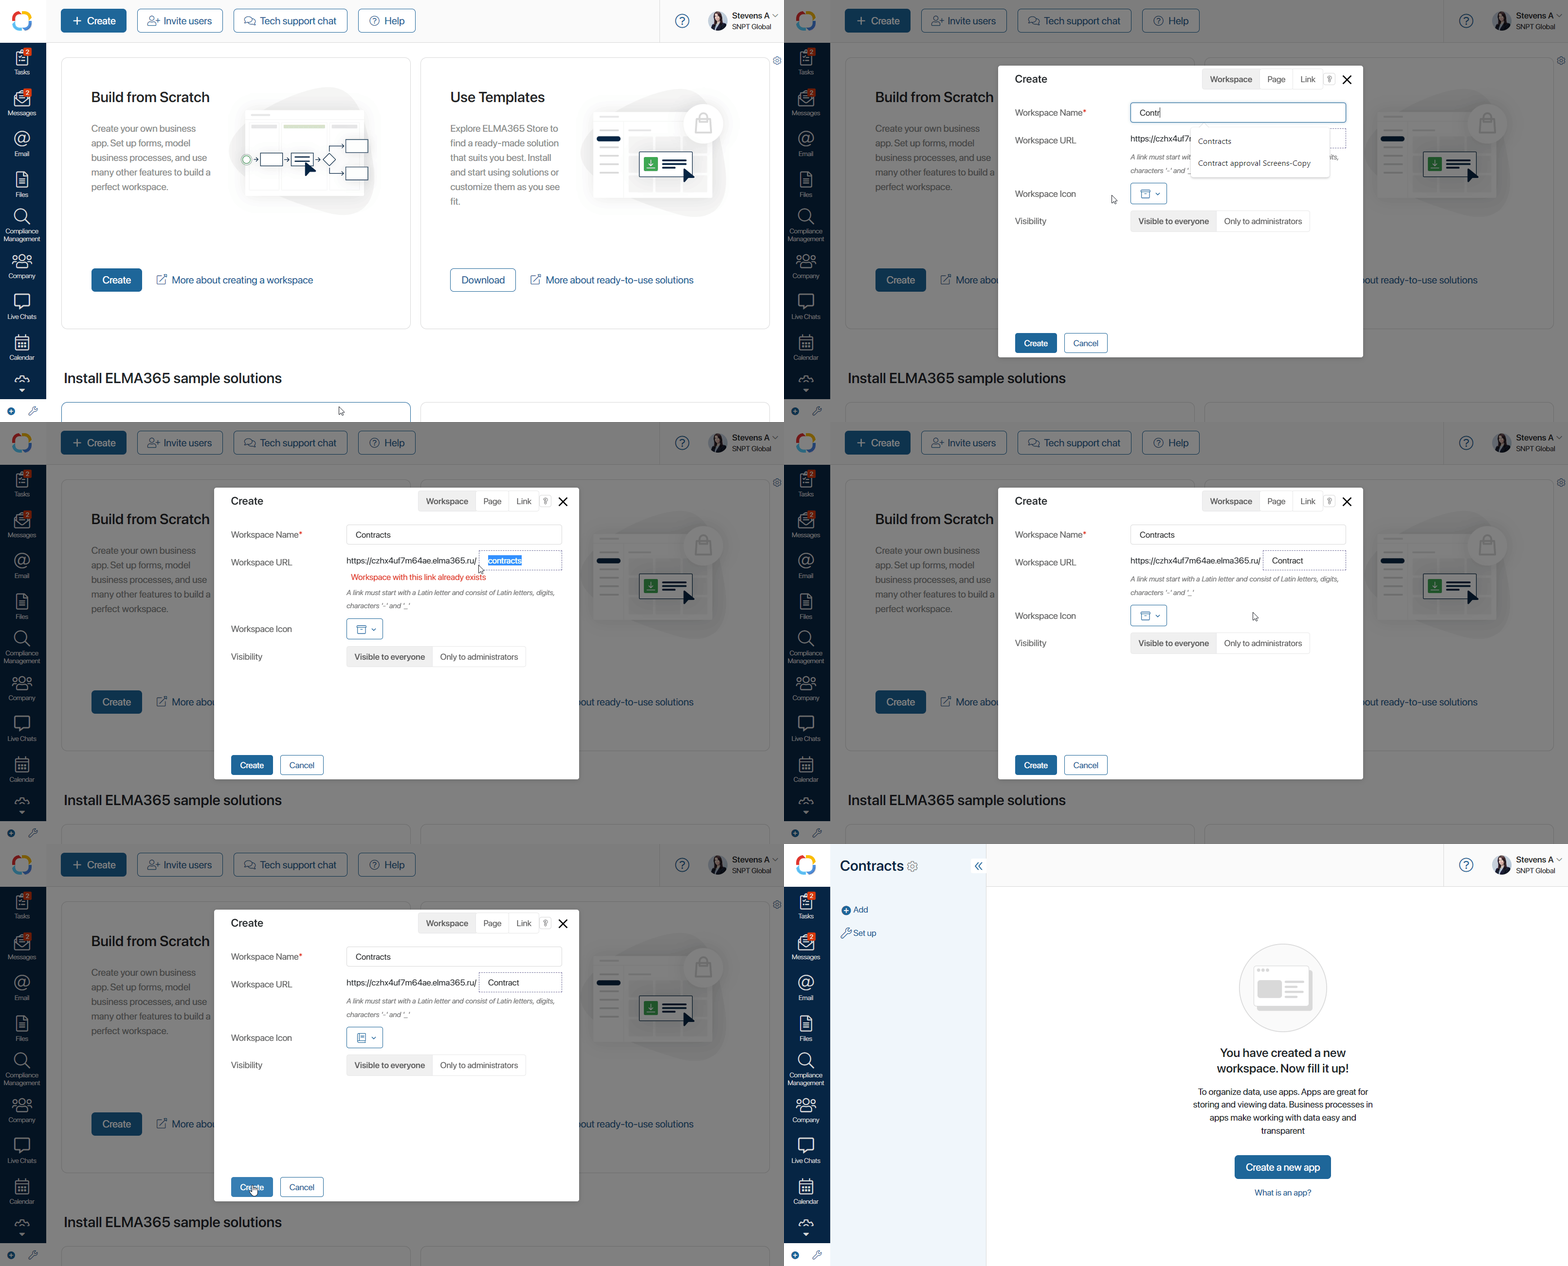
- To add an app, click Create App on the workspace page.
- In the settings window, specify the app parameters:
- Name: Contracts.
- Item names for individual contracts in this example.
- App type. Select Document.
- Visibility in the workspace menu and app icon.
- Method for displaying items on the page.
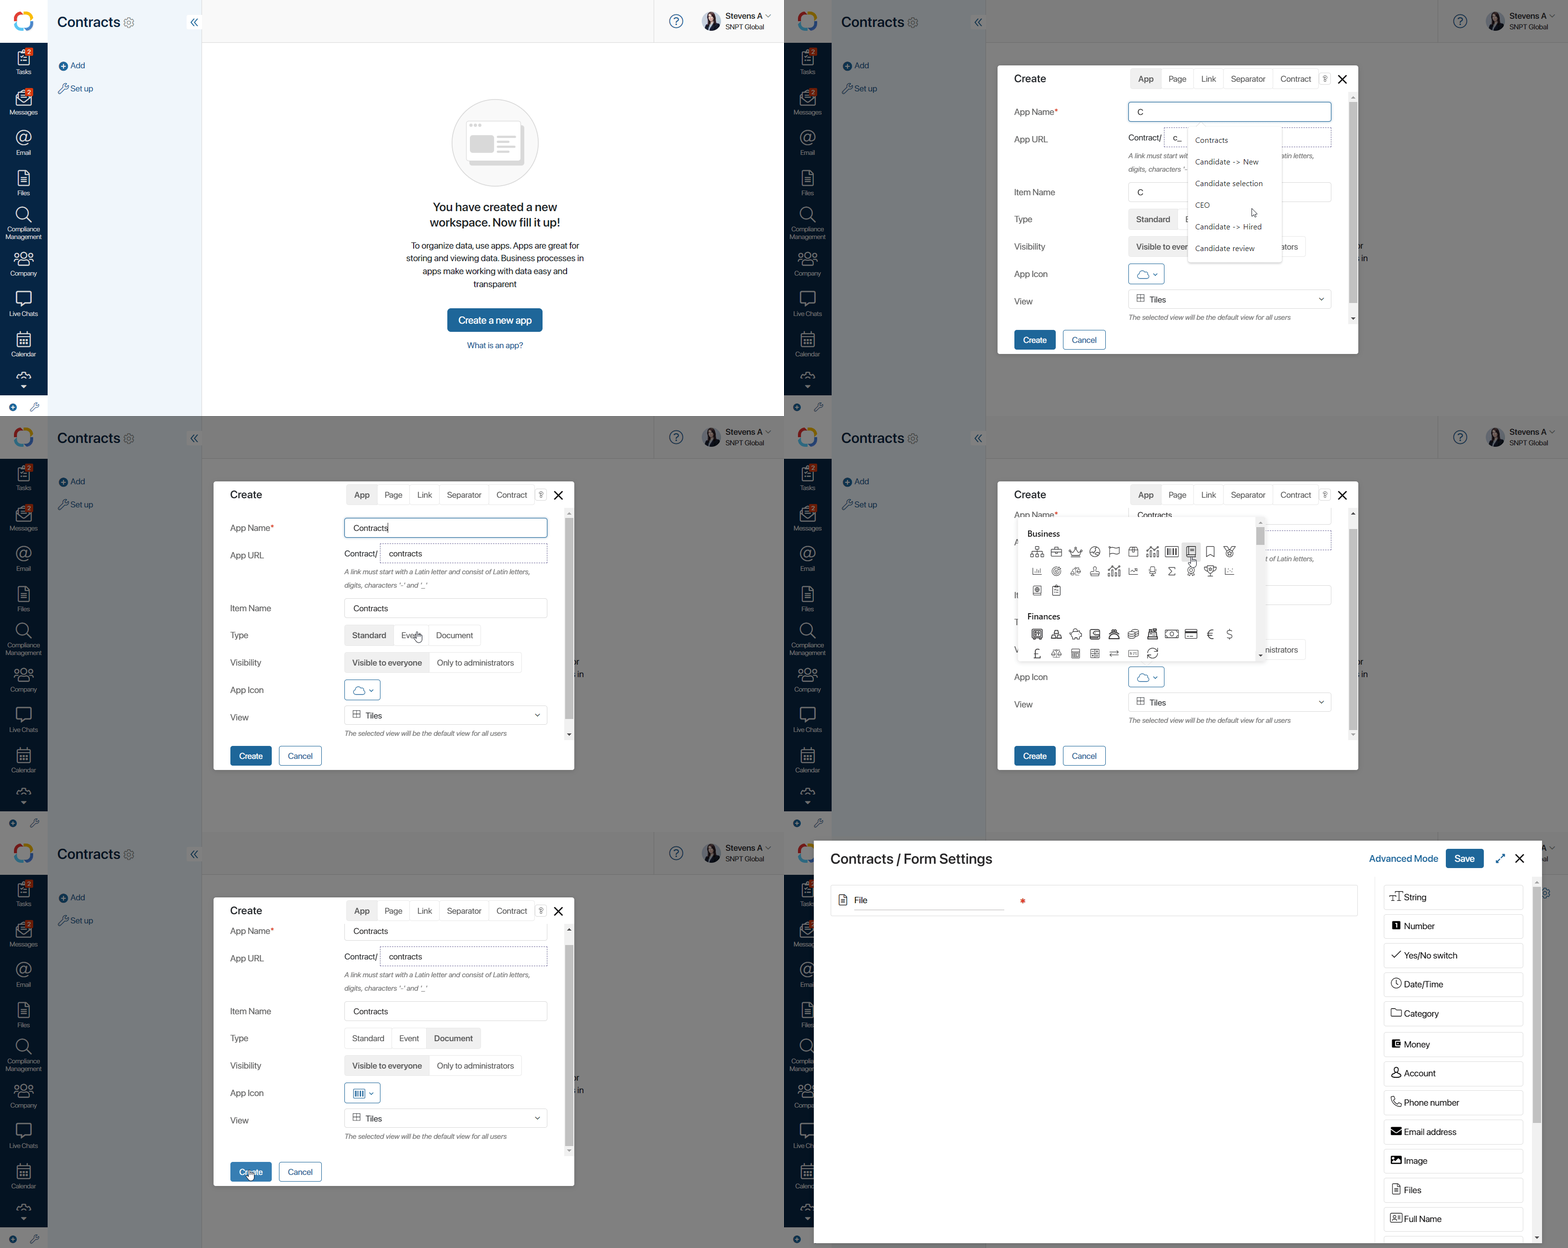
- To save the settings and add the app, click Create.
Step 2. Configure app properties
Properties are contract fields containing information, such as Contract number, Date, and so on. They form the app context. Employees will fill in these fields when creating a document and view this data in the contract item page.
After creating the app, the form configuration window opens, displaying data types on the right panel: Number, Money, Date/Time, and so on.
To configure the context:
- Drag the required property types from the right panel onto the form and name them. For example, add the following fields for the contract:
- Contractor . Property of type App (single). In the property settings, select the app where your business partner data is stored, such as Companies.
- Contract number. Property of type Number (integer).
- Date. Property of type Date/time.
- Contract amount. Property of type Money.
Please note that the Document-type app includes a mandatory field for uploading the file itself, such as a contract. You do not need to add it manually.
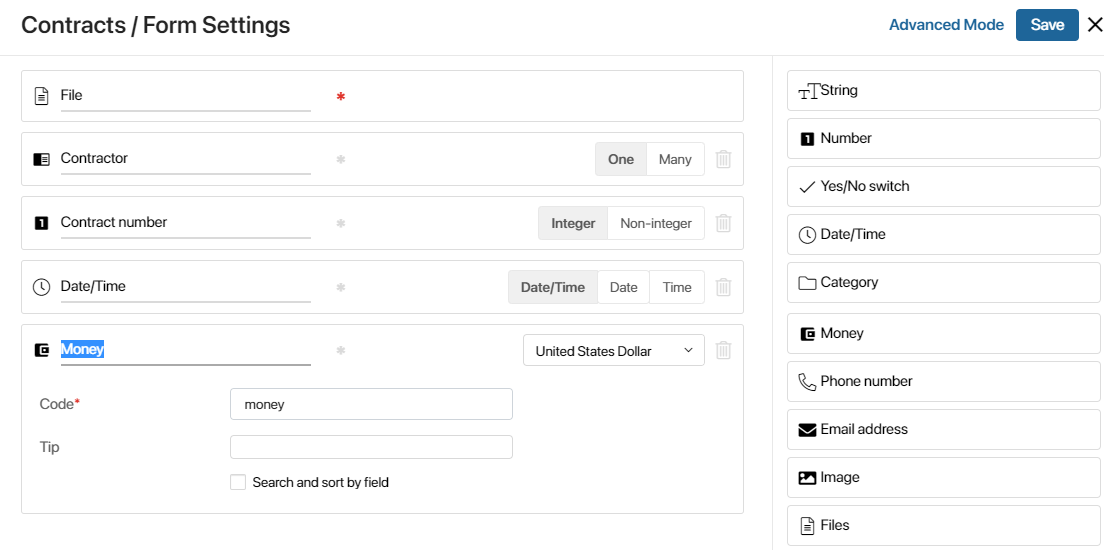
This is the simplest way to configure the context and contract form. However, in BRIX you can configure a form of any complexity using the available low-code designer.
This form configuration method is called advanced mode. In addition to properties, you can drag ready-made widgets onto the form, such as information blocks and pop-up windows. You can combine them, link them together, and connect script-based scenarios. For more details, see Example: Customize an app in the Low-code designer.
- After adding all the properties, click Save.
Step 3. Populate the app with data
To check what an item page looks like in the app, add an item:
- On the app page, click +Contract.
- In the form that opens, fill in the fields added in the previous step: contractor, number, date, and amount.
- Upload the contract file to the designated field. By default, the file name will become the name of the created item in the system.
- Click Save.
The contract item will appear on the app page. All contracts you add in the future will also be displayed here.
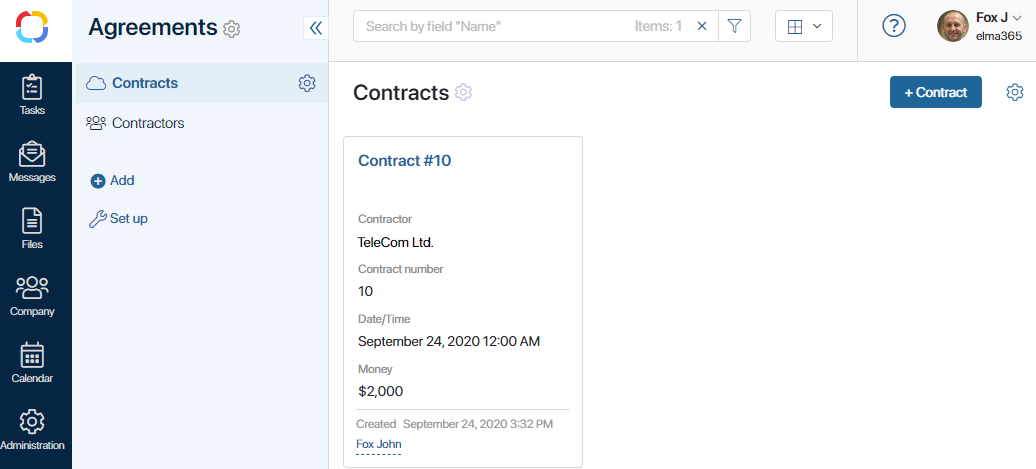
What's next
The app is ready and its data has been added. Next, you can configure other app settings and automate contract processing in the company.
начало примечание
Useful articles:
- Example: Customize an app in the Low-code designer. How to personalize creation, view, and edit forms.
- Naming app items. How to set a custom record name template.
- Manage app item views. How to choose how data is displayed on the app page.
- Example: Associate a process with an app. How to set up sending contracts for approval.
конец примечание