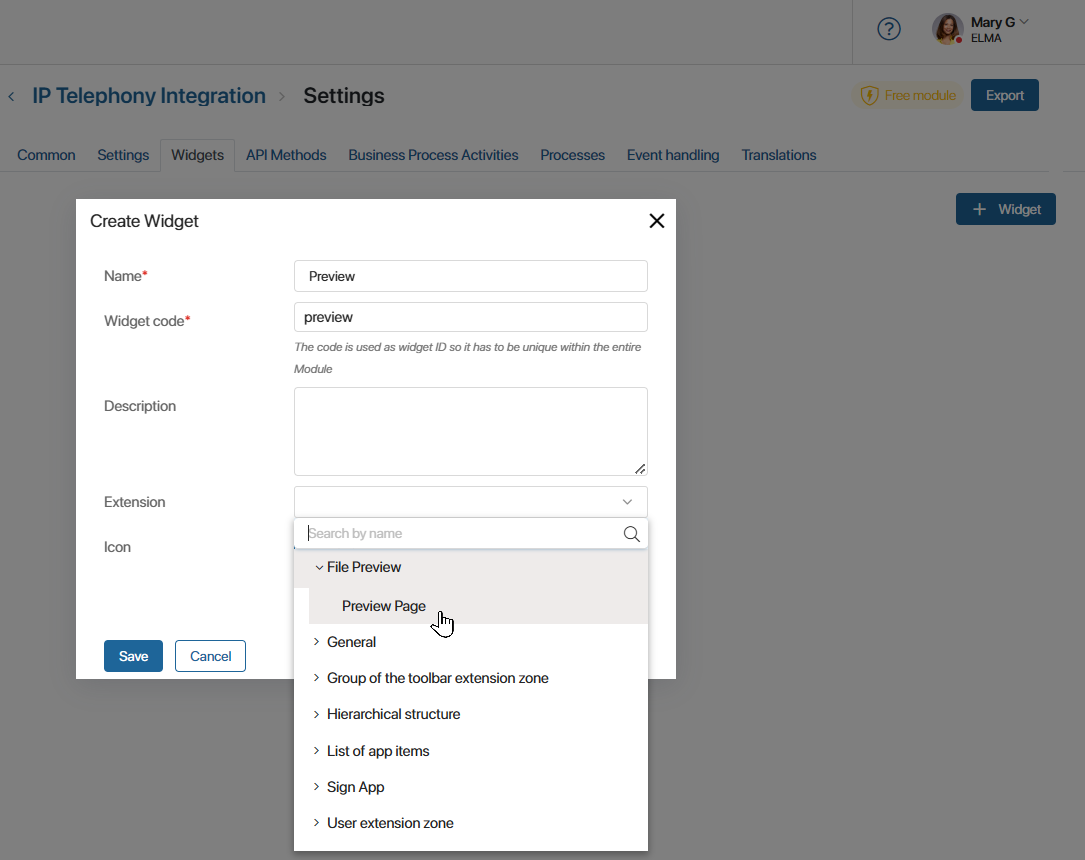
As a part of a module, you can create custom widgets to use them on forms of business processes, apps, workspace pages, and more. It is available in the interface designer. You can place the widget on forms, change its settings, and reuse it like any system widget. You can hide a custom widget from the right panel of the interface designer. Additionally, it becomes unavailable when the module is disabled.
You can also create widgets specifically for a particular module to make its interfaces more user-friendly and understandable for users.
To create or edit a widget:
- Go to Administration > Modules.
- Hover the mouse over the module and click the gear icon.

- Go to the Widgets tab.
- Click +Widget. In the opened window, fill in the fields:

- Name*. The name of the widget.
- Widget code*. A unique identifier required to refer to the widget in the module.
- Description. A description of the widget’s functionality and features.
- Extension. Select the widget extension zone that corresponds to its functional purpose. If the widget to be created does not belong to any of the available zones, leave the Extension field blank.
- Icon. A graphic symbol of the widget that helps users to find the desired widget faster.
- If all fields are filled in, click Save. This will open the interface designer where you can configure the new widget. To make it available to users, click Save and Publish in the interface designer.
All created widgets are displayed in the module settings on the Widgets tab. You can change the parameters specified during its creation: name, icon, extension, etc. To do this, click the three dots icon next to the widget in the list and select Edit.
To remove a widget from the list, check the box, click the Delete button that appears, and confirm the action.
Found a typo? Select it and press Ctrl+Enter to send us feedback