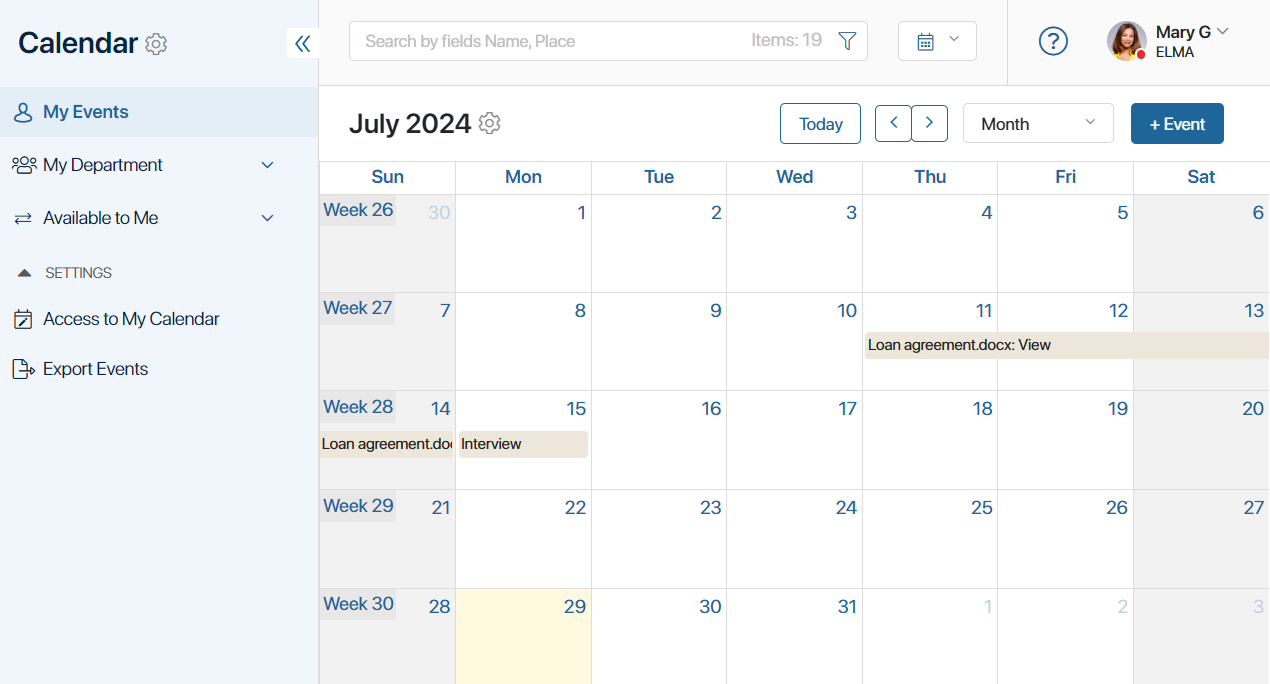
The personal calendar displays all scheduled events of a user including those from app calendars.
A user can create simple and reccurring events, edit and close them, and customize notifications.
Create an event
There are two ways to create an event in a personal calendar:
- Double-click on a cell in the calendar
- Click on the +Event button in the top-right corner of the page.

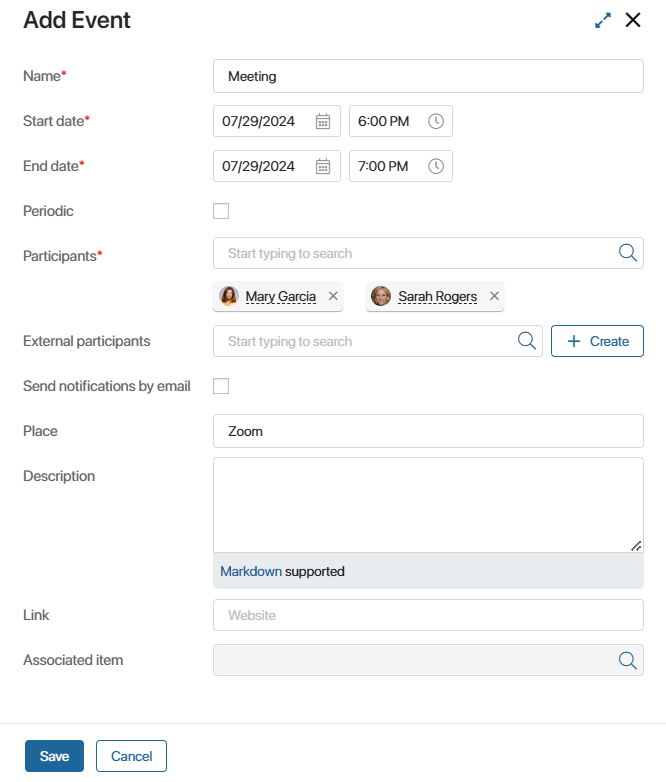
The event form opens. Fill out the fields:

- Name*. Enter a name for your event.
- Start date*, End date*. Enter a date or click on the
 icon and specify the start and end date of the event. Similarly, specify the time.
 - Periodic. Check this option if you want the event to repeat on a regular basis and set the following parameters:
- Frequency. Select how often the event should repeat: on business days (according to the Business Calendar), daily, by weeks, by months, quarterly, or annually.
For example, to have the event repeat on the second Monday of each month, specify Repeat every 1 month, and then specify the desired day of the week:

You can also create an event that repeats on a specific day of the month. For example, once every four months on the 10th of the month:

- Frequency. Select how often the event should repeat: on business days (according to the Business Calendar), daily, by weeks, by months, quarterly, or annually.
Let’s consider another example. Suppose you want the event to repeat once every two weeks on Mondays and Wednesdays. In this case, set the following parameters:

- End. Set the date that the periodic event should stop repeating. If you leave this field empty, the event will repeat until you edit the page and set an end date.
- Participants*. By default, the field specifies the current user. To add another user, select them from the drop-down list. All selected users will see the event in their personal calendars.
- External participants. Select an item in the Contacts app to specify a client participating in the event. Use the +Create button to add a new contact to the app.
- Send notifications by email. Enable this option so that after the event is created, all participants will receive an email notification about it. The email will contain an .ics file with the details of the event. Notifications will be sent to the email addresses specified in the contact’s page in the Work email field, as well as in the BRIX user profile.
- Place. Specify where the event will take place.
- Description. Provide information about the planned event.
- Link. Insert a link related to the event, such as an invitation link to an online meeting.
- Associated item. Select the app item associated with the planned event. For example, when creating a meeting with a client, you can specify a deal in the event, and when discussing a contract, you can specify a file.
Click Save.
After that, the event will be added to the calendar.
If you try to create an event on a date and time that was previously reserved for another event, you will see a warning about this.
View event details
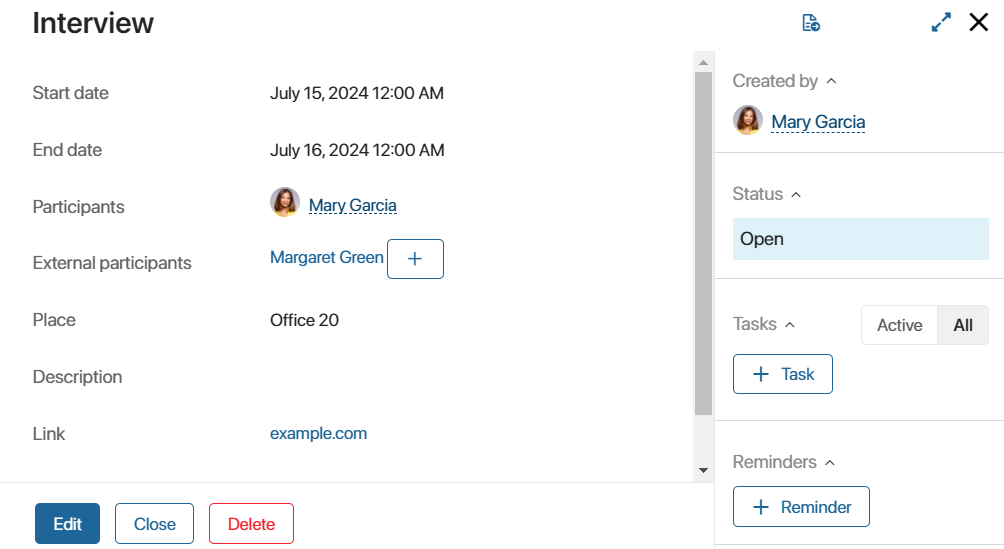
Select the event in the calendar and click on it. The event page opens.

Here you can review the event details and edit them by clicking Edit, or delete it. When deleting a recurring event, a window will open where you should choose whether to delete the entire row or the current item. The deleted event will disappear from the calendar cell.
You can also set up an event reminder that will be sent to your activity stream as a notification. To do this, click the +Reminder button and specify the date and time in the field that appears.
Reschedule an event
There are two ways to reschedule an event:
- Click Edit on the event page and change the dates manually.
- Drag the event to another cell in the calendar. If you are using a weekly or daily calendar, you can change the time in 15-minute increments. In a monthly calendar, you can only move the event to a different date and the time will remain the same.
If the Send notifications by email option is enabled in the event, all participants will receive a notification with the edited event details.
Event statuses
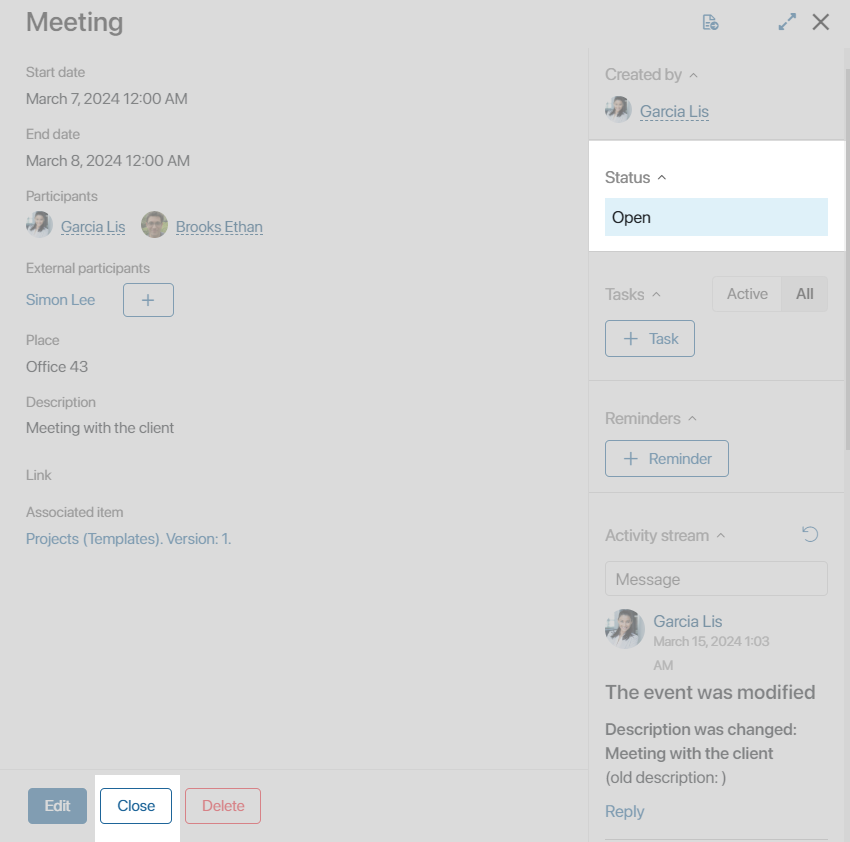
An event in a personal calendar has two default statuses: Open and Closed. When the event is created, it is given the Open status. To change it, open the event page and click Close.

The status will change and the event itself will be crossed out from the calendar.
The deleted event is also given the Closed status but is not displayed in the calendar.
Tasks for approval and information in the calendar
By default, the calendar will display the tasks for information and approval assigned to you with a due date. To avoid overloading the calendar, disable the corresponding options in your user profile on the Document Management tab.
Found a typo? Select it and press Ctrl+Enter to send us feedback