In a business process, you can track the movement of items along a route by configuring statuses. This allows employees to see the current state of the process instance and its execution stages.
This article covers creating a status list, placing automatic status management activities on the process diagram, and configuring a Kanban board for visual monitoring.
As an example, let's configure statuses in the Contract approval process. Its creation and configuration are described in Example: link a process to an app.
Step 1. Create statuses
Statuses determine the current stage of a document's lifecycle. First, define the list of these stages in the settings:
- Go to the process designer and click the Statuses tab on the top panel.
- Select the checkbox next to Add Status field.
- Add statuses sequentially; for example, create the following stages for a contract: New, Approved, Signed, and Registered.
- Specify the final status, which indicates that work on the item is fully completed. There can be several such statuses. In our example, this is the Registered status.
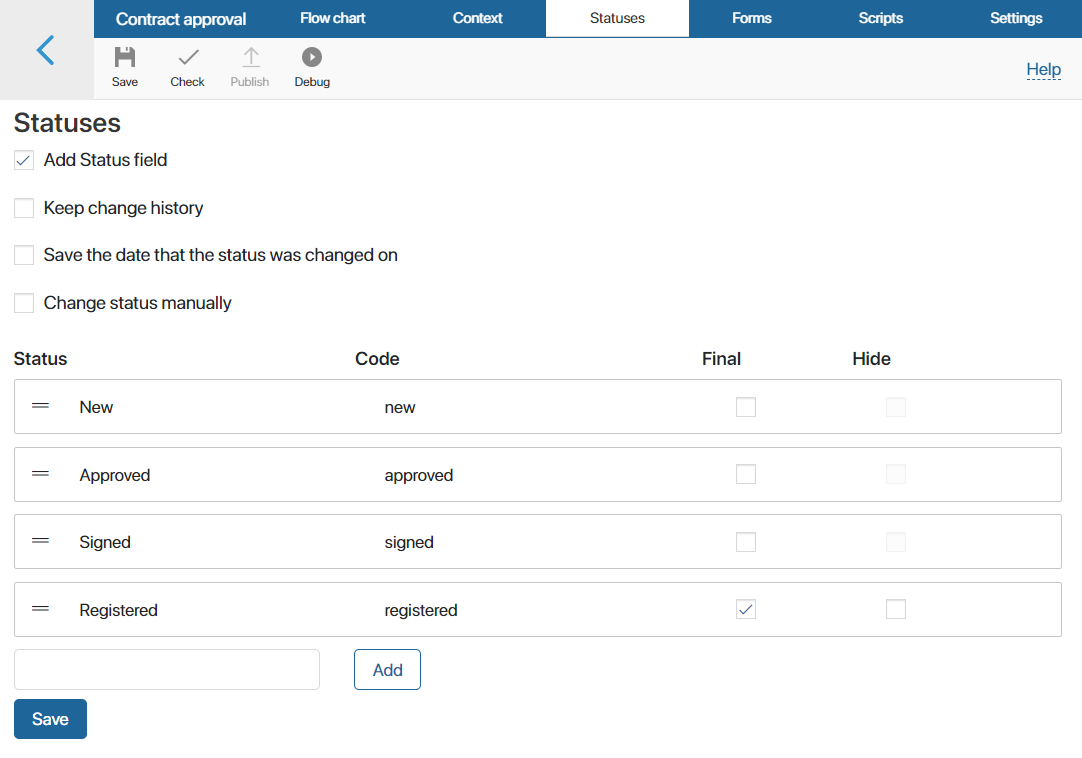
- Save the settings.
Step 2. Configure status changes in the process
Next, you need to set up automatic status changes for items along the route. To do this, special graphic activities are placed on the diagram:
- In the process designer, return to the Flow Chart tab. On the right toolbar, open the System Elements tab, and then drag the Manage Status activity onto the process diagram.
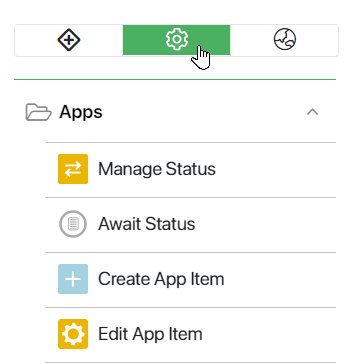
- Place the activity in the part of the process where the contract should change its status.
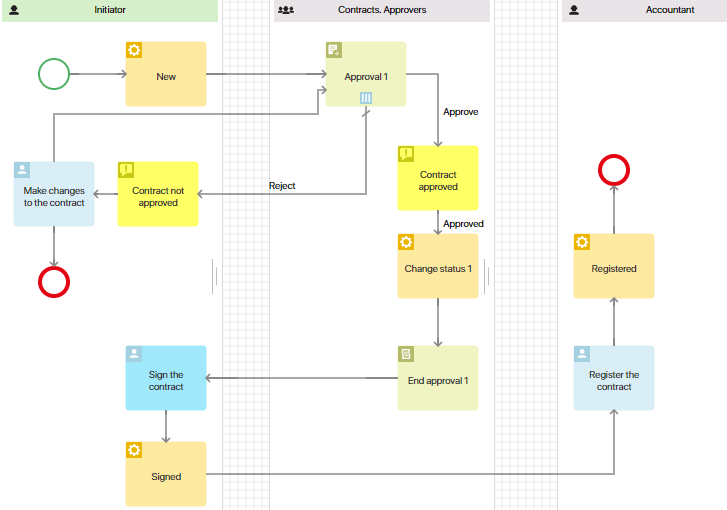
Suppose that the process we created earlier includes an additional step: signing the contract. Only after this step will the document be sent for registration. Let's place statuses at the following points in the process:
- Immediately after creation: the New status.
- After approval: the Approved status.
- After signing: the Signed status.
- After the registration task: the Registered status. This will be the final status.
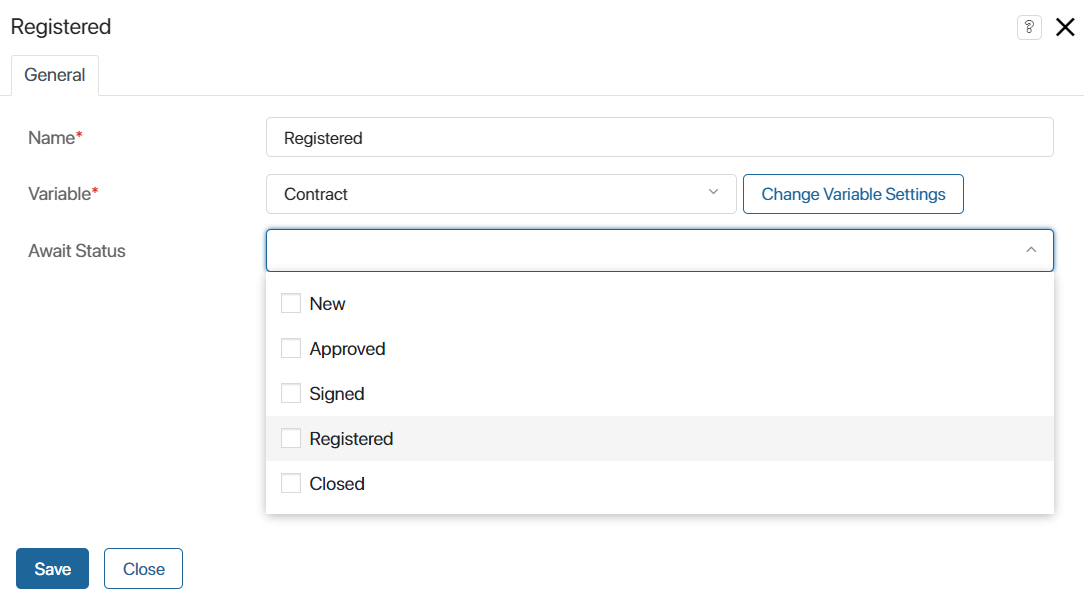
- In the settings window of the activities, determine which status will be assigned to the item at each stage of the process.
- Connect all added activities with connectors, and then save and publish the process.
Now the contract statuses will change automatically as the item moves through the process steps.
Step 3. Configure the Kanban board to monitor stages
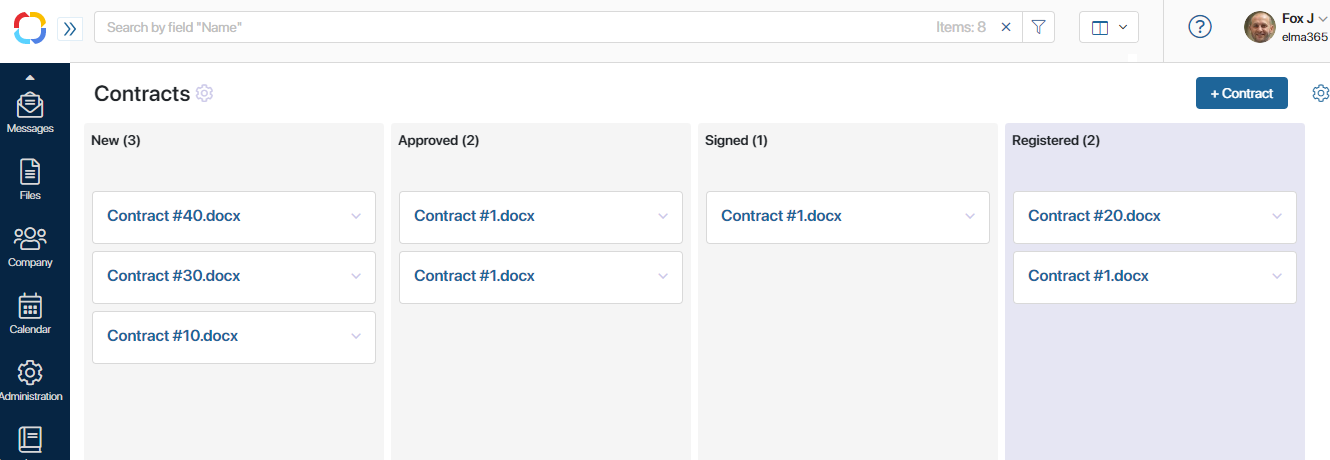
To track item movement through the process, the app provides a Kanban board view. Each column on the board corresponds to a configured status. Columns with a final status have a distinct background color. As the process progresses, the item will automatically move across the board.
Let's look at how to make the Kanban board as informative as possible.
- Go to the Contracts app page. After adding statuses to the process, all contracts are displayed on the Kanban board by default.
- In the upper-right corner of the page, click the gear icon and select Board Settings.
- In the window that opens, you can configure board display parameters such as column width, sorting settings, visibility of sums for specific fields, and more. You can also select the app fields to display on the board cards. In our example, let's enable the following options:
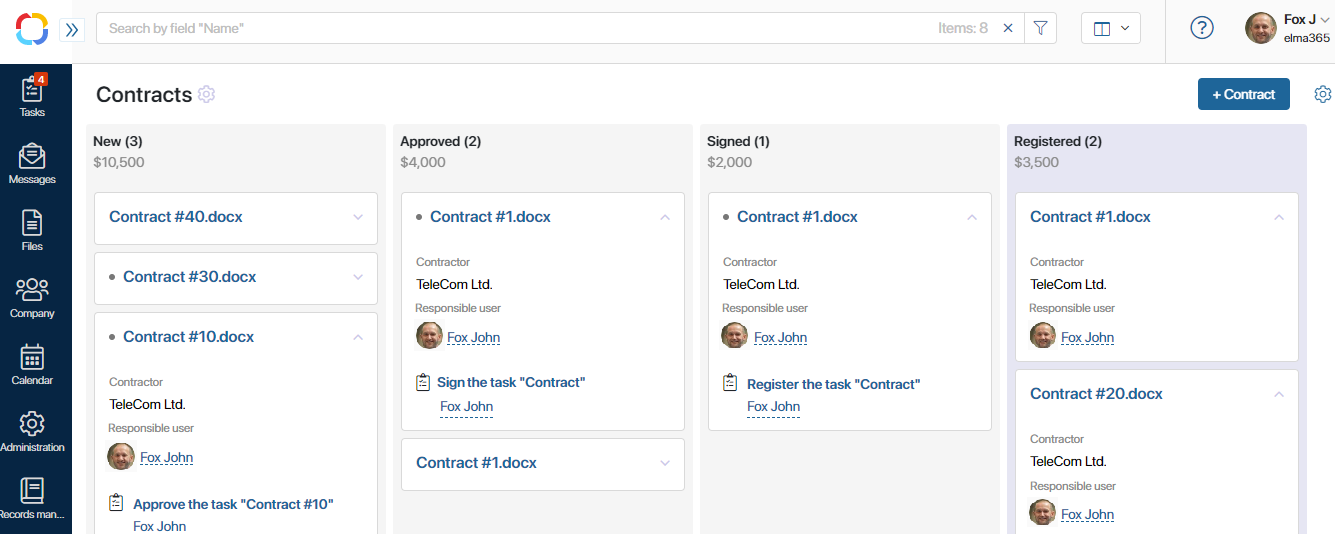
- Expand item. To display expanded cards on the board with current tasks and item properties.
- Show tasks. To display the list of process tasks and execution color markers. For example, if tasks in a business process have deadlines, an overdue task is highlighted in red, and a red dot appears on the card.
- In the same window, select the contract properties that should be visible on the card, such as the counterparty and the responsible person.
- Save the parameters.
A Kanban board with these settings will look as follows:
What's next
Process stage monitoring is configured. Users will be able to view statistics on contract work, such as how many documents are currently approved, signed, or registered.
начало примечание
Useful articles:
- Status field. How to create statuses in an app and configure manual changes.
- Manage Status. How to configure the status change activity on a business process diagram.
- Kanban board. How to correctly use Kanban and what settings to apply.
- Example: Create an app and set up its properties. How to configure summary analytics for contract work.
конец примечание