In standard apps and apps of the Document type, you can track app items on a Kanban board. Each column corresponds to an item status.
By default, one Kanban board is available when configuring statuses. If your process for working with app items is more complex, a single board might not be enough. For example:
- The app handles different item types, each requiring its own set of statuses. For instance, a Requests app that stores incidents, service requests, and internal inquiries.
- An item moves through a multi-stage process with distinct statuses at each stage. For instance, an Equipment app with separate statuses for the Procurement, Operation, and Maintenance stages.
In these cases, you can enable and configure the Status Groups in Apps tool. For each group, the system administrator creates a separate Kanban board with its own set of statuses. The administrator can name these boards, set up visibility permissions for specific users, and add actions triggered by status changes.
Users can switch between Kanban boards using tabs in the app left menu.
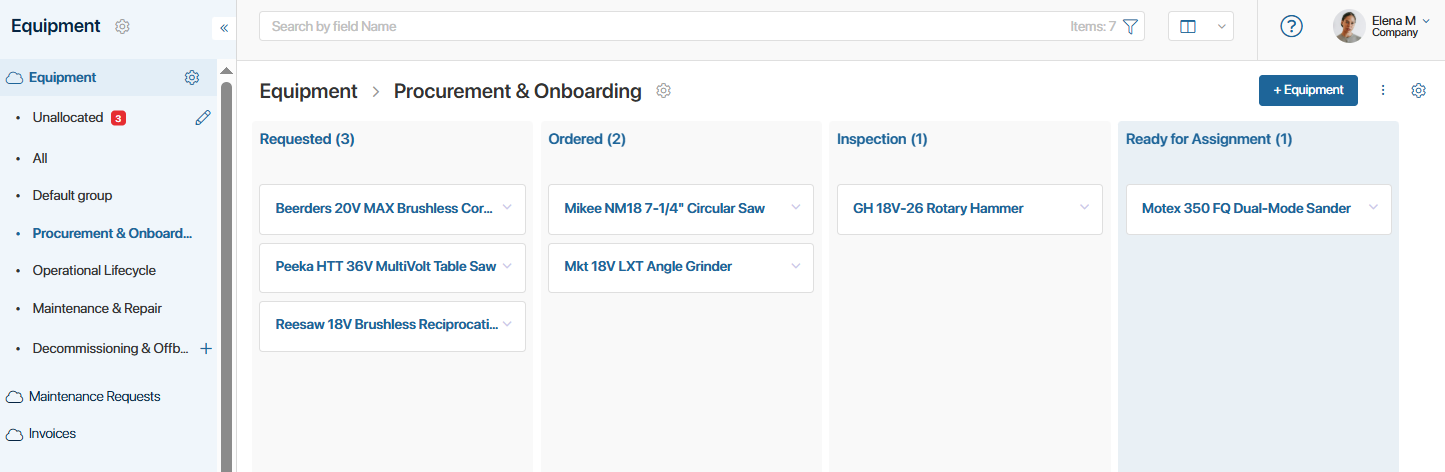
Enable the Status Groups in Apps tool
Setting up multiple Kanban boards in apps using status groups is available starting with release 2026.7. Using this tool requires enabling a separate server license. To learn more about activation, see Tool licenses.
In release 2026.6, SaaS environments allowed configuring status groups in apps in trial mode. Any groups created during the trial will continue to work. To edit them or create new status groups, activate a paid license for this tool.
Enable status groups
By default, status groups are disabled in app settings. To set up multiple Kanban boards with custom statuses:
- In the app settings, select Status Field.
If statuses have not been configured yet, enable the Add Status field option and create at least one status. - Enable the Use status groups option.
Once enabled:
- All existing app statuses will be grouped into a default status group that cannot be deleted. You can rename this group and edit its statuses.
- In the business process designer, the Statuses tab for this app will become unavailable. You can create and edit statuses only in the settings of the corresponding status group.
- Two system pages will appear in the app left menu:
- All: Displays all app items in a table view.
- Unassigned: Displays items that do not belong to any configured status group.
Add a status group
After enabling status groups, add a new group using one of these methods:
- In the app settings, select Status Field and click Add Status Group. Enter a name and click Save.
- In the app left menu, click the gear icon next to Unassigned and select + Add Pipeline. In the window that opens, enter a name and press Enter.
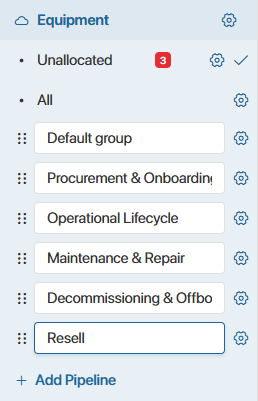
Users with access to the status group will see Kanban boards in the order the groups are listed. You can change this order by dragging and dropping them.
Set up a status group
Step 1. Go to group settings
Open the status group settings using one of these methods:
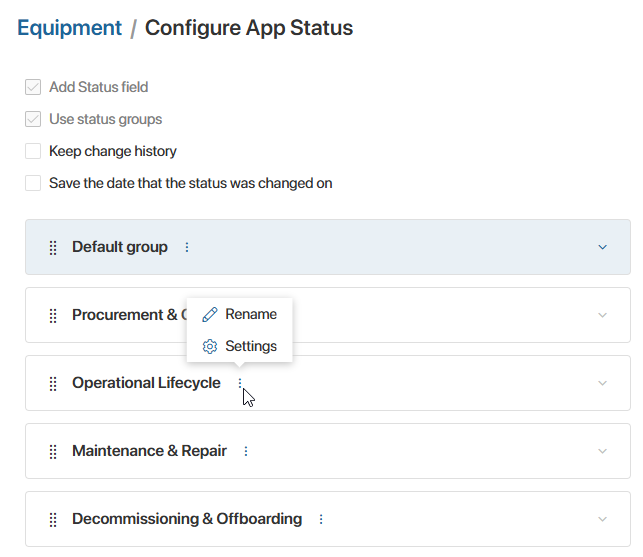
- In the app settings, go to Status Field, click the three dots icon next to the required group, and select Settings.
- On the status group page, in the upper right corner, click the gear icon and select Pipeline Settings. This section allows configuring statuses for the selected group.
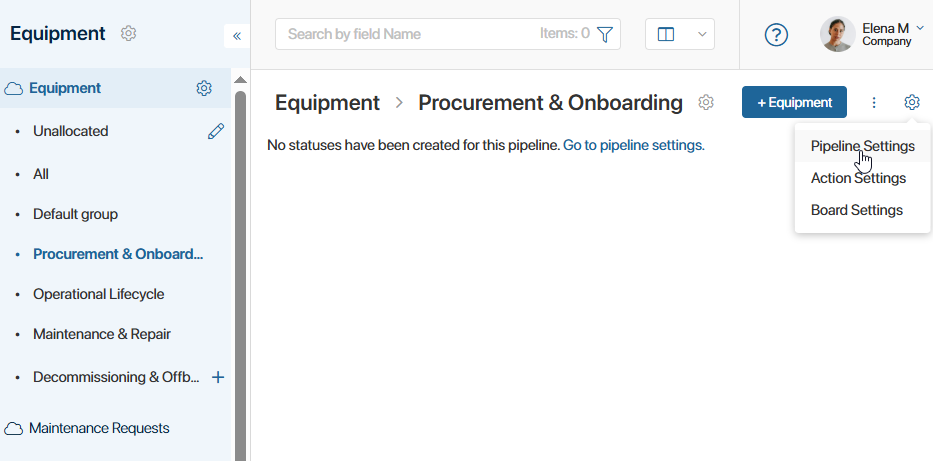
If no statuses exist yet, click the Go to pipeline settings link.
Step 2. Set up statuses
On the opened page, create and configure statuses:

- Click the plus icon to create a status.
- Click the pencil icon to edit the name or code of a status.
- Drag a status to change its order.
Step 3. Set up status change action
You can select an action that will execute automatically when an app item status changes. This is configured the same way as in lead pipelines or deal pipelines.
Step 4. Allow manual status changes
Statuses can be changed:
- Automatically during a configured business process.
- Manually using one of these methods:
- From the item form using the App Item Status widget or the Change Status button.
- By dragging and dropping items on the Kanban board.
To learn more about ways to change statuses, see Status field.
By default, manual status changes are disabled in status group settings.
If you want to allow users to change statuses manually from item forms using the widget or on the Kanban board, enable the App status can be changed manually option in the status group settings. This option is configured separately for each group, so you can enable manual changes in one group while leaving it disabled in another.
Once enabled, the Transitions field will appear in the individual settings of each status. You can specify which target statuses users can manually transition an item to from its current status.
Step 5. Configure individual status settings
Click the gear icon next to a status name. In the window that opens, you can:
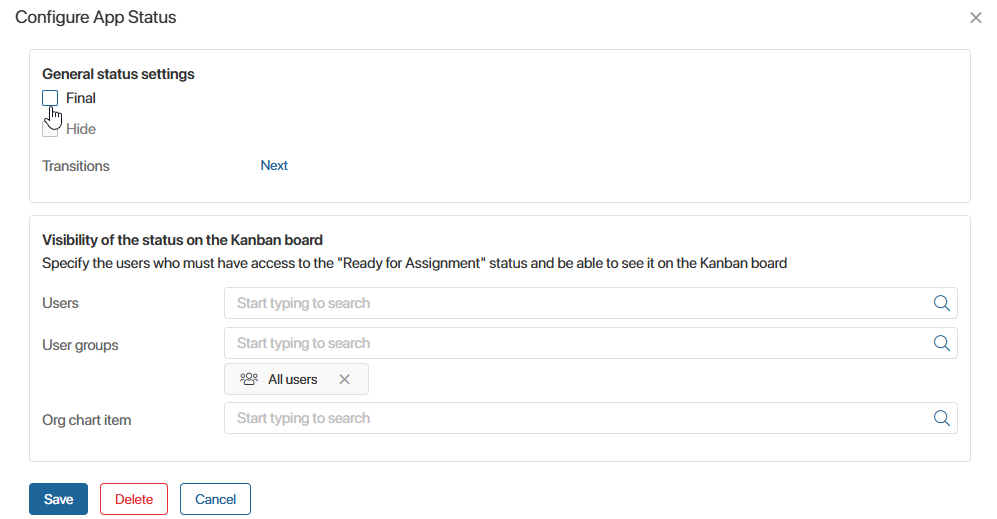
- Mark final statuses. These complete the item lifecycle within the current group. Final statuses can be hidden from the Kanban board or kept visible.
- Configure transitions. If the App status can be changed manually option is enabled for the group, the Transitions field will be displayed. Specify which target statuses users can manually transition an item to from its current status.
To change statuses automatically, set up a business process that moves the app item from one stage to another. - Configure status visibility. Specify users, groups, or organizational chart elements that can see the column for this status on the Kanban board.
Note that app items with hidden statuses remain visible to all users when using the table view.
Save the status settings.
Configure visibility of status groups in the app left menu
By default, all users can see the system pages Unallocated and All, as well as Kanban boards created using status groups. You can restrict their visibility.
To do this:
- Go to the page of the app where status groups are configured.
- In the left menu, click the gear icon next to Unallocated.
- Click the gear icon next to the required tab and select Visibility Settings.
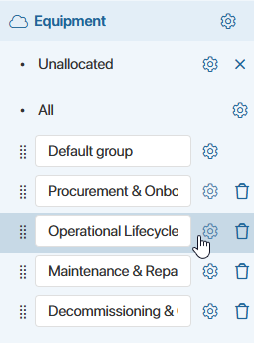
- In the window that opens, define who can see the selected tab in the app left menu. Specify system or custom groups and roles.
Delete a status group
The All and Unallocated pages, as well as the default status group, cannot be deleted.
You can delete custom status groups if they contain no app items. To do this:
- Click the gear icon next to Unallocated.
- Click the gear icon next to the tab you want to delete and select Delete Pipeline.