This widget is used for working with table-based approval routes and is placed on app creation and editing forms. With this widget, users can configure an approval route: create stages, set their type and sequence, assign approvers, and remove unnecessary steps.
For more information about using the widget, see Work with table-based approval routes.
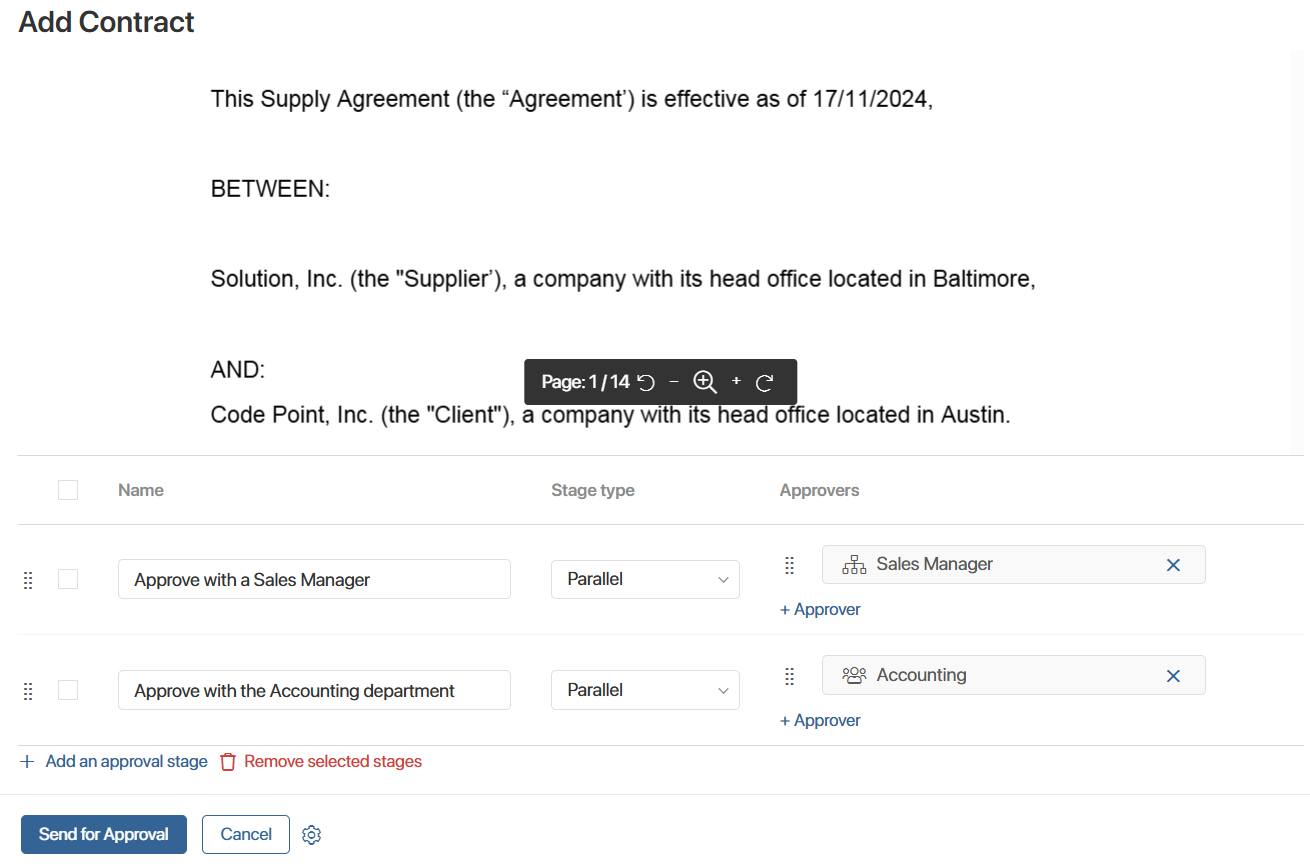
The widget can be placed:
- On app creation and edit forms so employees can configure the route when adding or modifying an item.
- On the app view form to review the route settings defined during creation or editing, for example, before launching the approval process.
- On a task form in a business process so employees can:
- Configure the route.
- Review the route being used.
To send an item for approval along a specific route, use the Approval Route activity in the business process. For a detailed overview of all stages of creating and executing a route, see the Initial setup for working with table-based approval routes article.
Configure the widget
- Open the app form in the interface designer.
- Place the Approval Routes widget on the modeling space where you want to display the table-based route table.

- In the widget settings, on the Main tab, fill in the fields. The available options depend on where the widget is placed:

- On an app form. In the App item field, select App item. The widget will display the approval route of the current item.
- On a task form:
- App item. Leave this field empty.
- App item from context. Select a property that references the app whose item is being sent for approval.
- View only. Enable this option to prevent the route from being edited. For example, if the route was set earlier in another task and the current task only needs to show the configured stages to the employee.
- You can configure system settings, which are the same for all widgets.
- Save the widget settings. Then save and publish the app form.