If the initial setup is completed, employees can add an approval route when creating or modifying an app item. After that, the user just clicks the process start button on the app form to send the item along the route. During the process, the approval stages specified on the item page will be executed.
User work with table-based routes includes the following stages and actions:
- Configure a table-based approval route when creating or editing an app item.
- Start the table-based approval route via a button on the app form.
- Track the route approval progress on the item page and view the history of previous approvals.
To see how this works, let's look at the Contracts app.
Configure a table-based route for an app item
On the forms for creating and editing an app item, the system administrator can place a widget for configuring the table-based route.
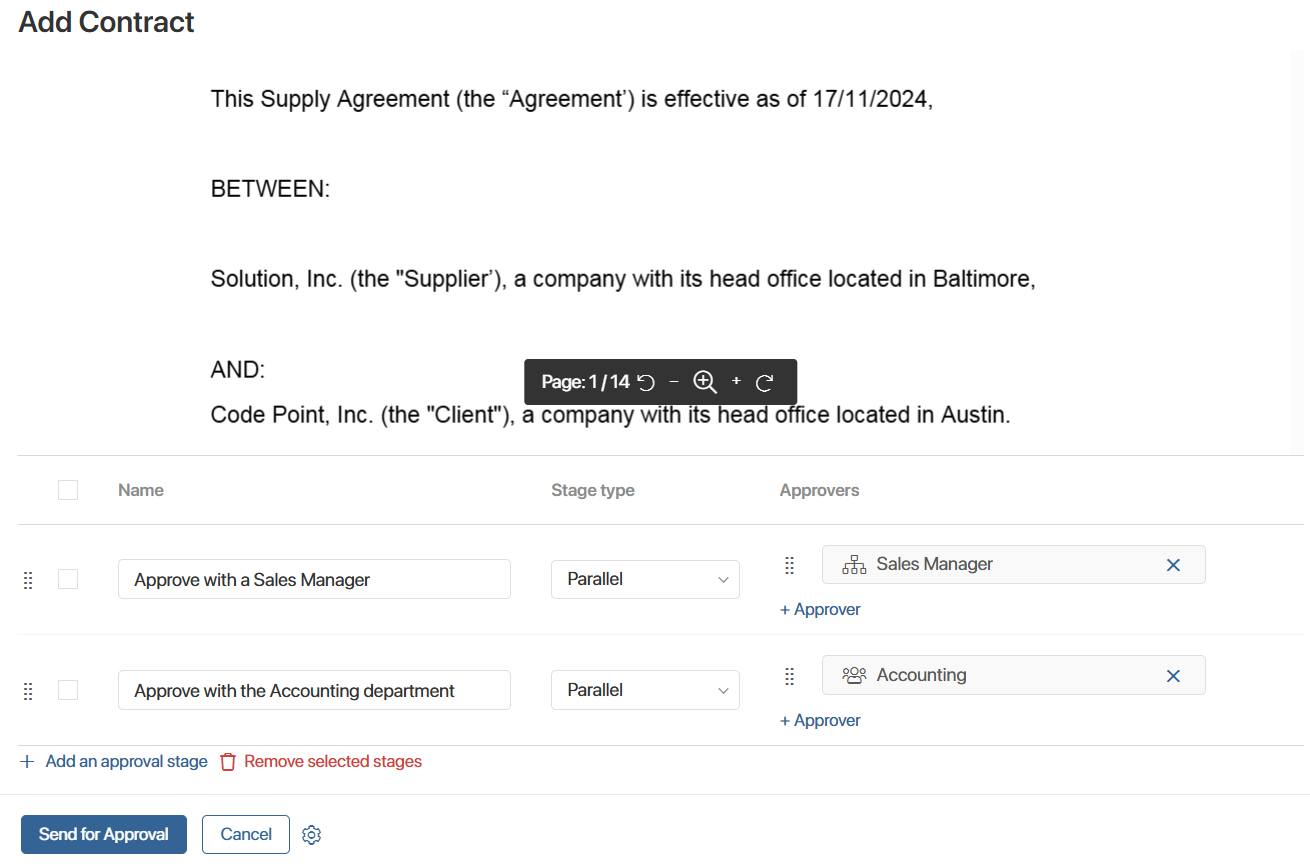
Let's see how to fill out the route table when creating a contract. Configure each stage of the route manually:
- Enter the stage name.
- Select the approval type:
- Parallel. All approvers at the current stage will receive approval tasks simultaneously.
- Sequential. Approvers will receive tasks in the order specified in the stage settings. Approval participants can view previous approvals in the item page.
- First Response. The task will be received by all approval participants simultaneously. If one of them issues a resolution, the task will be canceled for the remaining approvers. The cancellation status of the task will be reflected in the approval results.
- Specify the approvers. To do this, click + Approver and in the window that opens, select a user, a user group, or an org chart item. For sequential approval, consider the order in which employees should receive approval tasks. If a user group is selected, the task assignment sequence may not match the order of the members within it.
- To create the next stage, click + Add an approval stage.
You can edit the route:
- Change the sequence of stages. Click the
 icon to the left of the desired stage and move it.
 - Change the order of the participants in the sequential approval process. Click the icon to the left of the approver and move it.
- Delete unnecessary rows. Check the boxes to the left of the stage names and then click Remove selected stages.
Start the approval route via a button on the app form
If the route is ready, start the execution process via a button, which the system administrator can configure:
- On the contract creation or editing form. In this case, the item will be saved, and then the process will start, during which the contract will go through the approval route.
- On the contract view form. Here you can start the process at any time. For example, create a contract, configure a route for it, and save it. Then you can open the contract page and send it for approval.
The system administrator sets the name of the process start button. For example, on the contract creation or editing form, you might see a Send for Approval button instead of a Save button.
Track approval via the table-based route
During the execution of the route, approvers at all stages will sequentially receive a task to approve the contract.
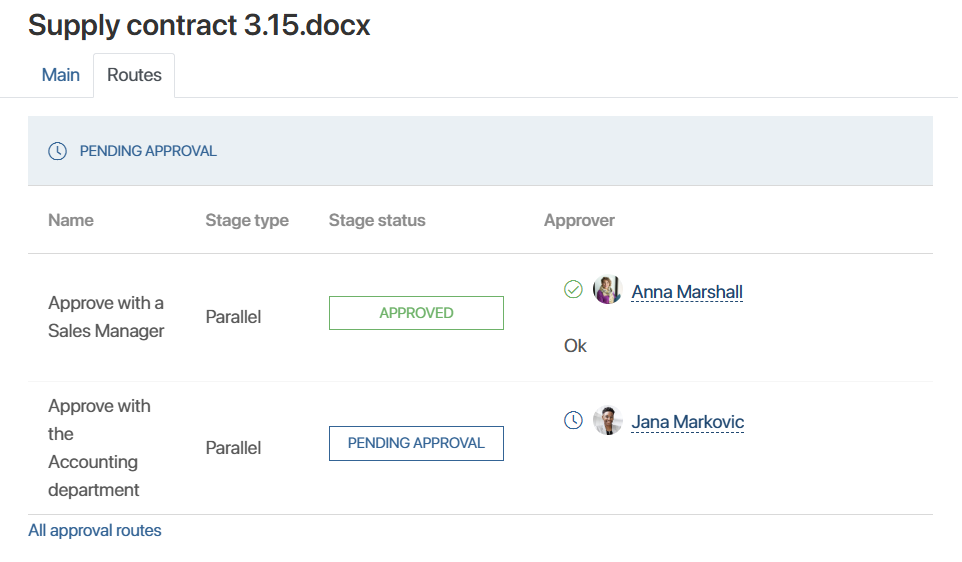
The contract page allows you to view the status of the route and each of its stages, as well as approval resolutions and comments. The system administrator can display this information in a separate tab, for example, Routes. Approval progress data on this tab is updated in real time.
Statuses of the table-based route execution:
- Pending Approval. Assigned when the route is started.
- Approved. Applied if the contract is approved at all stages.
- Rejected. Assigned if at least at one stage a negative resolution was made on the contract.
- Canceled. Used in case the process is interrupted by the system administrator.
The route stages can have the same statuses.
The approval process participants' resolutions are marked with icons:
 Approved.
 Rejected.
 No resolution yet.
 The approval task has been canceled at a stage with the First Response type.
If the approver adds a comment, its text will appear under the author's name.
Completed and current approval tasks for the route will be displayed on the side panel of the contract page, just like other business process tasks.
You can view the results of all routes through which the current contract was submitted for approval. To do this, click All approval routes below the table displaying the progress of the current or most recent route.
How route approval works
- The next stage begins after all approvers at the previous stage have made their resolutions.
- Approvers can view resolutions submitted by other employees on the item page.
- If at any stage at least one rejection is received:
- The stage of any type and the entire route will continue.
- Upon completion, the stage and route will be assigned the Rejected status.