You can configure data masking for an AI agent or AI action to prevent the language model from accessing personal and corporate data.
The following detectors identify sensitive data in prompts:
- Built-in detector BRIX AI. Always enabled when data masking is turned on. It provides basic protection and recognizes all common types of personal data.
- Additional detectors. You can configure custom sensitive data checks using regular expressions or external masking services.
To set up data masking, complete these steps:
- Enable data masking for an AI agent or AI action.
- Configure general data masking settings.
- Add additional detectors.
Step 1. Enable data masking
- When configuring an AI agent or AI action, go to the Masking tab and click Enable.
- Select the types of personal data to mask from the language model. To mask all built-in data types, enable the Detect all supported data types option.
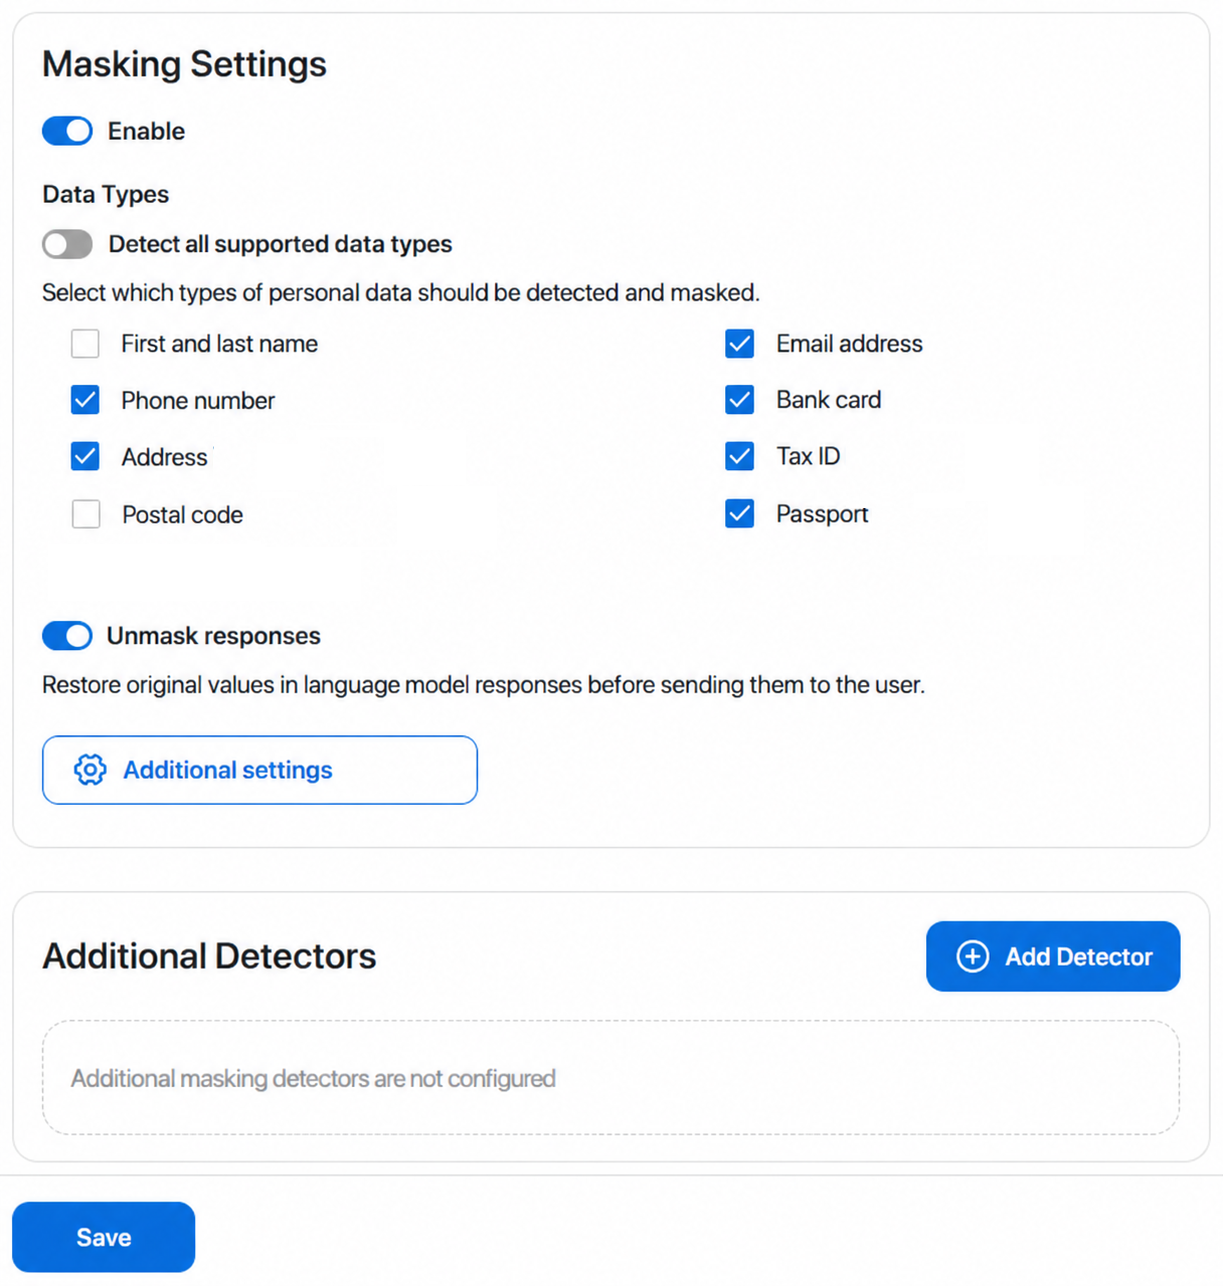
- Keep the Unmask responses option enabled to show original values from the prompt in the AI agent or AI action response. If you disable this option, the data remains masked.
- Click Save at the bottom of the page.
The built-in BRIX AI detector will now automatically apply sensitive data masking to prompts.
You can customize masking settings and add additional detectors.
Step 2. Configure general data masking settings
To customize masking settings, click Advanced settings and fill in the fields:
- Masking mode. Select an option.
- Replace with token. Replaces detected values with structured tokens based on the data type, such as [PERSON-1] or [EMAIL_ADDRESS-1]. Use this mode when you need to explicitly indicate masked data locations to the language model.
- Replace with realistic synthetic data. Replaces real data with realistic placeholder values.
- Token metadata. Enable this option to store additional metadata, such as grammatical case and gender, when using tokens. This helps the language model properly use masked data in user responses and tool calls.
- Custom prompt snippet. Optionally add custom data masking requirements to complement the standard BRIX AI instructions for the selected masking mode.
Once you complete the fields, close the window and click Save at the bottom of the page.
Step 3. Add additional detectors
In the Additional Detectors section, you can add other methods to detect sensitive information, for example, to find data types that are not supported by default.
To do this, click Add Detector, select the detector type, and configure its settings:
- Regex detector finds text matching specific regular expressions. Suitable for masking corporate IDs, ticket or contract numbers, and other structured data formats.
- Name. Enter a detector name.
- Entity type. Specify the type of sensitive data detected, such as passport details or contract numbers. Enter uppercase Latin letters and use _ to separate words. You can use a built-in sensitive data type or enter a custom type, such as CONTRACT_NUMBER.
The selected masking mode determines how original values matched by the regular expression are replaced:
- Token replacement that uses the entity type name to generate tokens, such as [PERSON-1] or [CONTRACT_NUMBER-1].
- Realistic synthetic data replacement that generates synthetic values for built-in types. For custom types and the built-in UNKNOWN type, the system replaces text with <MASKED> because synthetic generation is not configured for them.
|
- Patterns. Enter regular expressions matching the sensitive data format.
- Regex flags. Optionally specify flags for additional options, such as case-insensitive or multiline search.
For details on regular expression syntax, see MDN Web Docs.
- External service analyzes text using a corporate classifier, dictionary, machine learning model, or security service.
- Download OpenAPI schema. Click the link to download the JSON schema file required to set up the sensitive data detection service.
- Name. Enter a detector name.
- Webhook URL. Enter the full endpoint URL used to call the external service.
- Request headers. Add HTTP headers, such as Authorization: Bearer <token>.
- Request timeout (seconds). Specify the timeout duration for masking.
- Max retries. Specify the maximum number of retry attempts for network errors.
- Error policy. Select the action to take if masking with the external service fails.
- Block. Request processing stops, and the user sees an error message.
- Skip. Request processing continues.
- Replacement mode. Select an option.
- Pipeline replacement. The external service only identifies sensitive data locations. Masking takes place on the BRIX AI side.
- Use webhook replacement. Applies replacement values generated by the external service.
- Additional parameters. Enable this option and provide a JSON object with additional check execution details.
After filling in all required fields, save the detector settings, then click Save at the bottom of the page.
The newly added sensitive data detector will apply to all prompts sent to the AI agent or AI action. If multiple detectors find overlapping sensitive data fragments, BRIX AI applies a single combined replacement.
Note that data masking is also enabled by default for data sent to the tracing system. You can disable it. To learn more, see Debugging AI agents or AI actions.
Manage sensitive data detectors
The additional sensitive data detectors you configure appear in the list on the Masking tab. You can perform the following actions:
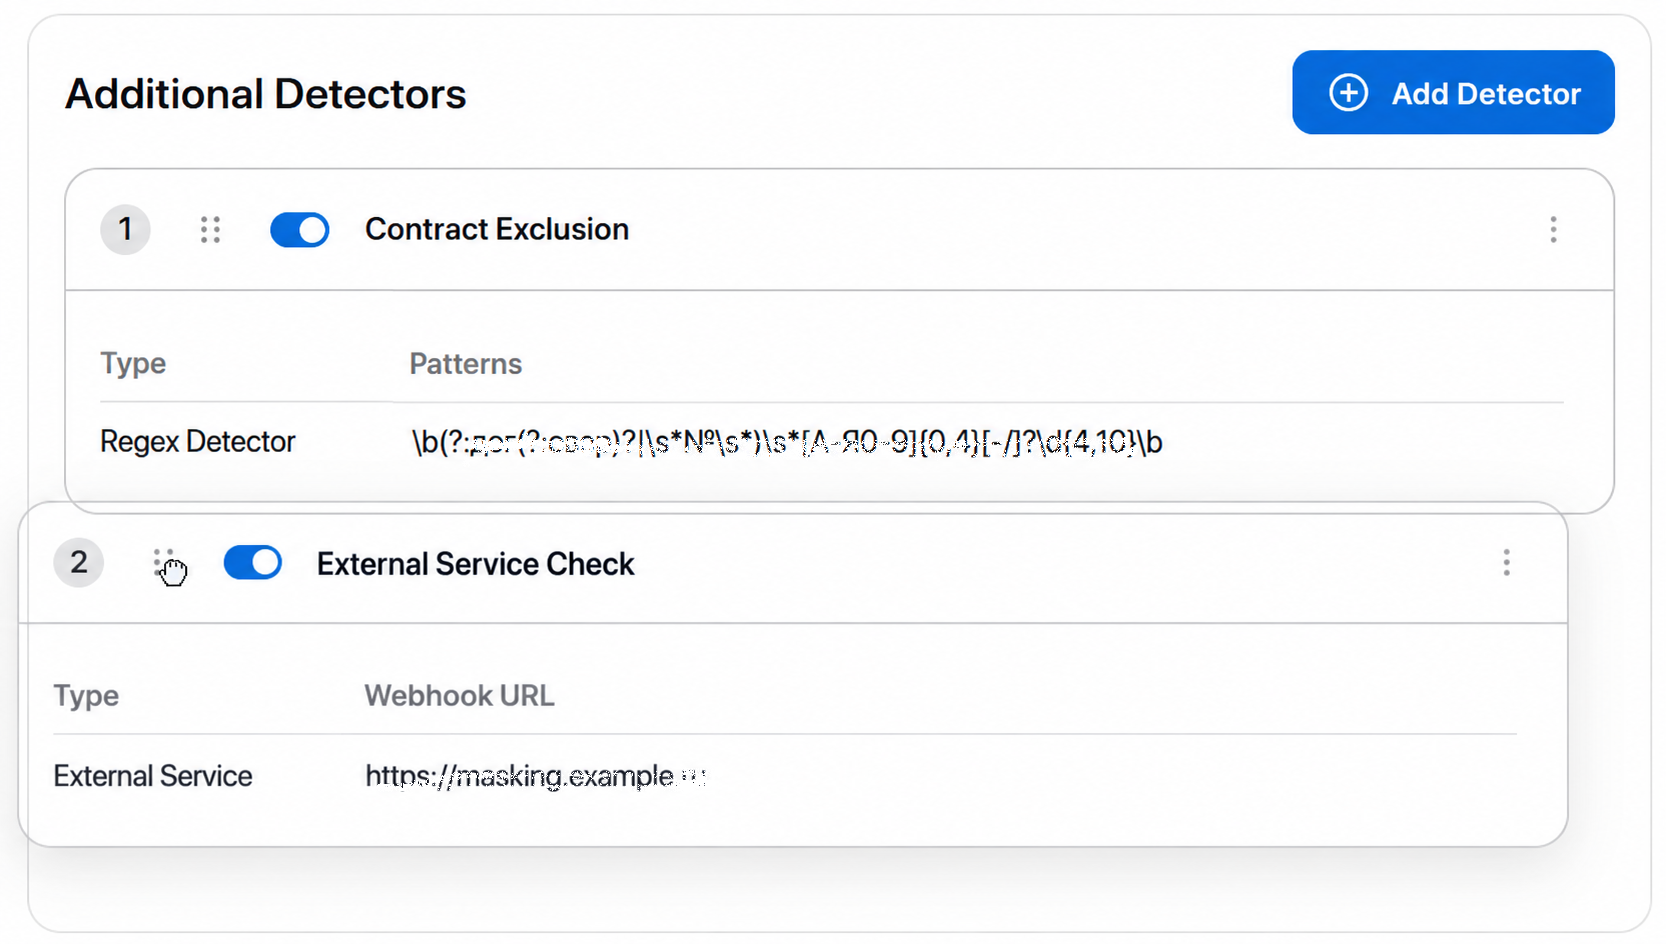
- Create a new detector. Click + Add Detector and configure the settings.
- Temporarily disable a detector. Click the toggle next to its name.
- Edit detector settings. Click the three dots in the upper-right corner of the section and select Configure.
- Change detector execution order. Drag the check block or click the three dots and select Move up or Move down.
- Delete a detector. Click the three dots and select Delete. Deleted detectors cannot be restored.