Before creating AI actions, make sure you have connected language model providers in BRIX AI.
This article covers how to manually create and configure an AI action. You can also download and use a prebuilt component. To learn more, see Import a component or project into BRIX AI.
To set up a new AI action in BRIX AI, follow these steps:
- Create an AI action.
- Configure basic settings. Select a language model, write instructions (prompt) for processing tasks, and specify the input and output data formats. You also need to select the runtime environment for the AI action (OpenAI or ReAct), which defines how tools are handled.
- Connect tools. You can set up additional features for the AI action. They determine what data it can retrieve, what actions it can perform in BRIX, and more. You can also connect child components of BRIX AI as tools to configure routing for complex tasks.
- Connect managed agents. If necessary, specify child AI agents with specialized capabilities to which the AI action can pass tasks along with their full execution context. This is the second way to route tasks within an AI action.
- Set up an API key to call the AI action in scripts. Optionally enable calling the AI action via API from BRIX scripts and external systems.
- Configure security tools. Enable Guardrails checks to block unwanted requests and responses, as well as sensitive data masking before sending data to the language model.
After completing the configuration, debug the AI action and configure its call in BRIX.
Important: the steps in this article are described based on the features of the BRIX AI Enterprise edition. If you are using other editions, some tools may be unavailable. For details, see Available BRIX AI editions.
Step 1. Create an AI action
- In the left menu of BRIX AI, go to the AI Actions page.
- Click the Add AI Action button.
- In the window that opens, enter the action name.
- Click Create.
Step 2. Set main AI action settings
On the Settings tab, set up the basic parameters:
- Fill in the fields in the Response Generation section:
- Instructions. Write a prompt describing the AI action operations and the expected result.
- LLM Model. Select the language model to generate responses. The list of available options depends on the connected large language model providers.
This field also provides settings for fine-tuning the predictability and variety of AI action responses. We recommend completing the setup and testing the AI action with default settings first, then adjusting them to your needs if the results are unsatisfactory. This is done the same way as configuring response generation parameters for an AI agent.
- Runtime type. Select the execution environment for the AI action: OpenAI or ReAct. It determines how tools are called. Make sure the selected runtime is supported by your language model:
- OpenAI. Uses function calling to run tools. The model receives a description of available tools and sends a structured request to use them. This is a reliable option suitable for most tasks.
- ReAct. At each step of task execution, the language model provides textual reasoning about the actions it intends to perform, then specifies in text which tool to use.
- In the AI Action Settings section, specify the input data format and the language model response format. Identical options are available for both and can be combined based on your goals:
|
Format details |
Usage for input data |
Usage for response schema |
Text |
Data is passed as plain text. |
Used when you need to pass unstructured data for processing, such as an email body or document text. |
Suitable when structured output with dedicated fields is not required, e.g., to generate an email summary. |
Custom JSON |
Data is passed as a JSON object with any structure.
|
Suitable when working with different data sources, such as items from different BRIX apps.
The AI action automatically determines what information is contained based on field names in the JSON schema.
|
Used when you need a JSON object, but its structure is not known in advance. The AI action automatically decides which fields to add to the schema depending on the task.
For example, if you send a JSON object for processing to sanitize sensitive data, the AI action will return an object with the same structure and updated values. |
Strict JSON Schema |
Passes a JSON object with a structure and field types defined by you.
When placing an AI action in BRIX, the JSON schema fields are mapped to properties from the context of processes, apps, etc. |
Used when processing data with a known structure, such as information from items of a specific BRIX app.
You can specify processing details for specific fields in the AI action prompt to avoid ambiguous data interpretation.
|
Suitable when the response must have a fixed structure, for instance, to use output values in a process, pass them to a script, etc. Specifying a JSON schema also increases response predictability.
For transparent results, you can add a field explaining the reasoning behind a specific decision. For example, an AI action that classifies incoming requests can explain its decision in a separate field.
|
- If you selected Strict JSON Schema for input or response data, set up the data structure. You can:
- Write a JSON schema in the field that appears.
- Add fields to the JSON schema using the visual editor. All core JSON capabilities are available in the editor.
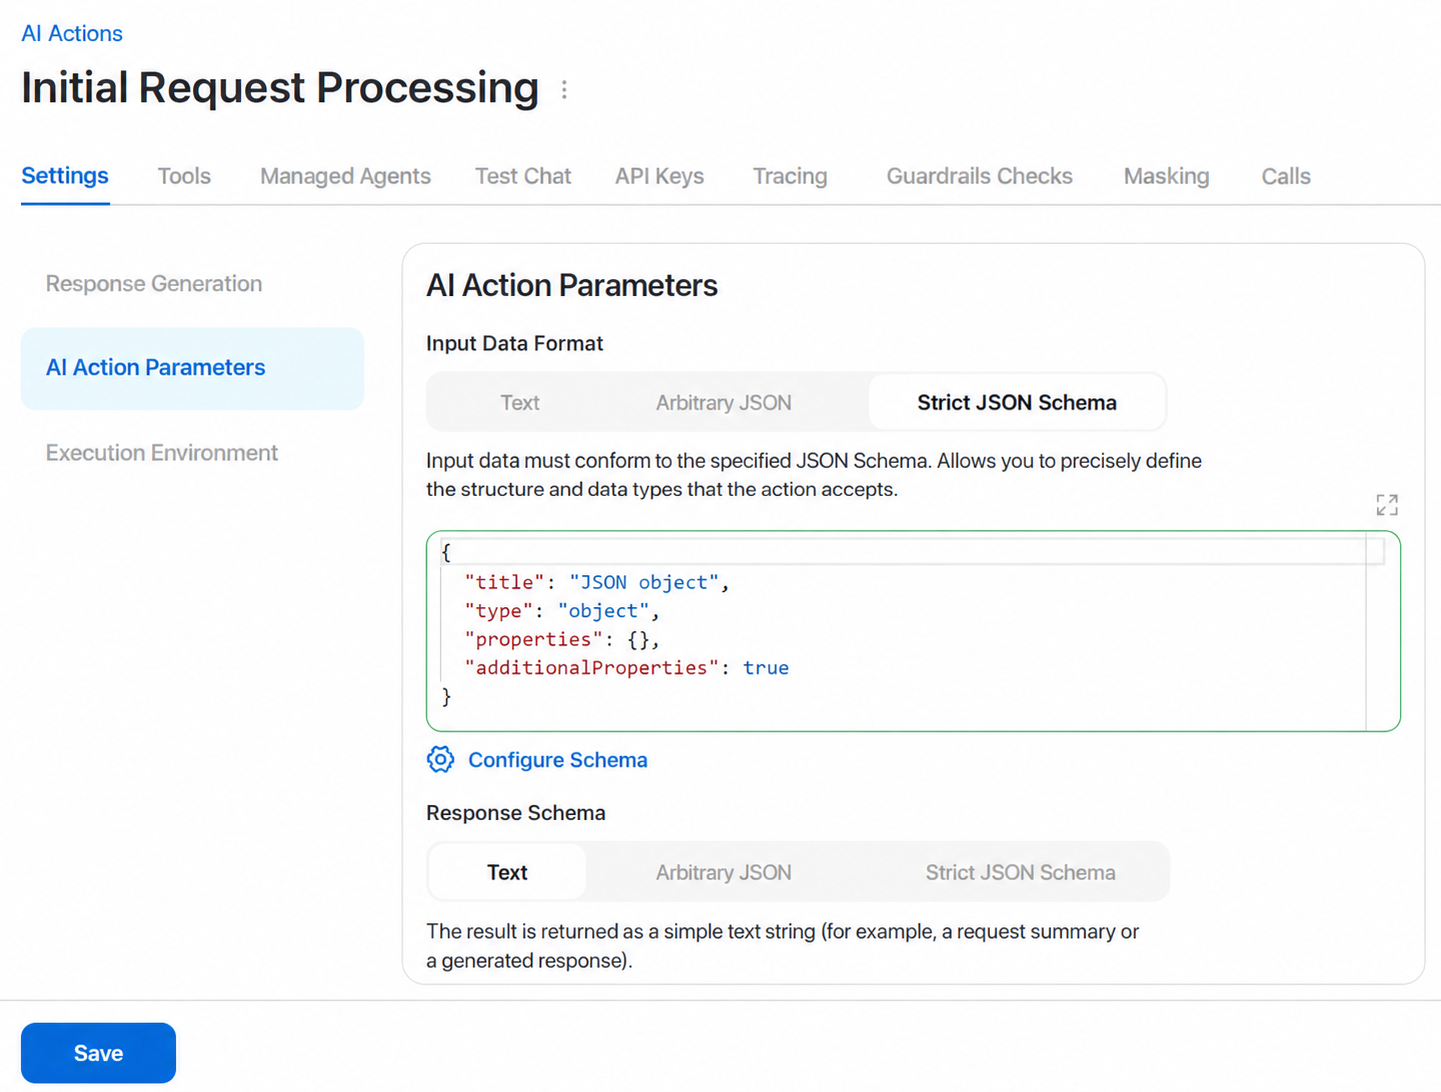
Note that different language models support different JSON standards. Refer to your model documentation to see which features you can use.
- Fill in the fields in the Runtime section:
- API Mode. When using OpenAI runtime, specify the mode for interacting with the language model: Chat Completions API or Responses API. We recommend using Responses API as it is more up-to-date. Make sure it is supported by the selected language model provider.
- Max agent iterations. The maximum number of request processing cycles before returning a response. Each cycle includes calling the language model, running tools if needed, and processing the output. Higher values improve answer accuracy but consume more tokens.
- Max tool response size (in tokens). The maximum token limit for a tool response used to generate the AI action output. Setting a limit helps reduce token consumption.
- Enable parallel tool calling. By default, the AI action executes tools sequentially when processing a request, which is more stable. Enable parallel tool calling to execute multiple tools simultaneously and reduce AI action response times. Available only for OpenAI runtime.
- Generate response via "final_answer" tool instead of structured output. For OpenAI runtime, enable this option if the chosen language model does not support JSON schema response generation (Structured Output). This helps retrieve a structured final response.
- Enable stream mode. Set this depending on whether streaming is supported by the model you are using.
- Enable reasoning mode. For OpenAI runtime, enable this to include the language model reasoning process before the final output. Then configure:
- Reasoning effort. Select an option from the list to set the level of reasoning detail. Deeper reasoning improves accuracy for complex queries but consumes more tokens.
- Response summary. Select the displayed length of reasoning text.
- Click Save.
Configure JSON schema in the visual editor
You can define the input data structure or AI action response using the visual editor:
- After selecting Strict JSON Schema, click Configure Schema under the field.
- In the window that opens, click + Add field on the left side.
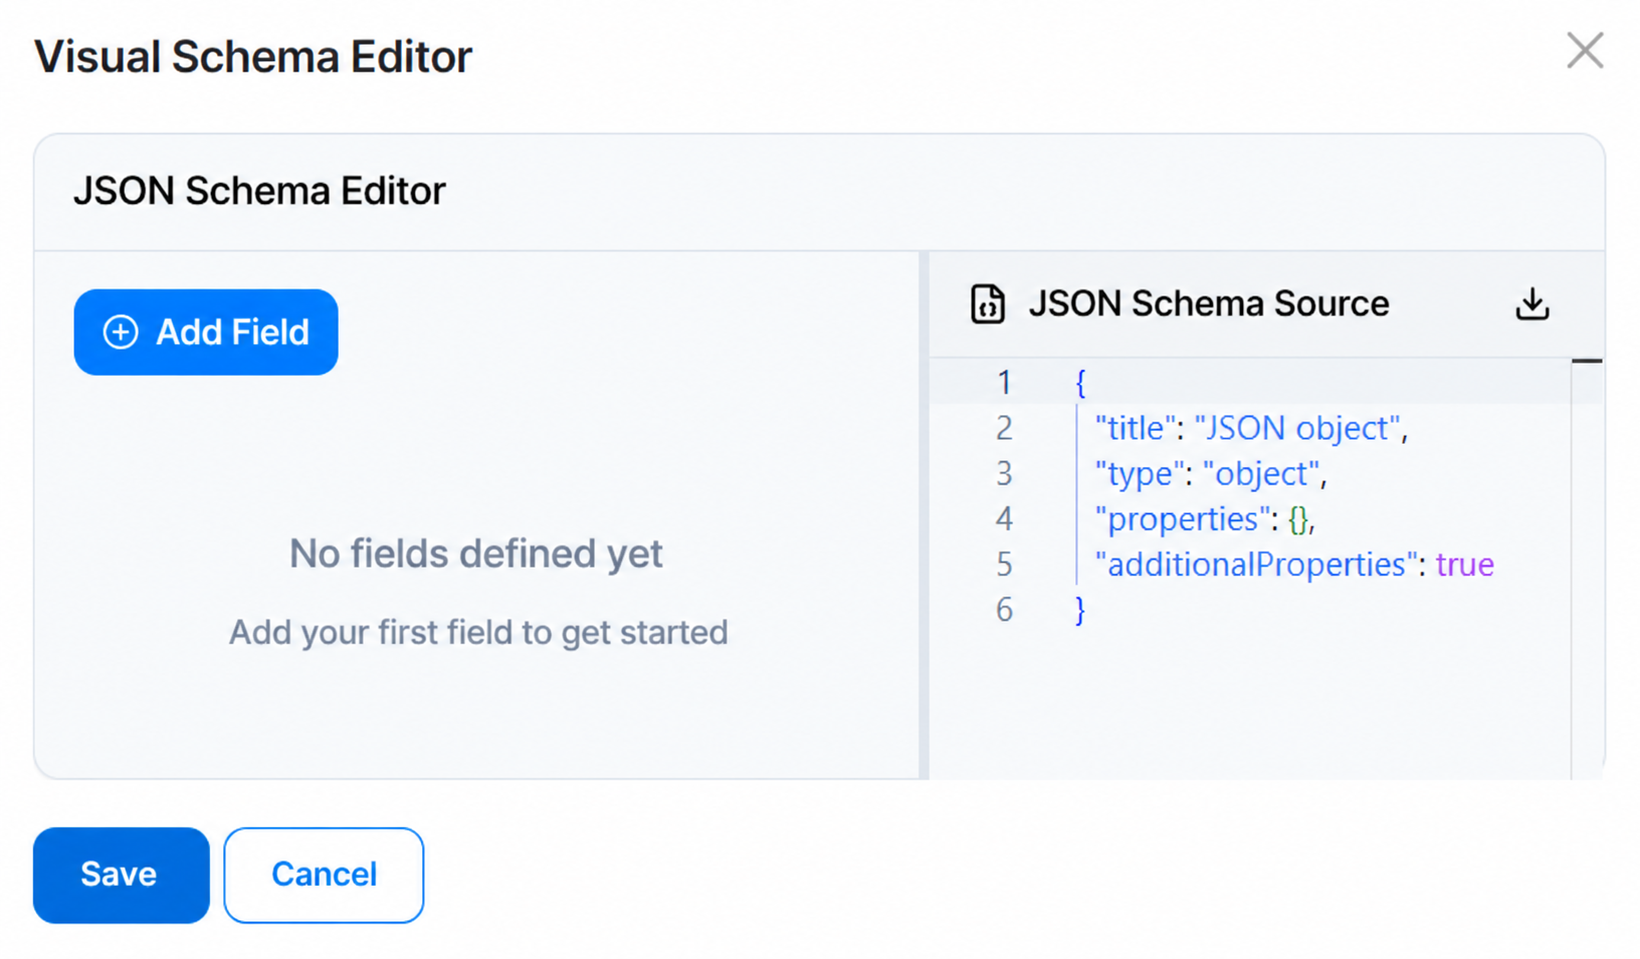
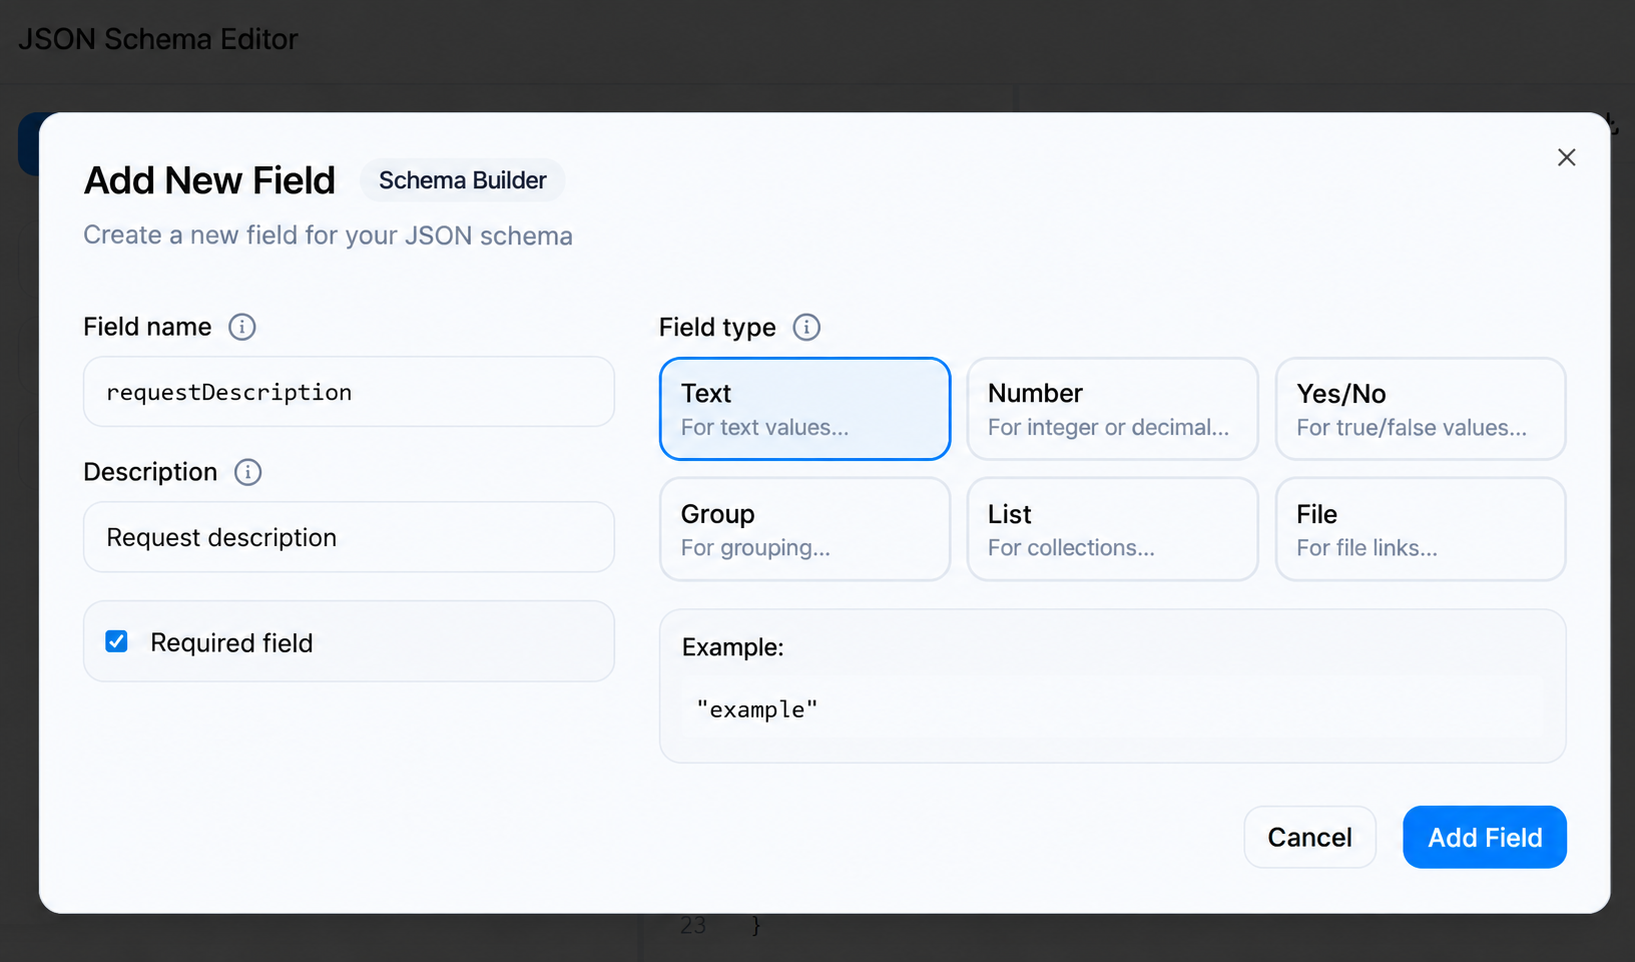
- Field name. Enter the field name in the JSON object.
- Description. Describe the field content.
- Required field. Check this option if the field must not be empty. Note that if you mark a field as required in the input data schema, passing an empty value will result in an AI action error.
- Field type. Select the data type:
- Text. Text data such as a customer name or issue description. This type is also used to store date and time, email addresses, monetary values with currency, etc.
- Number. An integer or decimal fraction.
- Yes/No: true or false value.
- Group. Used to combine multiple related fields, for example, all fields of a BRIX app item.
- List. A set of values of the same type, such as dates, amounts, etc.
- File. A document from BRIX. Note that you can pass only one file using this field. To work with multiple files, use the List type.
- In the bottom right corner, click Add Field.
- Configure possible field values by clicking the arrow icon to its left. Available options depend on the field type:
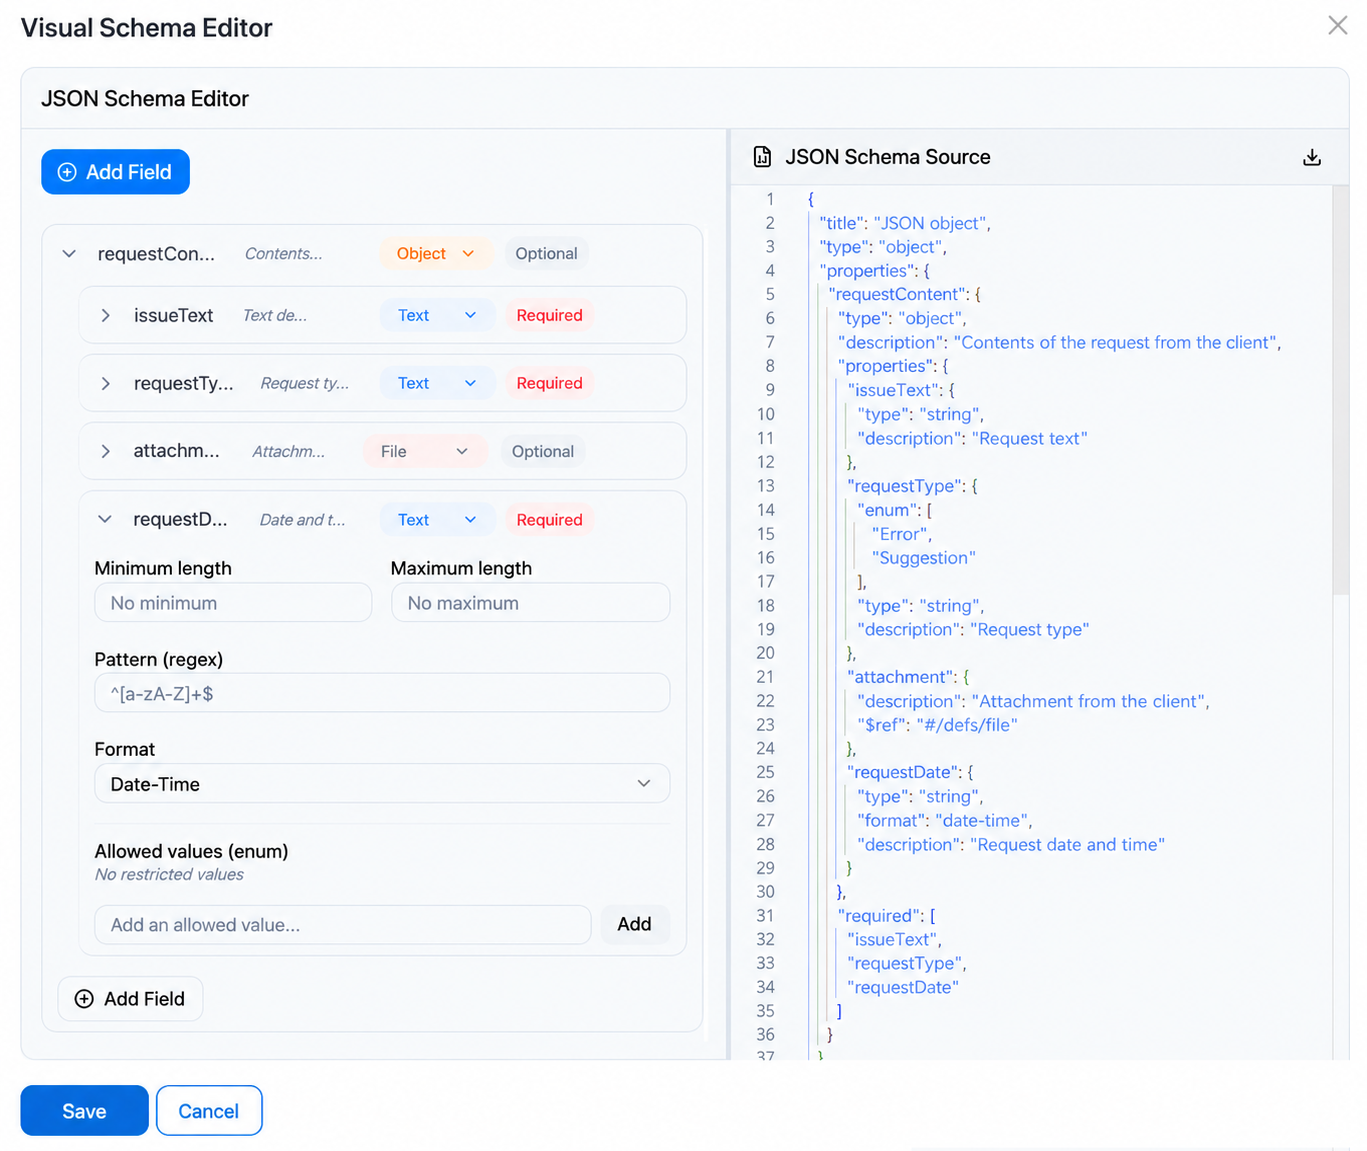
- Text. You can perform the following configuration:
- Specify minimum and maximum length of the value.
- Define the format by setting a pattern as a regular expression or selecting an option from the list. Keep in mind which option your language model supports. An error occurs if the input value does not match the chosen format.
- Set allowed values: if values must be chosen from a predefined list, specify acceptable options. Enter the text for each option and click Add.
- Number. You can perform the following configuration:
- Specify minimum and maximum values, inclusive or exclusive.
- Enter a number that the value must be a multiple of.
- Set allowed values: create a list of options the same way as for a Text field.
- Yes/No. You can disallow true or false values. For example, if a field flags a request as deleted, but the AI action should only process active items, the allowed values are false or an empty value. Passing true will trigger an error.
- Object (corresponds to the Group type). Add fields that need to be grouped together, such as properties of a BRIX app item. To do this, click Add Field in the bottom left corner and configure settings.
- List. You can perform the following configuration:
- Specify minimum and maximum number of items in the list.
- Require item uniqueness to avoid duplicate values in the list.
- Specify item type: set the data type for items in the list. The same types as for JSON schema fields are available.
- File. Fields of this type cannot be customized.
- After adding all fields, you can download the AI action JSON schema to your computer, for instance, to configure input data mapping. To do this, click the download icon
 in the top right corner.
Note that when placing an AI action in processes or user interfaces, you can map schema fields directly to process or app context properties instead of manually providing a JSON schema.
- Click Save.
Step 3. Connect tools to the AI action
To expand AI action capabilities, add one or more tools it can use during task execution. Tools allow retrieving information from external sources, performing actions in the system, and more.
For details, see Connect tools to an AI agent or AI action.
Step 4. Connect managed agents to the AI action
Adding managed AI agents is one of the task routing options available for an AI action. The action can delegate specific workflow steps to specialized child agents to achieve more accurate results.
Unlike AI agents used as tools, managed agents receive full execution context when delegated a task. The managed agent performs its part and returns the result to the AI action.
To connect a child AI agent:
- On the Managed Agents tab, click + Add.
- n the window that opens, select the configured AI agent and enter instructions for task delegation.
- Click Save.
Step 5. Set up an API key to call an AI action from a script
You can call the AI operation using the API from BRIX scripts or third-party systems.
To do this, on the API Keys tab, configure authorization for requests to the AI action. Click + Add Key, specify a name for the key, and select Chat in the Access field.
You can then call the AI action from a script using its API key and the identifier specified in the Agent ID for API field.
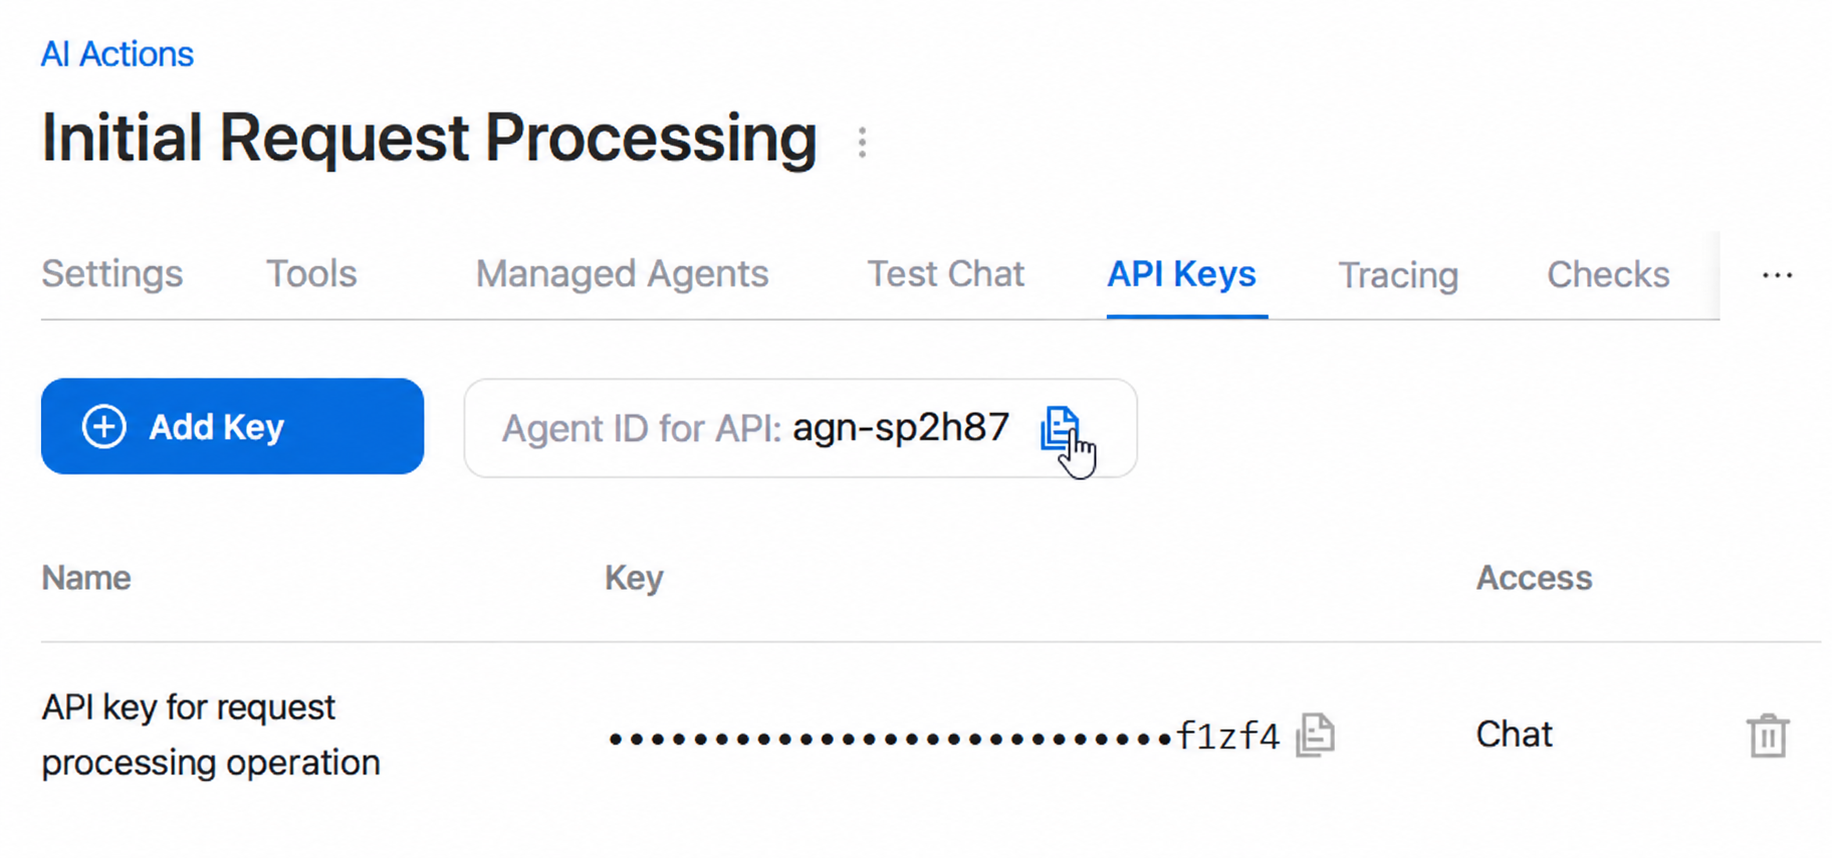
The BRIX AI public API documentation is available at https://<BRIX_AI_domain>/api/pub/v1/docs.
Step 6. Configure security tools
To ensure security when using AI actions, BRIX AI provides::
- Guardrail. Checks that can block user requests and language model responses that violate the configured rules.
- Masking. Protects against sensitive data leaks by replacing actual values in requests before they are sent to the language model.
For more information about configuring and using these tools together, see Configure request validation and data masking..
The AI action is now configured. You can find it on the AI Actions page.
Manage AI actions
To view the list of created operations, go to AI Actions in the BRIX AI navigation menu. On this page, you can:
- Find an AI action by name. Start entering its name in the search bar in the upper-right corner.
- Open an AI action. Click the action's card to edit its settings.
- Disable an AI action. Click the toggle next to its name to temporarily make it unavailable. If the action is already used in BRIX or serves as a tool for other BRIX AI components, replace it with another operation to ensure they continue working correctly.
- Manage an AI action. Click the three-dot icon next to it and select an option:
- Export. Download a .zip file containing all AI action settings and dependencies to your computer, for example, to transfer it from a test BRIX AI environment to a production environment. To learn more, see Export a component or project from BRIX AI.
- Import. Update the AI action version from a .zip file, for example, if it is developed on another BRIX AI server and needs to be transferred to the main server. To learn more, see Import a component or project into BRIX AI.
- Edit. Change the name of the AI action in BRIX AI and when it is displayed in BRIX.
- Delete. Delete the AI action from BRIX AI. The component cannot be restored.