After setting up a personal live chat, you can reply to customer messages within the unified BRIX interface and start new conversations. To do this:
- Set your system status to Online.
- Open a session in the Live Chats workspace or on a linked item page.
Step 1. Set your status to Online
To chat with customers, change your status to Online.
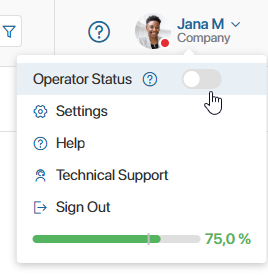
Click your name or profile picture in the top right corner of the page and toggle the switch next to the Operator Status field. The red indicator next to your profile picture will turn green.
начало внимание
To change your status to Online, you need a BRIX Platform license.
конец внимание
If you have a named license, you can change your status and start working with sessions at any time. If a named license is not assigned to you, the system uses a concurrent license that any user can occupy. If no concurrent licenses are available, you cannot change your status.
Step 2. Open a session
Working with sessions in a personal live chat is similar to how operators handle requests in standard live chats.
You can communicate with customers:
Chatting in the Live Chats workspace
Go to the Live Chats workspace. It contains:
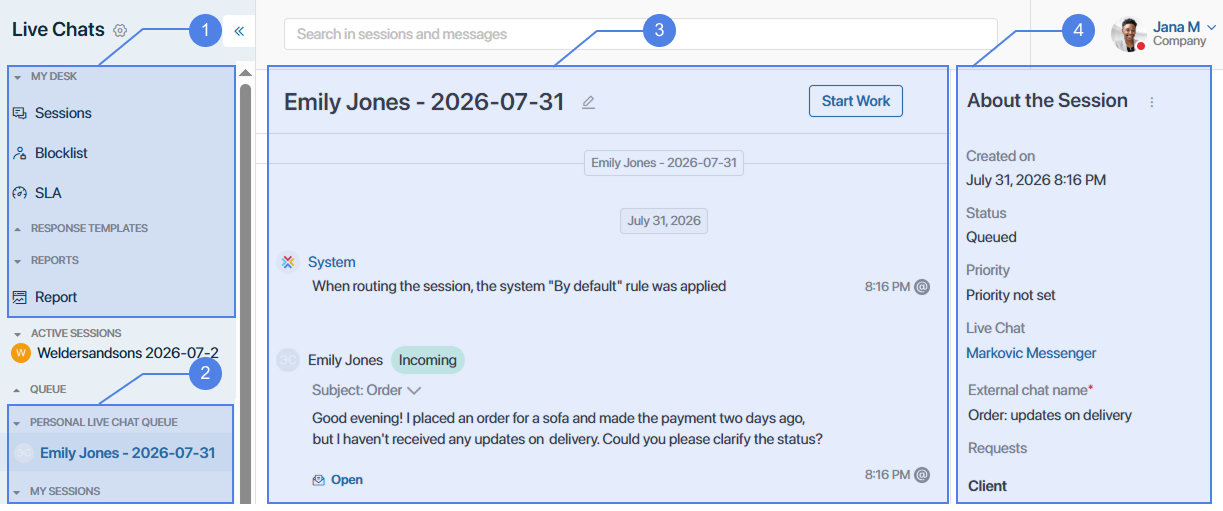
- The Sessions, Blocklist, and SLA apps, as well as the Articles and Templates directories. To learn more, see Live chats overview.
- A list of sessions organized into groups:
- Personal live chat queue. All new sessions arrive here.
- My sessions. Displays sessions assigned to you. You can also click + New Session to create a session with a customer manually.
To open a customer chat, select a session from the left menu or create a new one.
- Chat window. When you open a session, this window displays the conversation with the customer along with system notifications. You can:
- Assign the session to yourself to enable messaging.
- Send messages, quote replies, attach files, and perform other chat actions.
- Close the session when finished. If the customer messages you again, the session reopens automatically.
To learn more about chat capabilities, see Process customer requests.
- The right sidebar with the Session Information panel. Here you can view session and customer details, start business processes, link the session to app items, and more. For details, see Process a requests.
Chatting on app item pages
If you configured the fields for binding an account and registering messages, linked sessions can be displayed directly on item pages of the selected apps. To enable this, an administrator adds the Live Chat Messages widget to the app view form.
You can handle customer messages on item pages in the same way as in the Live Chats workspace. For details on displayed sessions and available actions, see Live chats messages.