In BRIX AI, there are several ways to debug an AI agents. You can:
- Test the AI agent in a test chat to analyze responses to queries and tool calls.
- Enable AI agent tracing to collect data about each processing step, review it, and optimize agent performance.
- When the agent is already in use in BRIX, view chat history with the AI agent in threads.
Using this data, you can evaluate whether the AI agent meets your requirements and find the root causes of errors. You can then adjust the agent behavior in its settings by modifying instructions, parameters, or tools.
To use debugging options, in the left menu of BRIX AI, go to Agents and select the required AI agent.
Test the AI agent in a test chat
On the Test Chat tab, you can test the AI agent by simulating a user conversation with the bot in BRIX.
The left pane displays the chat with the agent, while the right pane shows detailed information about its actions. Below are the debugging options available in the test chat.
Send requests to the test chat
If OAuth 2.0 authentication is configured for the AI agent tools, a sign-in button is displayed. To use the chat, allow access to your data. You can revoke access later by clicking the sign-out icon to the right of the input field.
After that, in the left part of the page, you can:
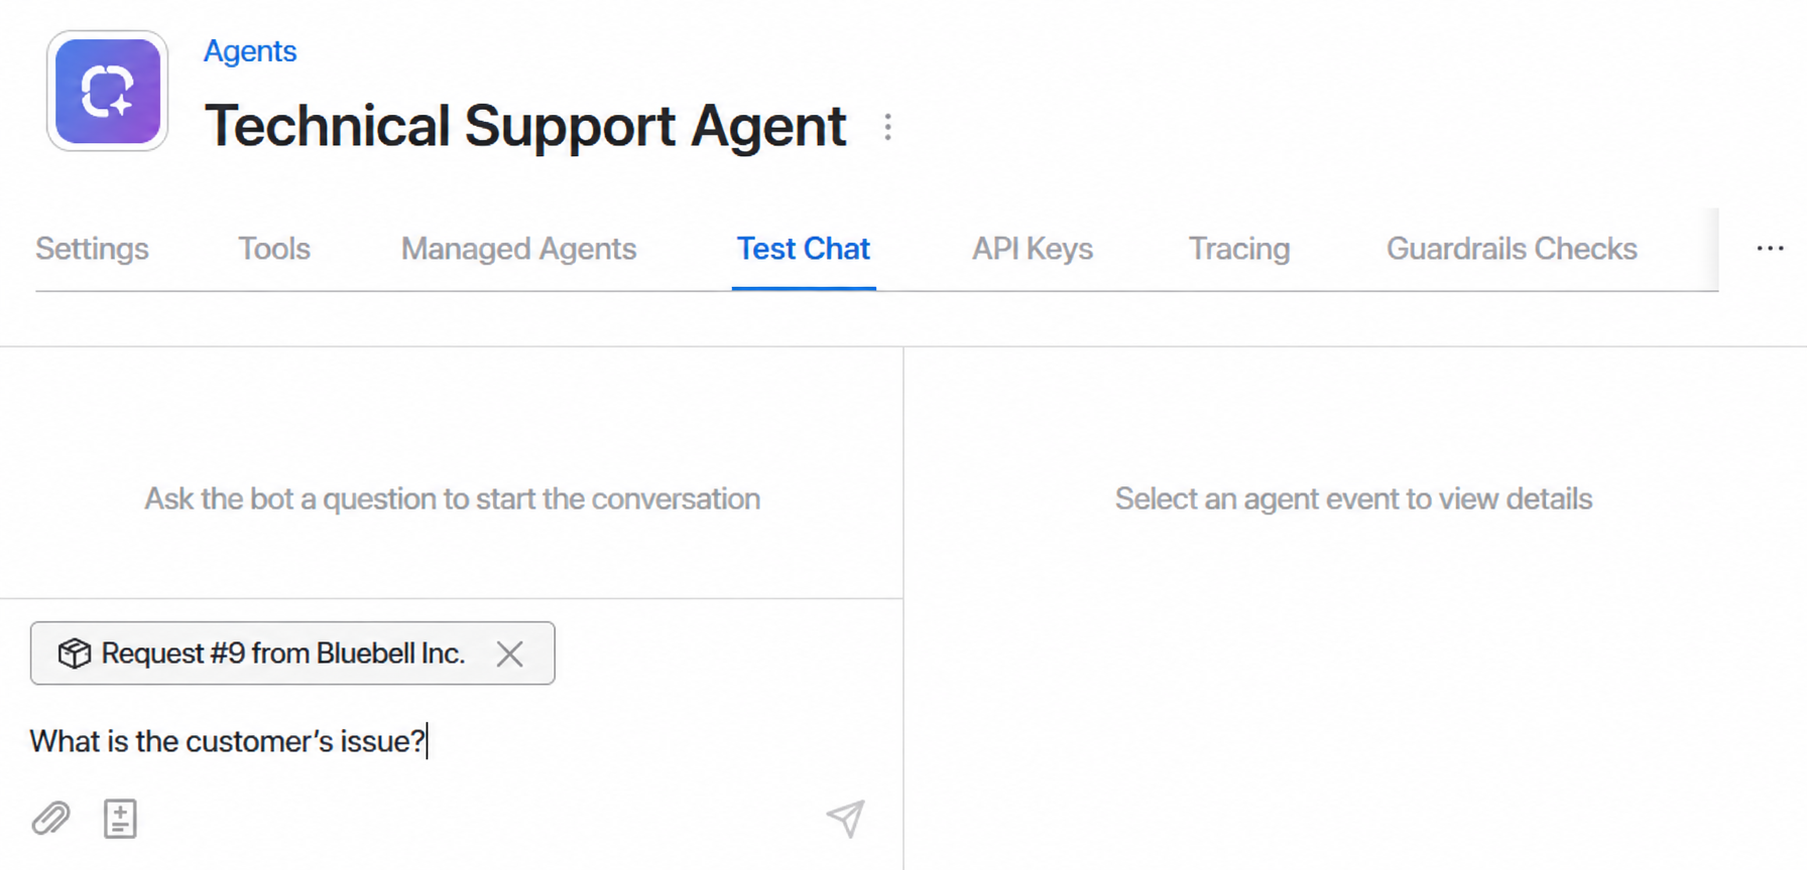
- Type messages in the input field.
- Attach files by clicking the paperclip icon.
- Specify additional data sources by clicking the add resource icon
 . This allows you to set context for the AI agent responses by showing information that should be on the user's screen:
- Text. Custom text that complements the request.
- BRIX app. A link to an item in any BRIX app. The AI agent reads information from its item form just as if a user opened it in the system and asked a question in the chat.
- BRIX session. A link to an item of the Sessions app from the system Live Chats workspace.
- BRIX file. A link to a file from the Files workspace or an attachment on an item form in BRIX.
Work with AI agent responses
After sending a request, the left chat pane displays the tools called by the AI agent and the generated response. If the ReAct execution environment is selected in the AI agent settings, you will also see the reasoning thoughts performed by the language model between tool calls.
If Guardrails checks are configured for the AI agent, you will also see violations of established requirements detected in the request or response, along with the reasoning for the check decision.
In the chat, you can:
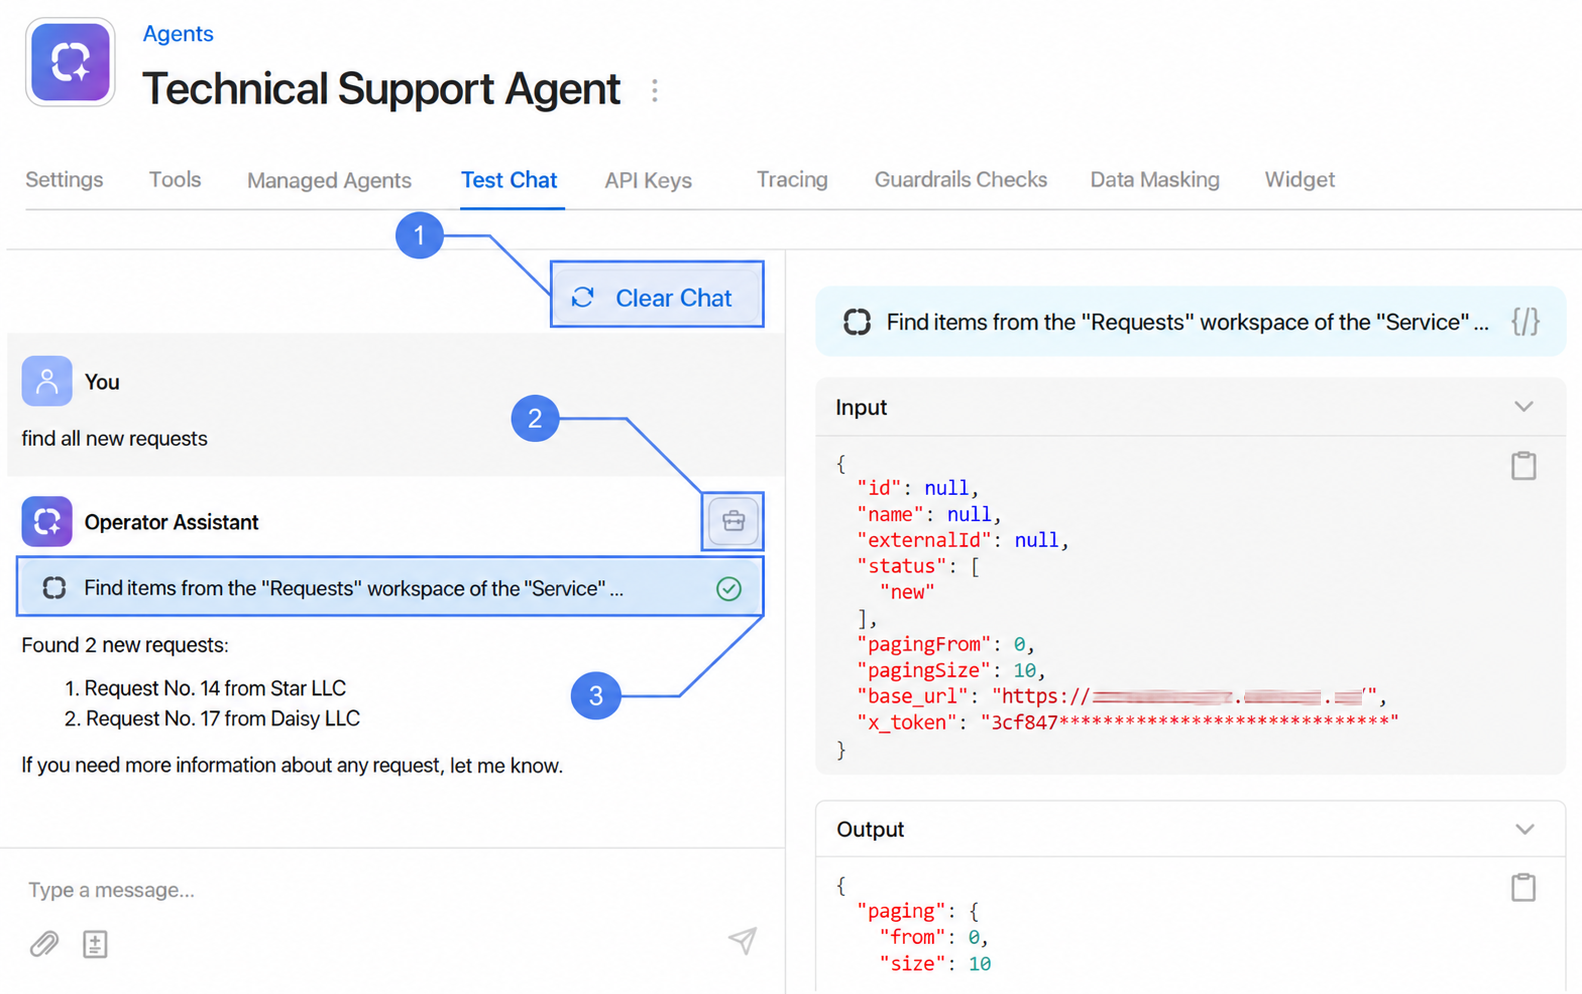
- Click Clear Chat to restart the dialogue. This allows you to apply updated AI agent settings and clear the previous conversation context when checking a new request.
- Review available tools and parameters by clicking the toolbox icon
 next to the agent name. In the window that opens, select a tool to view its JSON schema. It shows:
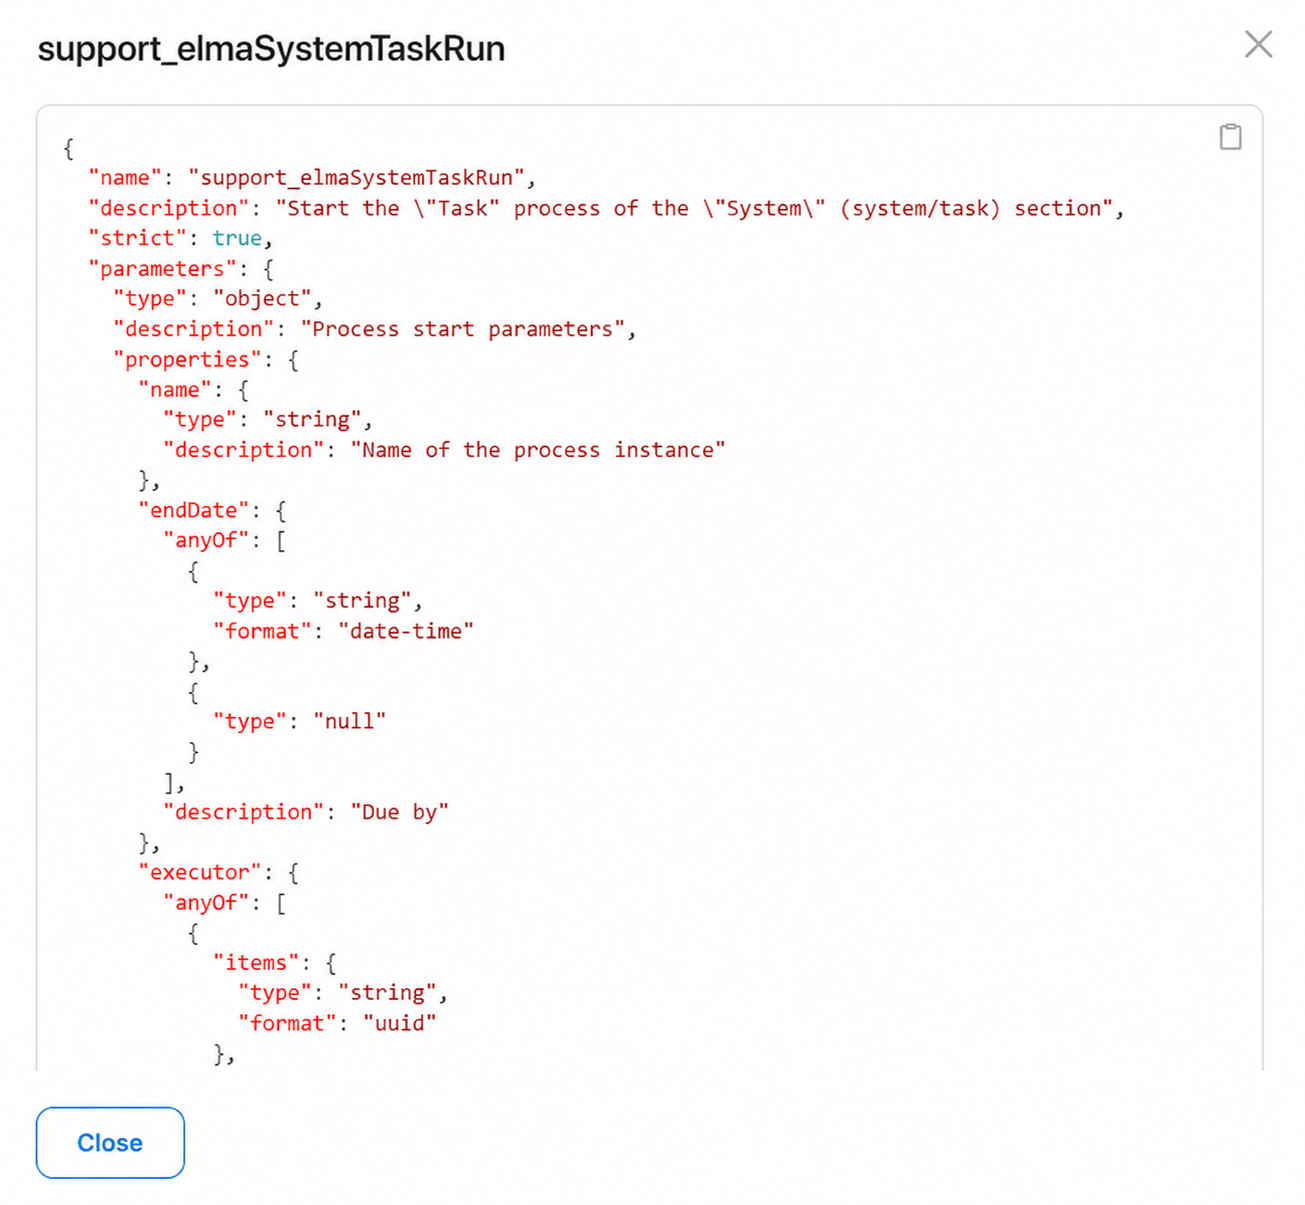
- Tool code name.
- Tool description. Text instructions with actions performed using the tool. The AI agent uses this description to determine when to apply the tool.
- Tool parameters. Properties used when executing an action, including data type, requirement flag, etc. For example, for a tool from a custom BRIX tool set that assigns tasks, you will see task fields available to the AI agent. If the parameters are insufficient to perform the action with the expected result, go to the tool and modify its settings.
- View tool call details by clicking its text in the chat. On the right panel, you can:
- Go to the tool JSON schema by clicking the curly brackets icon
 on the right panel. The same information is displayed as when viewing the schema in the tools list.
 - View input and output data structures. To copy them, click the clipboard icon
 .
.
If an error occurs during AI agent operation, it appears in the chat in a similar way, highlighted in red. Click its name to view details.
Configure tracing for an AI agent
Use tracing to track AI agent steps during request processing. You can view:
- Data received and returned by the language model.
- Token consumption for request processing.
- Tool call events.
- Data on delays during response generation.
AI agent tracing in BRIX AI is carried out using the Arize Phoenix platform located on a separate server.
Enable tracing
To use tracing:
- On the Tracing tab, enable the Enable Arize Phoenix option.
- Fill in the displayed fields:
- Phoenix Instance URL. Paste the URL of your Arize Phoenix server.
- Project ID. Specify the project in Arize Phoenix where agent traces should be saved.
- Click Save.
Traces can then be viewed and analyzed in the specified Arize Phoenix project.
Disable data masking for tracing
If you enabled data masking when creating the AI agent, it will be applied by default to texts sent to the tracing service.
To analyze original unmasked data, disable the Mask tracing data option on the Tracing tab.
View interaction history with an AI agent in threads
The Threads tab displays a list of:
- Dialogues in the test chat. Each conversation up until the chat is cleared is shown as a separate thread. You can return to a specific dialogue, for example, to review an error.
- User dialogues with the AI agent in BRIX, which allow you to analyze the practical application of the agent.
The table displays the thread title and the start date of the conversation. Click a thread to view the dialogue content and used tools, just like in the test chat. If Guardrails checks are configured for the AI agent, you will also see violations of established requirements detected in requests or responses, along with the reasoning for check decisions.
When the AI agent is debugged and ready for use, make it available to users.