After completing the preliminary configuration for Security Audit 3.0 or Security Audit 2.4.1, you can proceed with installing the required module. To do this:
1. Install the required module version. To get the installation file, please contact your BRIX sales rep.
2. Configure the downloaded module.
Step 1: Download the module
- Go to Administration > Modules and in the upper right corner, click +Module.
- In the window that appears, choose the Download option. In the BRIX Store catalog, select the Security Audit module and click the Install Module button.
начало примечание
Note
BRIX Store will be available soon. Please contact your sales rep to request the installation file and upload it.
конец примечание
- In the window that appears, click Next. Wait for the module to finish loading into the system.
Installing a module in a closed environment without internet access
|
Step 2: Set up the module
- Go to the installed module and fill in the the main settings:
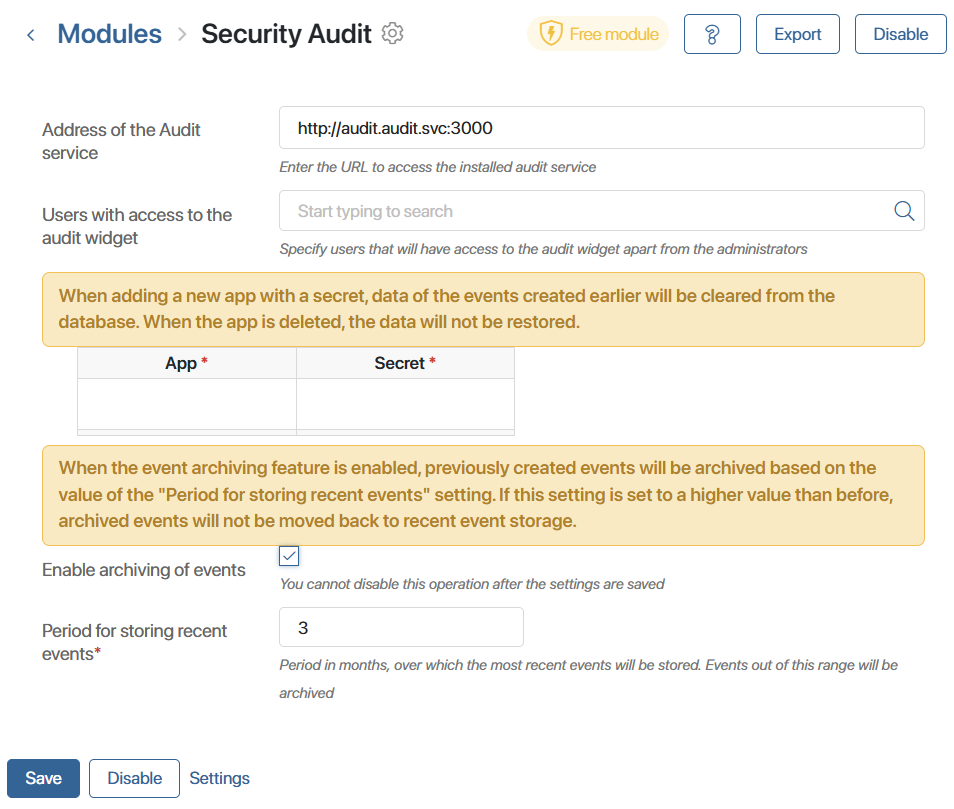
- The Audit service address. The field is available and filled in when using the Security Audit 2.4.1 module. Enter the URL address of the Security Audit service. The default value when installed inside the BRIX cluster is http://audit.audit.svc:3000.
- Users with access to the audit widget. Select the employees who will have access to the table with the audit result. The table is displayed in the Security Audit widget.
The widget is placed on a separate page that is visible to all users. At the same time, only administrators can view the widget data. The option will allow selected employees to work with the audit result without having other administrator rights.
- Set the secrets settings to define a list of apps with sensitive information. Events on the items of such apps will be logged, but users will not see the values of their fields in the Security Audit widget.
- Enable event archiving to move outdated data to temporary and long-term archives. This will optimize the search for events in the Security Audit widget.
- To save space in the event database, you can disable extended logging. This will reduce the amount of information stored for the following actions:
- Creating or deleting an app item, or adding a comment to its associated activity stream—the event page does not record the item's contents, so the Event data field remains empty.
- Updating an app item—the event page records only changed field values, not all the item's data.
- Save the changes.
After installing the module, the Security Audit widget will be available in the interface designer. For more information on placing the widget and working with it, read the Security audit report article.
Configure secrets
By configuring secrets, you can mark apps that contain confidential information. All data from items in such apps will not be displayed in the registered events. Confidential information includes:
- Trade secrets.
- Personal data.
- Medical secrets.
For example, specify in the module settings that confidential information is stored in the Contractors app. As a result, on the page with security audit data, users will not be able to view the properties of items for which events are logged.
To configure secrets, follow these steps:
- On the settings page of the Security Audit module, fill out the table:
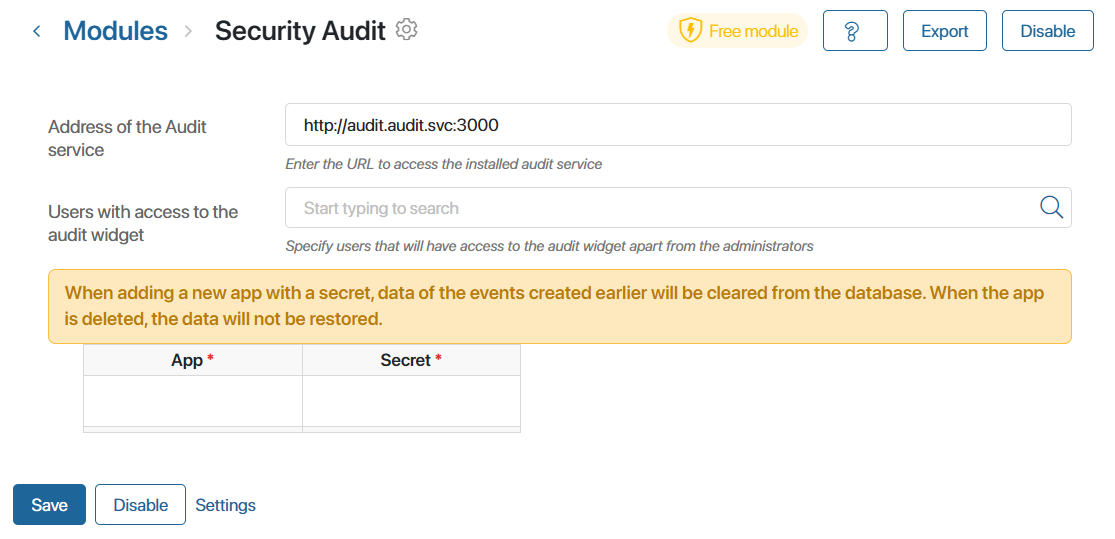
- App*. Enter the app URL storing confidential information, in the
namespace:codeformat. For example, if the full URL address of the app ishttp://mycompany.local/_clients/_companies, you should enter_clients:_companiesin the field. - Secret*. Click on the input field and from the drop-down list select what information is contained in the app. PD is for personal data, TS, for trade secrets, and MS, for medical secrets. You can specify multiple types of secrets in one field.
- Save the changes.
After saving the settings, all fields from the listed apps will not be displayed in the detailed information on logged events.
Configure archiving of events
You can enable archiving of old events in the Security Audit service. This will speed up the search when users want to find events in the table with registered records.
Events will be stored in the database as follows:
- Operational storage. Contains recent events. The period of their placement is defined in the module settings. By default, users search for these data in the Security Audit widget.
- Temporary archive. These are events moved from the operational storage. The data remain here for one year. To search for archived events in the Security Audit widget, users need to enable a special option.
- Long-term archive. These are outdated events from the temporary archive. Such data are not searchable.
Events are not automatically deleted from the archive. Users with access to the database can clear the archive manually for new events.
начало внимание
Once event archiving is enabled in the Security Audit module settings, the option cannot be disabled.
конец внимание
Follow these steps:
- On the settings page of the Security Audit module, activate the Enable archiving of events* option.
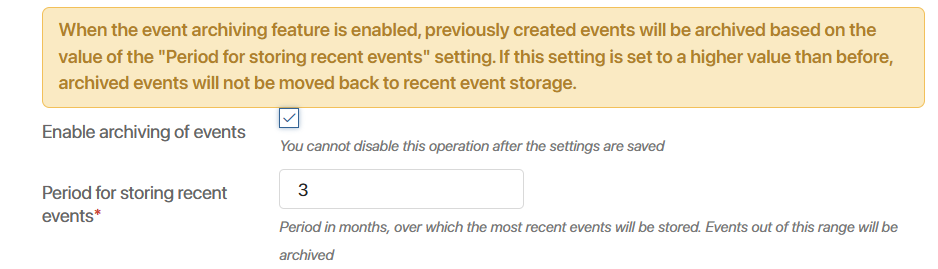
- In the Period for storing recent events* field, specify the number of months after which the data are moved to the temporary archive. The maximum value is 12 months.
- Save the changes.
Registered events
Below is the list of events registered by the security audit in different system components.
Users
- Successful and failed authentication, user logout from the system.
- User creation.
- User deletion.
- User update.
- User status change.
- User locked by administrator.
- User locked after exceeded number of password attempts.
Apps
- App item creation.
- App item deletion.
- App item update.
- App item status change.
- Changing the access permissions for an app item.
- Viewing the app item page.
- Adding a comment to an app item.
- App data import.
- App data export.
Files
- File creation.
- File deletion.
- File update.
- File download.
- File view.
- Access permissions for the file are changed.
- A comment is added.
Directories
- Directory creation.
- Directory deletion.
- Directory update (renamed or moved).
- Access permissions for the directory are changed.
Tasks and CRM Tasks
- Task creation, update, cancellation, and completion.
- CRM task creation, update, cancellation, and completion.
Modules
- Module enabled.
- Module disabled.
- Module installed.
- Module updated.
- Additional parameters change.
- Secrets are set up in the Security Audit module.
- Access to the Security Audit module.
- Changing the operational event storage period.
- Starting the event archiving operation.
- Starting the operation of transferring operational events to a temporary archive.
- Starting the event data clearing.
- Enabling and disabling extended logging.