# Install Harbor
> [HTML Version](installing-harbor.html)
BRIX On-Premises can be installed in a closed environment with no direct access to an external container image repository. To achieve this, you need to pre-install a private registry, such as [Harbor](https://github.com/goharbor/harbor).
The installation of the Harbor private repository involves four steps:
1. [Install docker and docker-compose on your OS](#installing-docker-docker-compose).
2. [Download the online installer archive](#download-archive).
3. [Fill in the configuration file](#complete-config-file).
4. [Install Harbor](#installing).
## Step 1: Install docker and docker-compose
Install [Docker](https://docs.docker.com/engine/install/) and [Docker Compose](https://docs.docker.com/compose/) for your operating system.
## Step 2: Download the online installer archive
1. На On a computer with internet access, go to the [Harbor](https://github.com/goharbor/harbor/releases) releases page and download the \[OBJECT\] archive by executing the following command:
````
wget https://github.com/goharbor/harbor/releases/download/vX.Y.Z/harbor-offline-installer-vX.Y.Z.tgz
2. ````
Copy the obtained archive to the server where the installation will take place.
3. Unpack the archive on the server and copy the default configuration file \[OBJECT\]:
````
tar xzvf harbor-offline-installer-vX.Y.Z.tgz \&\& cd harbor
cp harbor.yml.tmpl harbor.yml
## ````
Step 3: Fill in the configuration file harbor.yml
1. Fill in the variables in the \[OBJECT\] file.
Set the domain (FQDN) or IP address in the \[OBJECT\] parameter, through which the registry will be accessible, for example, set the domain name **registry.example.com**.
2. Determine the protocols through which the repository will be accessible.
````
Начало внимание
````
If the registry should only be accessible via the HTTP protocol, comment out the parameters in the HTTPS section and set the \[OBJECT\] parameter to \[OBJECT\].
````
Конец внимание
````
In this article, the repository will be accessible via the HTTPS protocol, with redirection from HTTP to HTTPS.
Port numbers for parameters \[OBJECT\] and \[OBJECT\]:
- 80 for HTTP;
- 443 for HTTPS.
Specify the path to the open certificate file in the \[OBJECT\] parameter, and in \[OBJECT\] specify the path to the private key file.
3. Set the password for the **admin** user in parameter \[OBJECT\]. If necessary, change the path to the directory where the images will be stored in the \[OBJECT\] parameter.
Example of filling in configuration file parameters for installation within the article's scope
````
\# Configuration file of Harbor
hostname: registry.example.com
\# http related config
http:
# port for http, default is 80. If https enabled, this port will redirect to https port
port: 80
\# https related config
https:
# https port for harbor, default is 443
port: 443
# The path of cert and key files for nginx
certificate: /your/certificate/path
private\_key: /your/private/key/path
\# The initial password of Harbor admin
harbor\_admin\_password: Harbor12345
...
````
4. ````
Configure other parameters according to your security policy and expected load.
## Step 4: Install Harbor
1. Install Harbor by executing the following command:
````
sudo ./install.sh
2. ````
Wait for the installation script to complete.
3. Open a browser and go to the Harbor login page at **http://hostname** or **https://hostname**. The ````
\[OBJECT\]````
parameter was specified during configuration file filling in the ````
\[OBJECT\] ````
confguration file on the fill in the configuration file step.
In this example, the login page address for Harbor is \[OBJECT\].
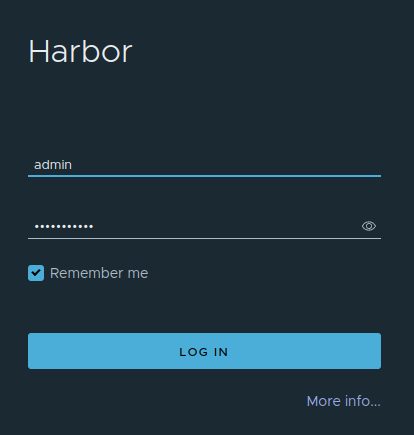
4. Log in with the username **admin** and the password set in the configuration file ````
\[OBJECT\] ````
in the ````
\[OBJECT\]````
parameter.
**[]**
5. The Harbor projects page opens.
**(creating-new-project-harbor-1.png)**
The Harbor private registry installation is complete.